autoimmunepantry.com

menu icon
go to homepage
  • About
  • Health Supportive Recipes
  • Privacy Policy
search icon
Homepage link
  • About
  • Health Supportive Recipes
  • Privacy Policy
×

AIP Roast Scallops

March 22, 2026 by sara Leave a Comment

Scallops are nutritional powerhouses with up to 1300 mg of omega-3 fatty acids in one serving! This alone makes scallops one of the very best sources of protein for anyone targeting inflammation.

You absolutely can pan-sear your scallops but this recipe gives roasting instructions so it's pretty hands off. For AIP, olive oil is an excellent compliment to seafood and you only need sea salt to bring out the subtle sweet, richness of fresh scallops.

A note on freshness, please be sure to feel and smell your scallops. Fresh scallops should smell like the ocean. Scallops that are slimy or fishy in smell are going bad.

Which Scallops To Buy

Look for dry-packed large sea scallops (as opposed to wet-packed) so you can get them to develop a little golden color. For reference, scallops may be referred to as U/10 or U/12 to indicate their size (with the 10 being the larger size because it would only take 10 scallops to equal 1 pound).

AIP Roast Scallops on plate

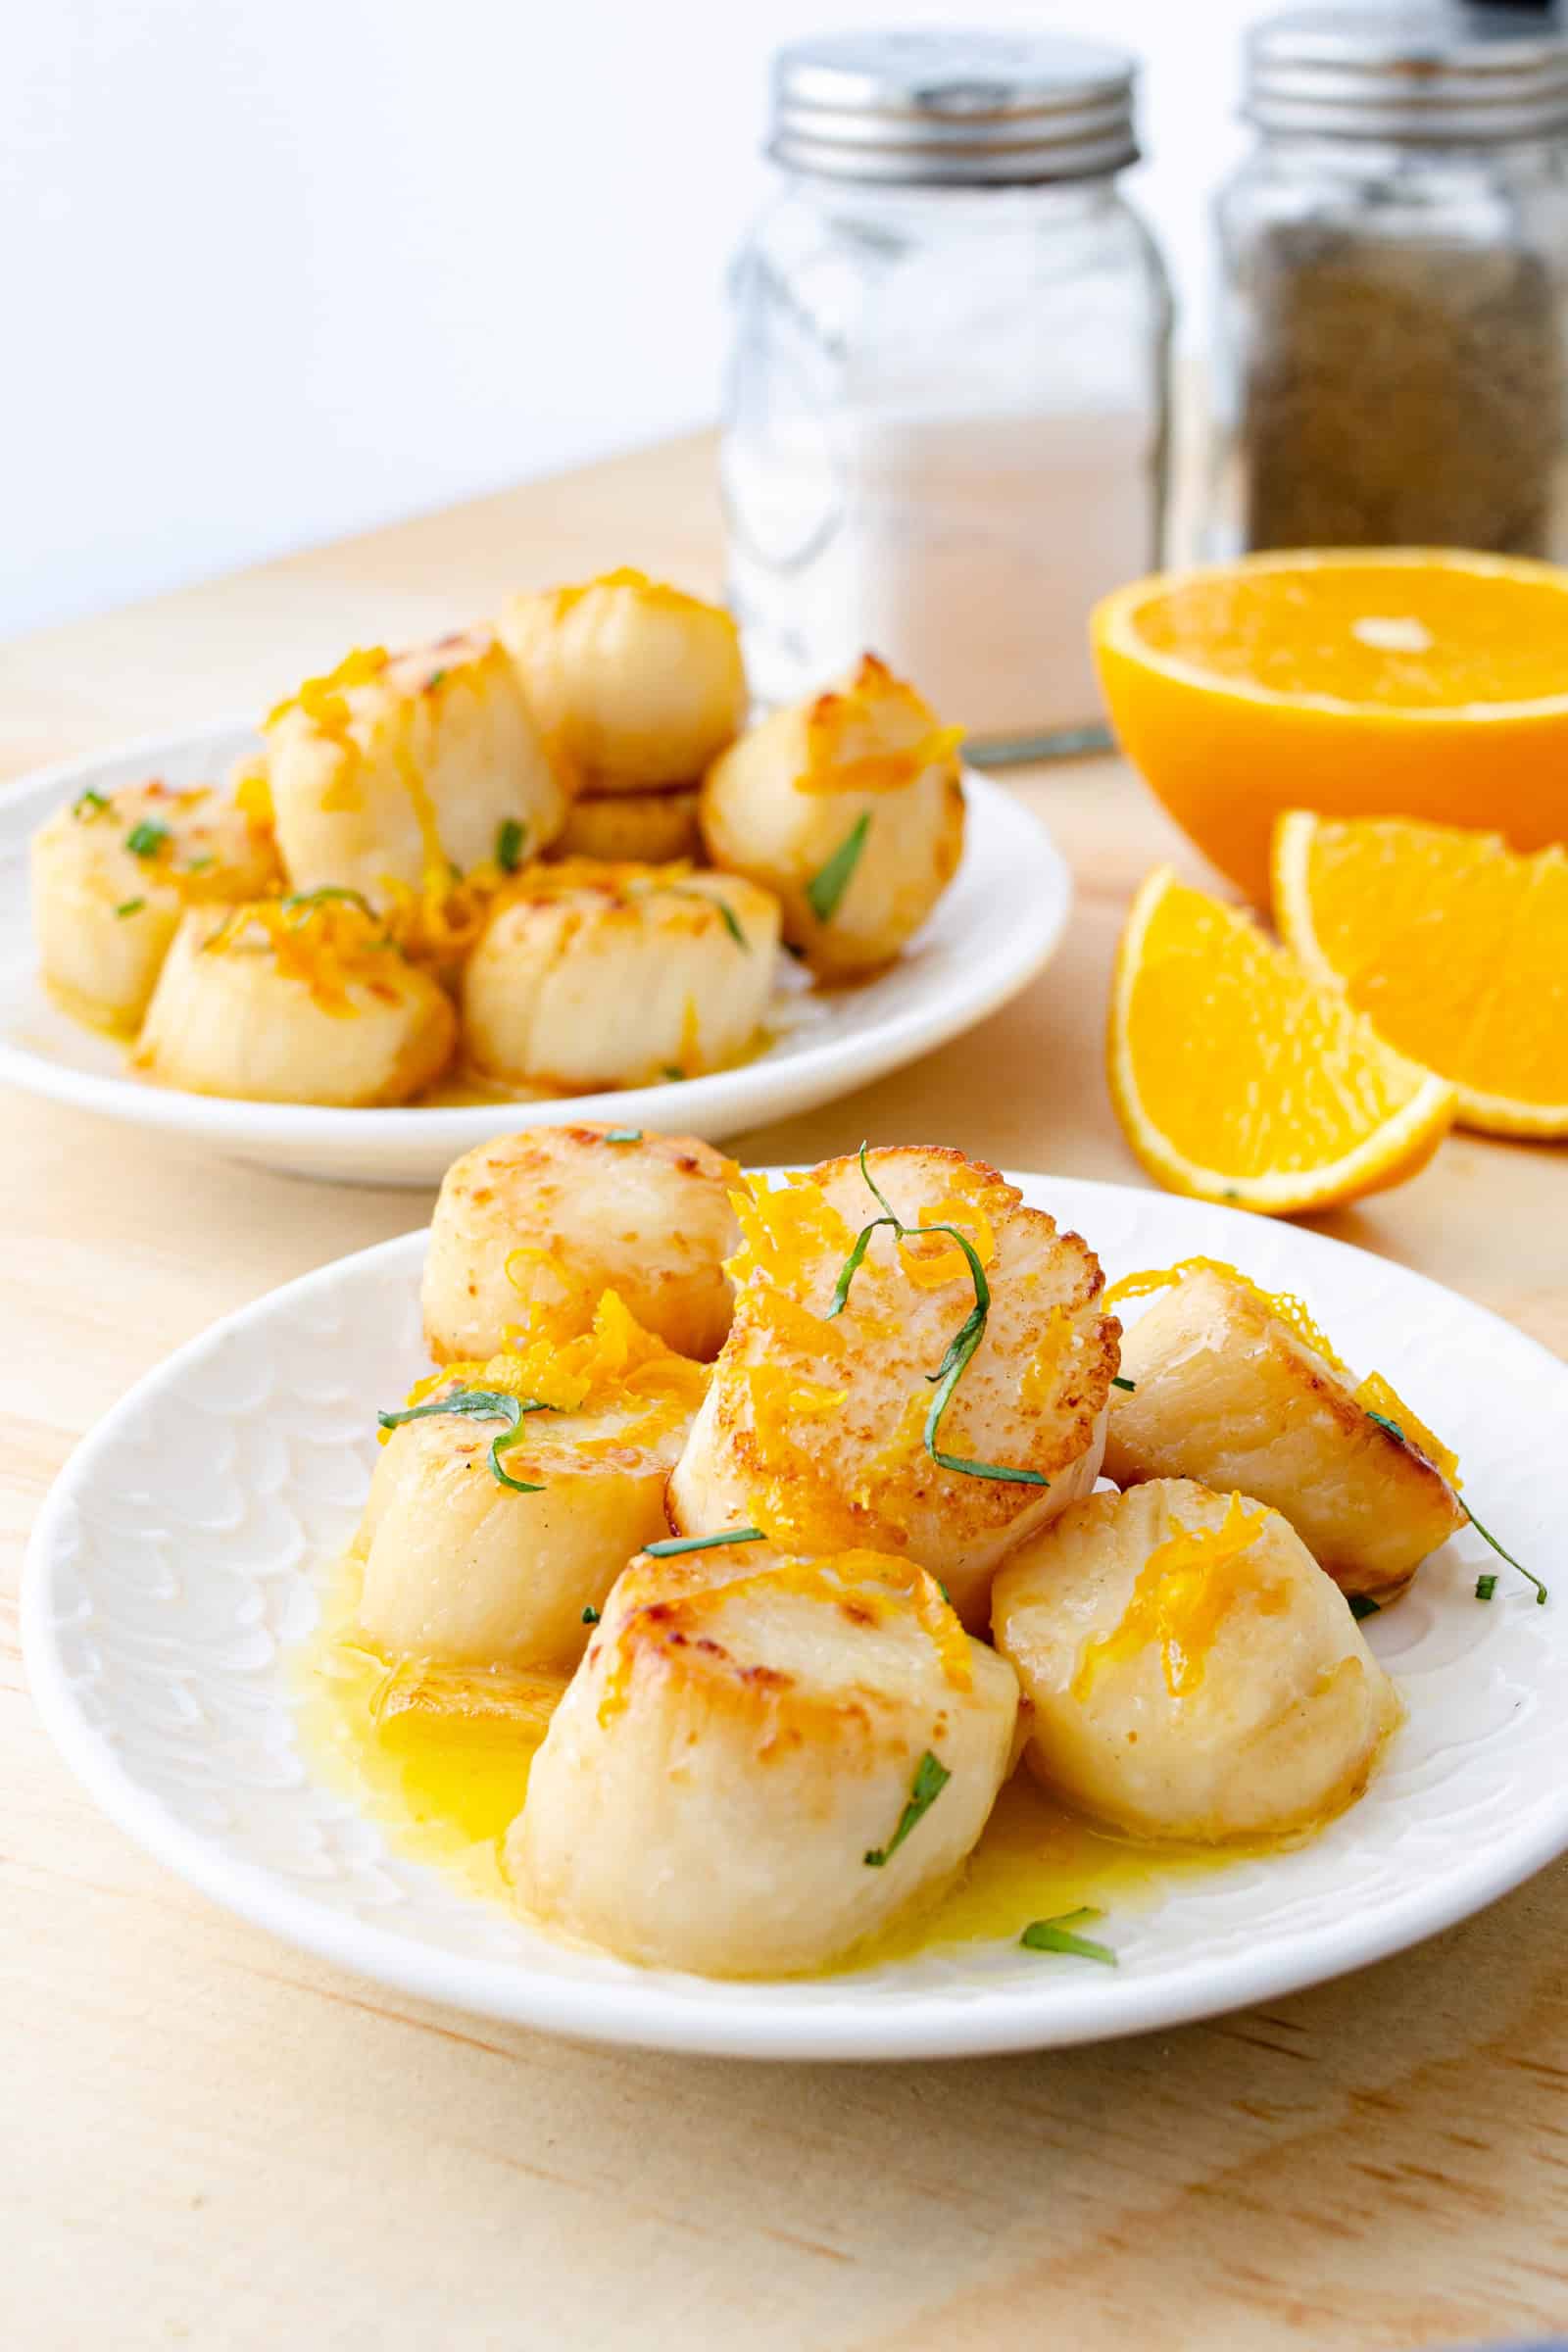
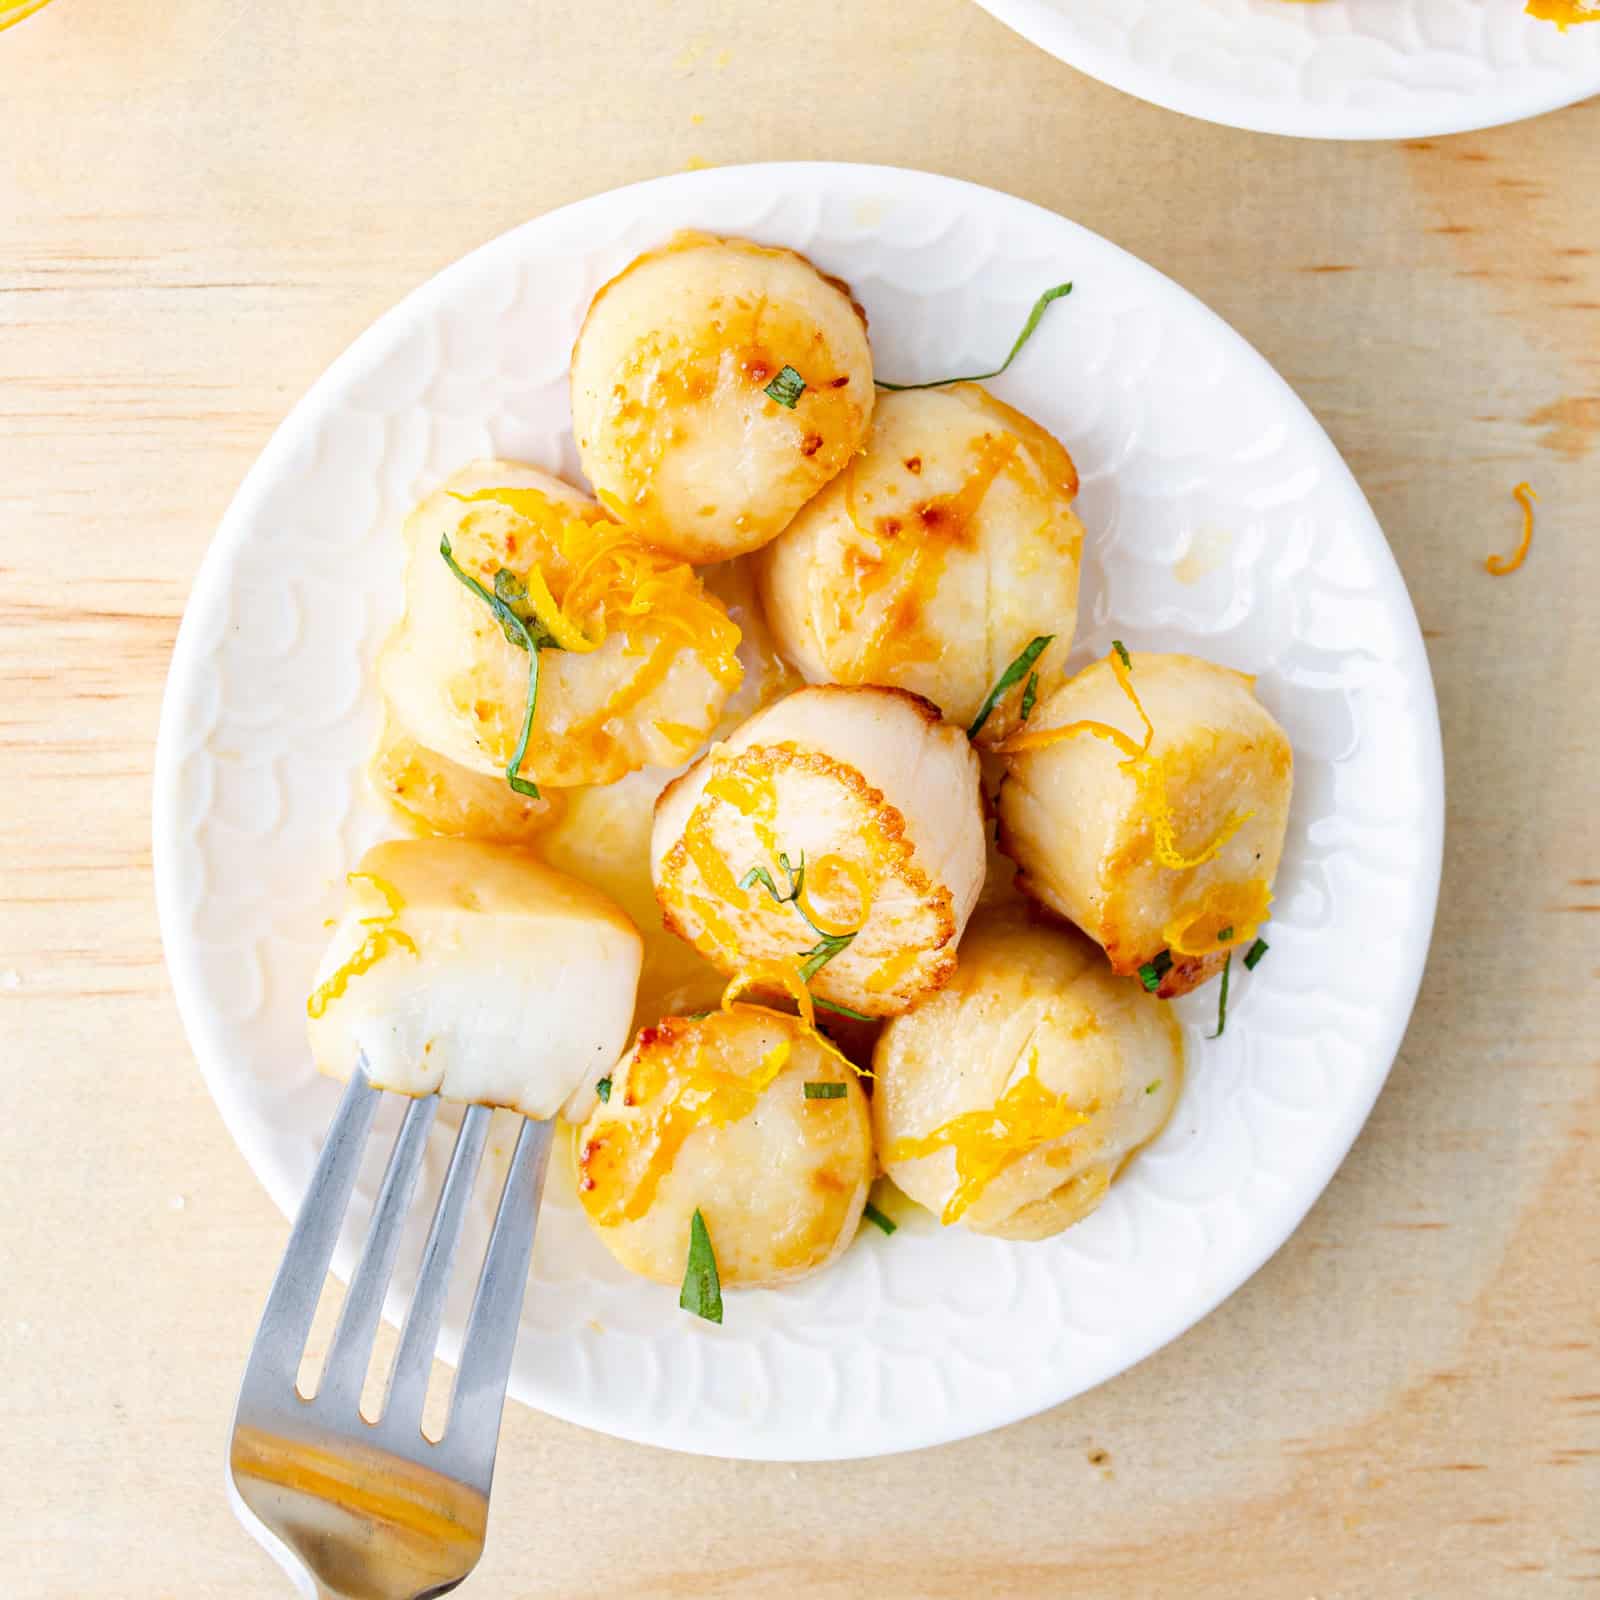
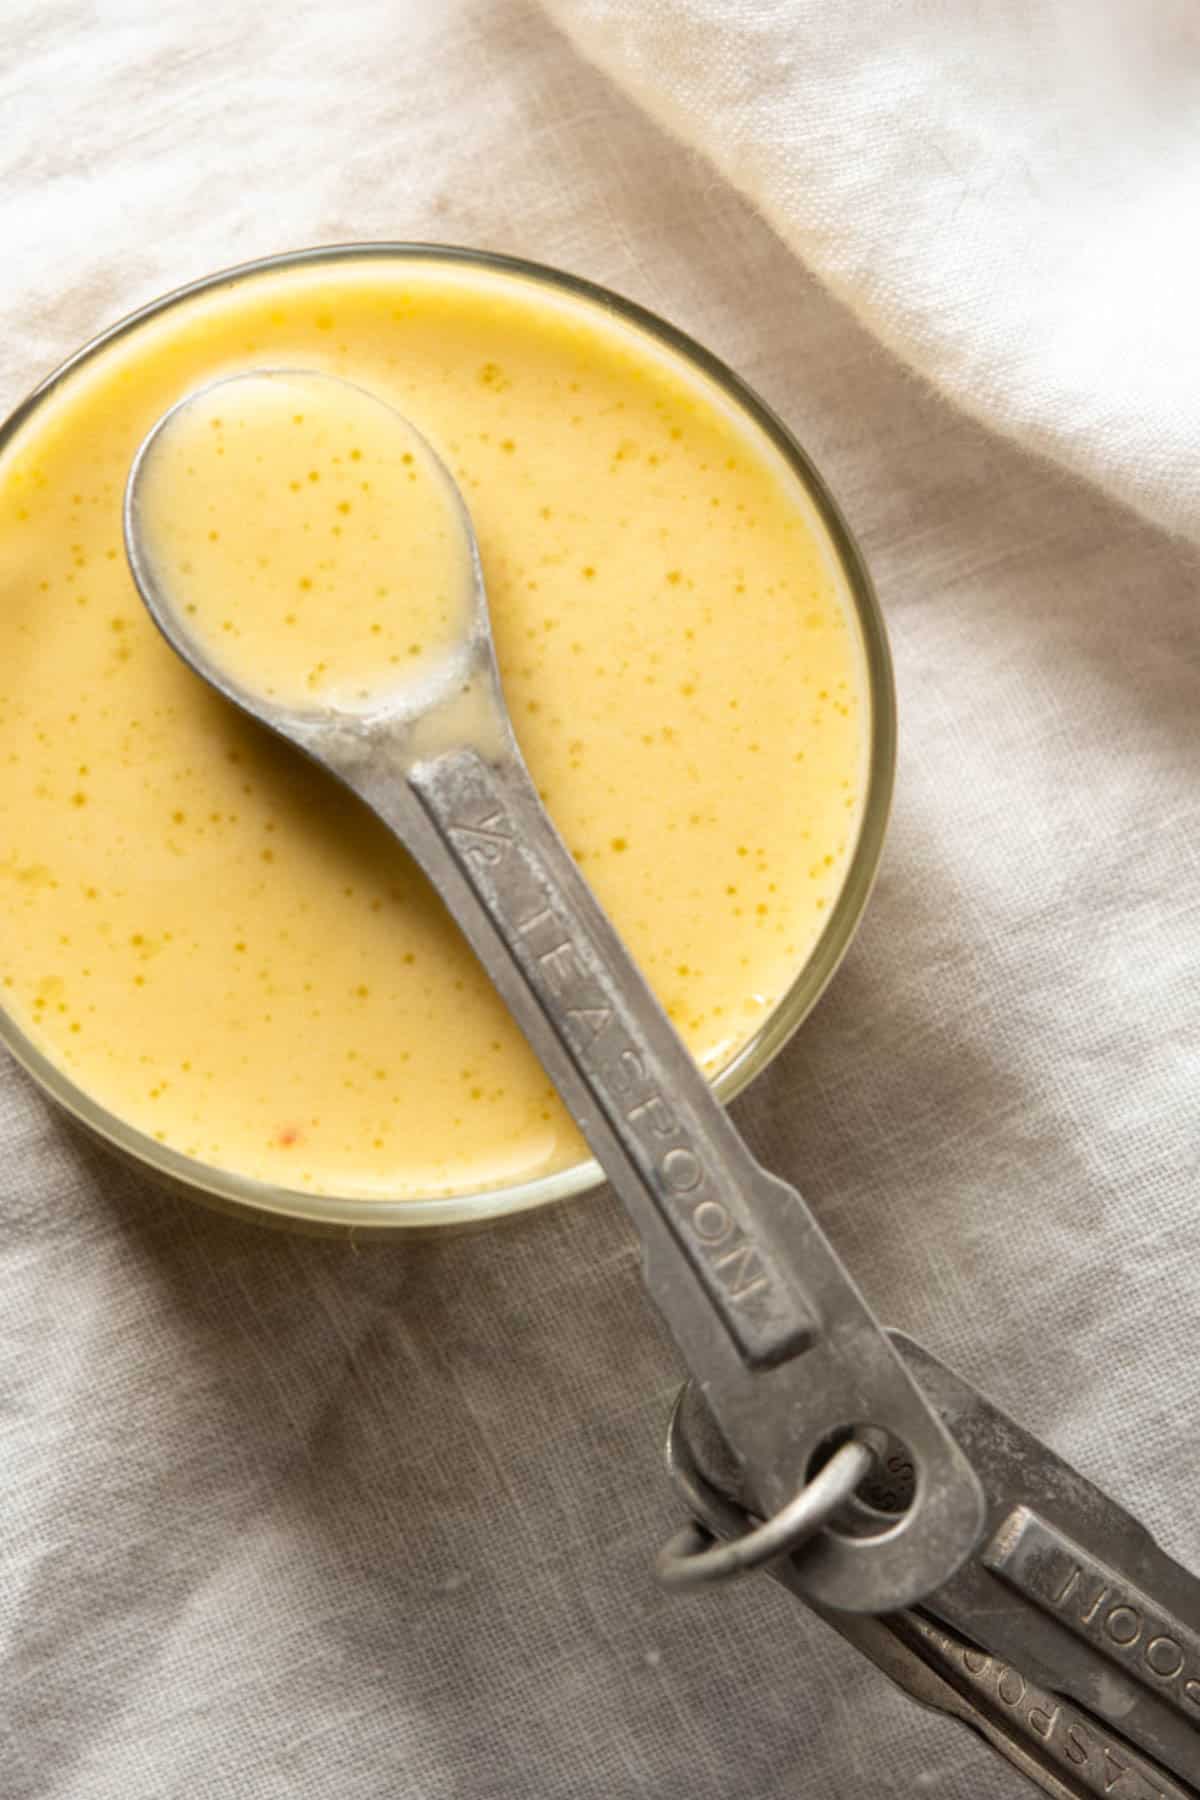
In this recipe, I serve them with the zest and juice of an orange and lemon juice. However, you really could just serve them as-is or with a small spritz of lemon juice. There is ginger juice in the recipe because it's anti-inflammatory and a nice spicy substitute for black pepper (not AIP). As an alternative to fresh ginger, you could also try adding finely grated fresh garlic which is also spicy and anti-inflammatory.

If you are familiar with seafood, scallops are like most seafood, in that they really need only be cooked with olive oil and salt to bring out their delicate flavor. I hope you fall in love with this cooking method for scallops.

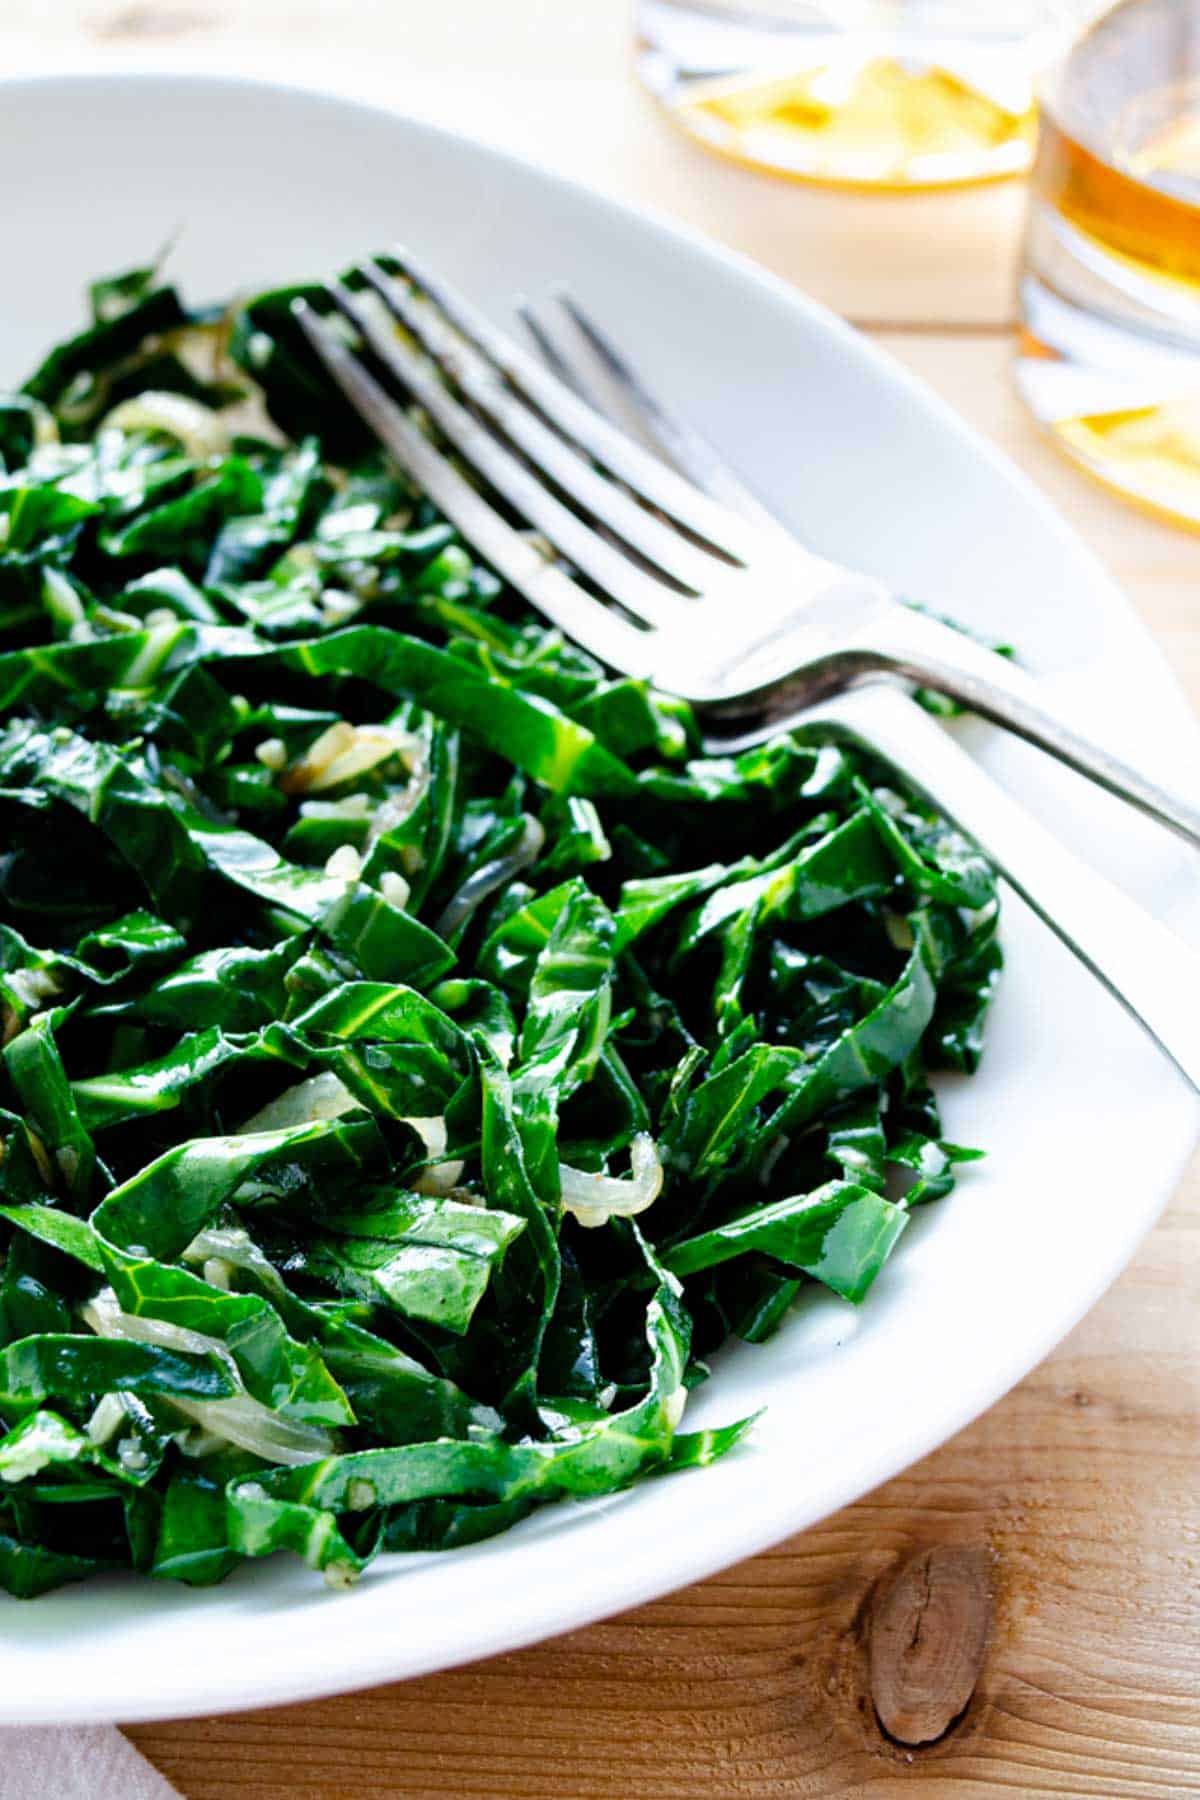
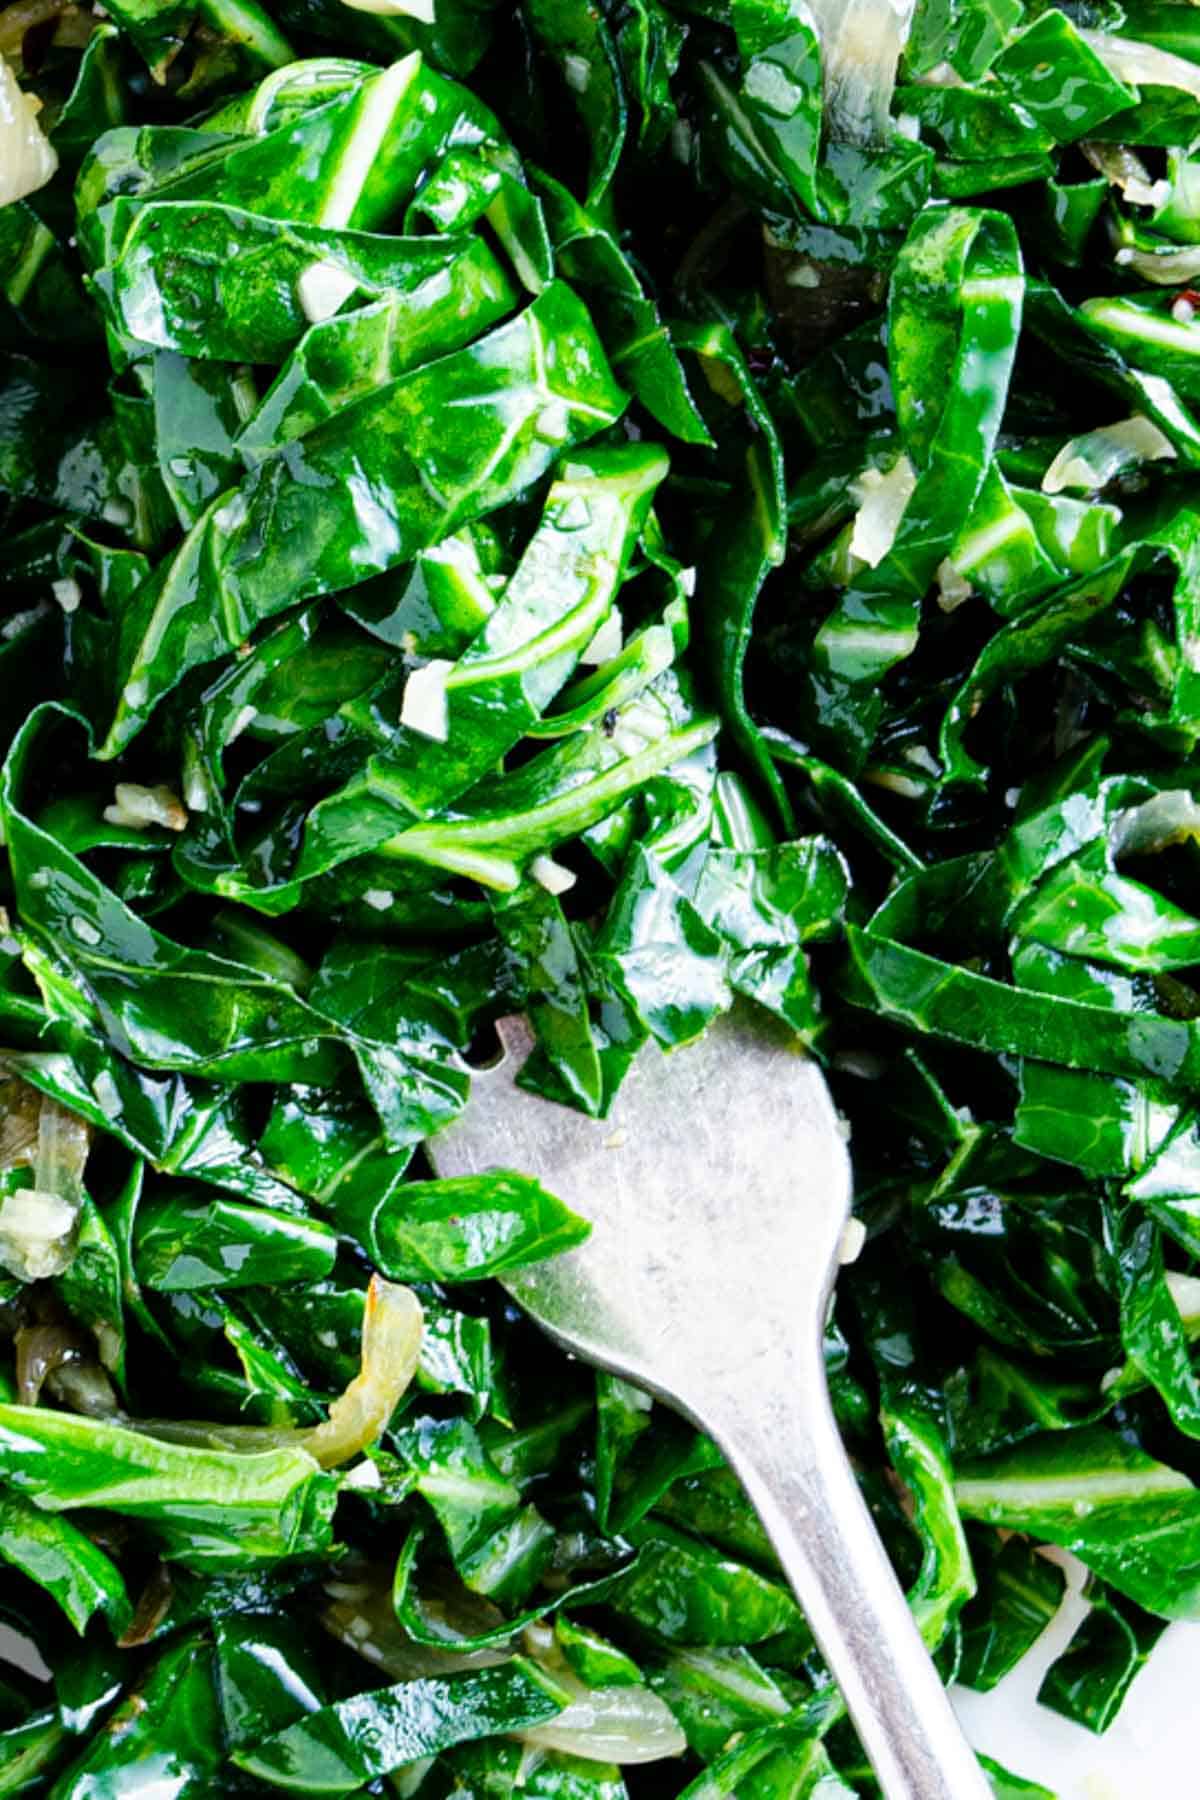
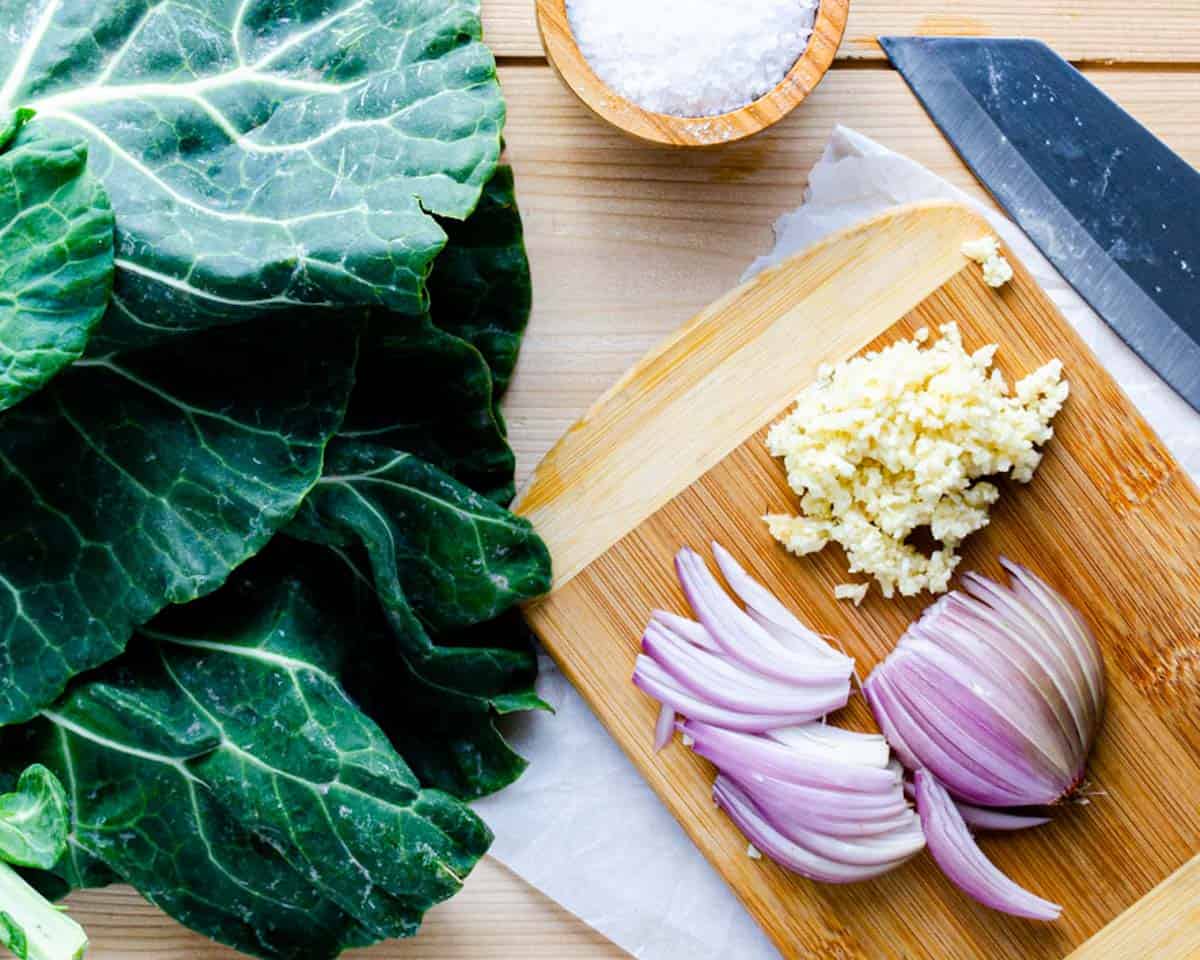
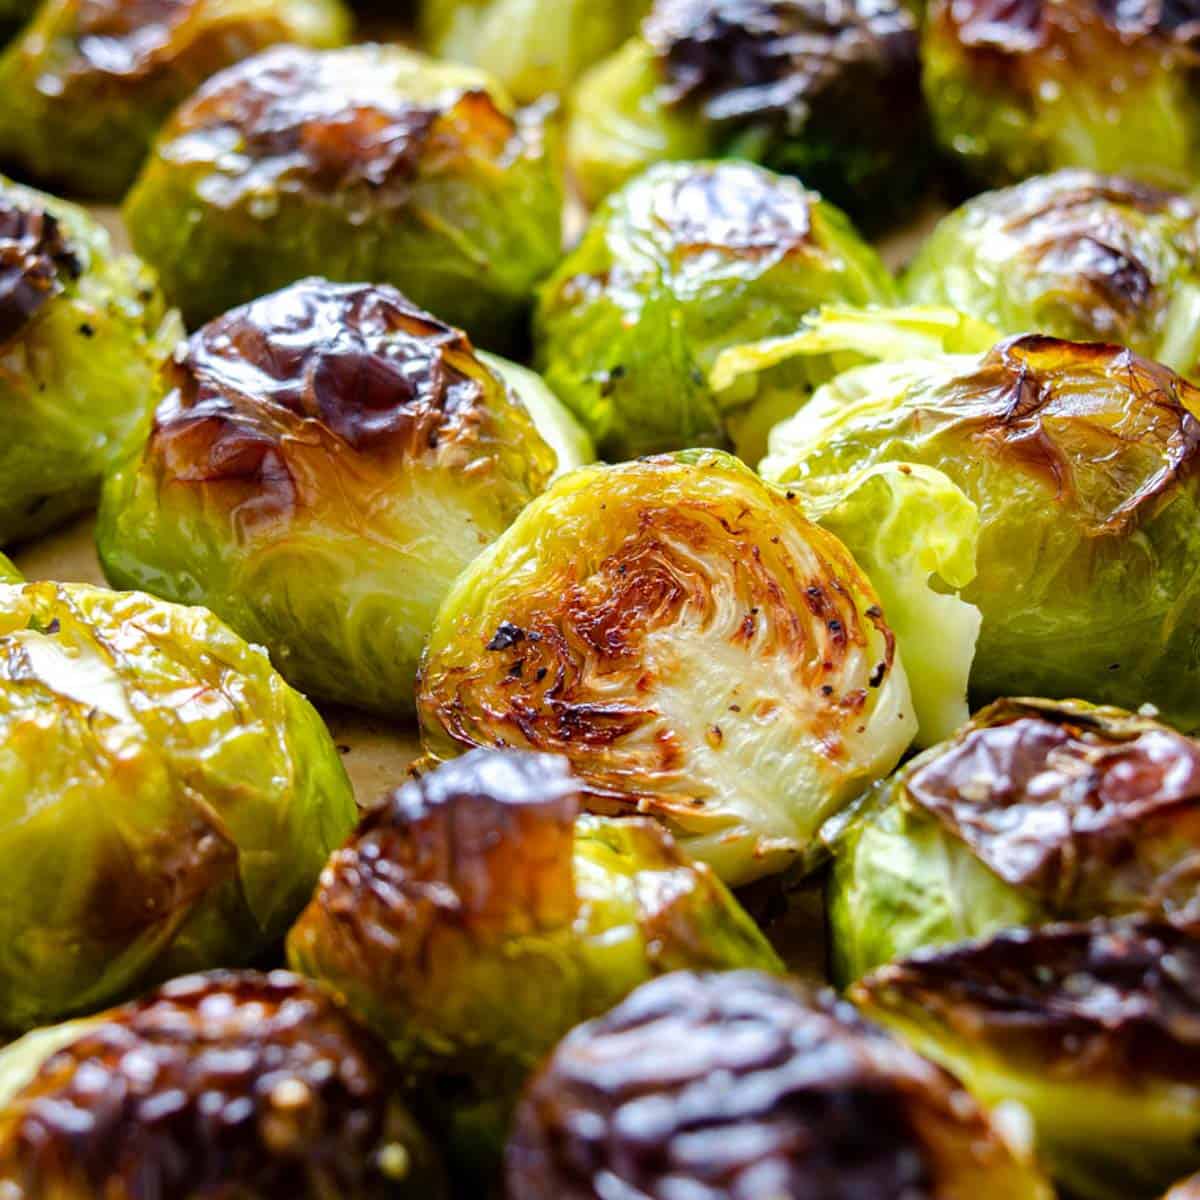
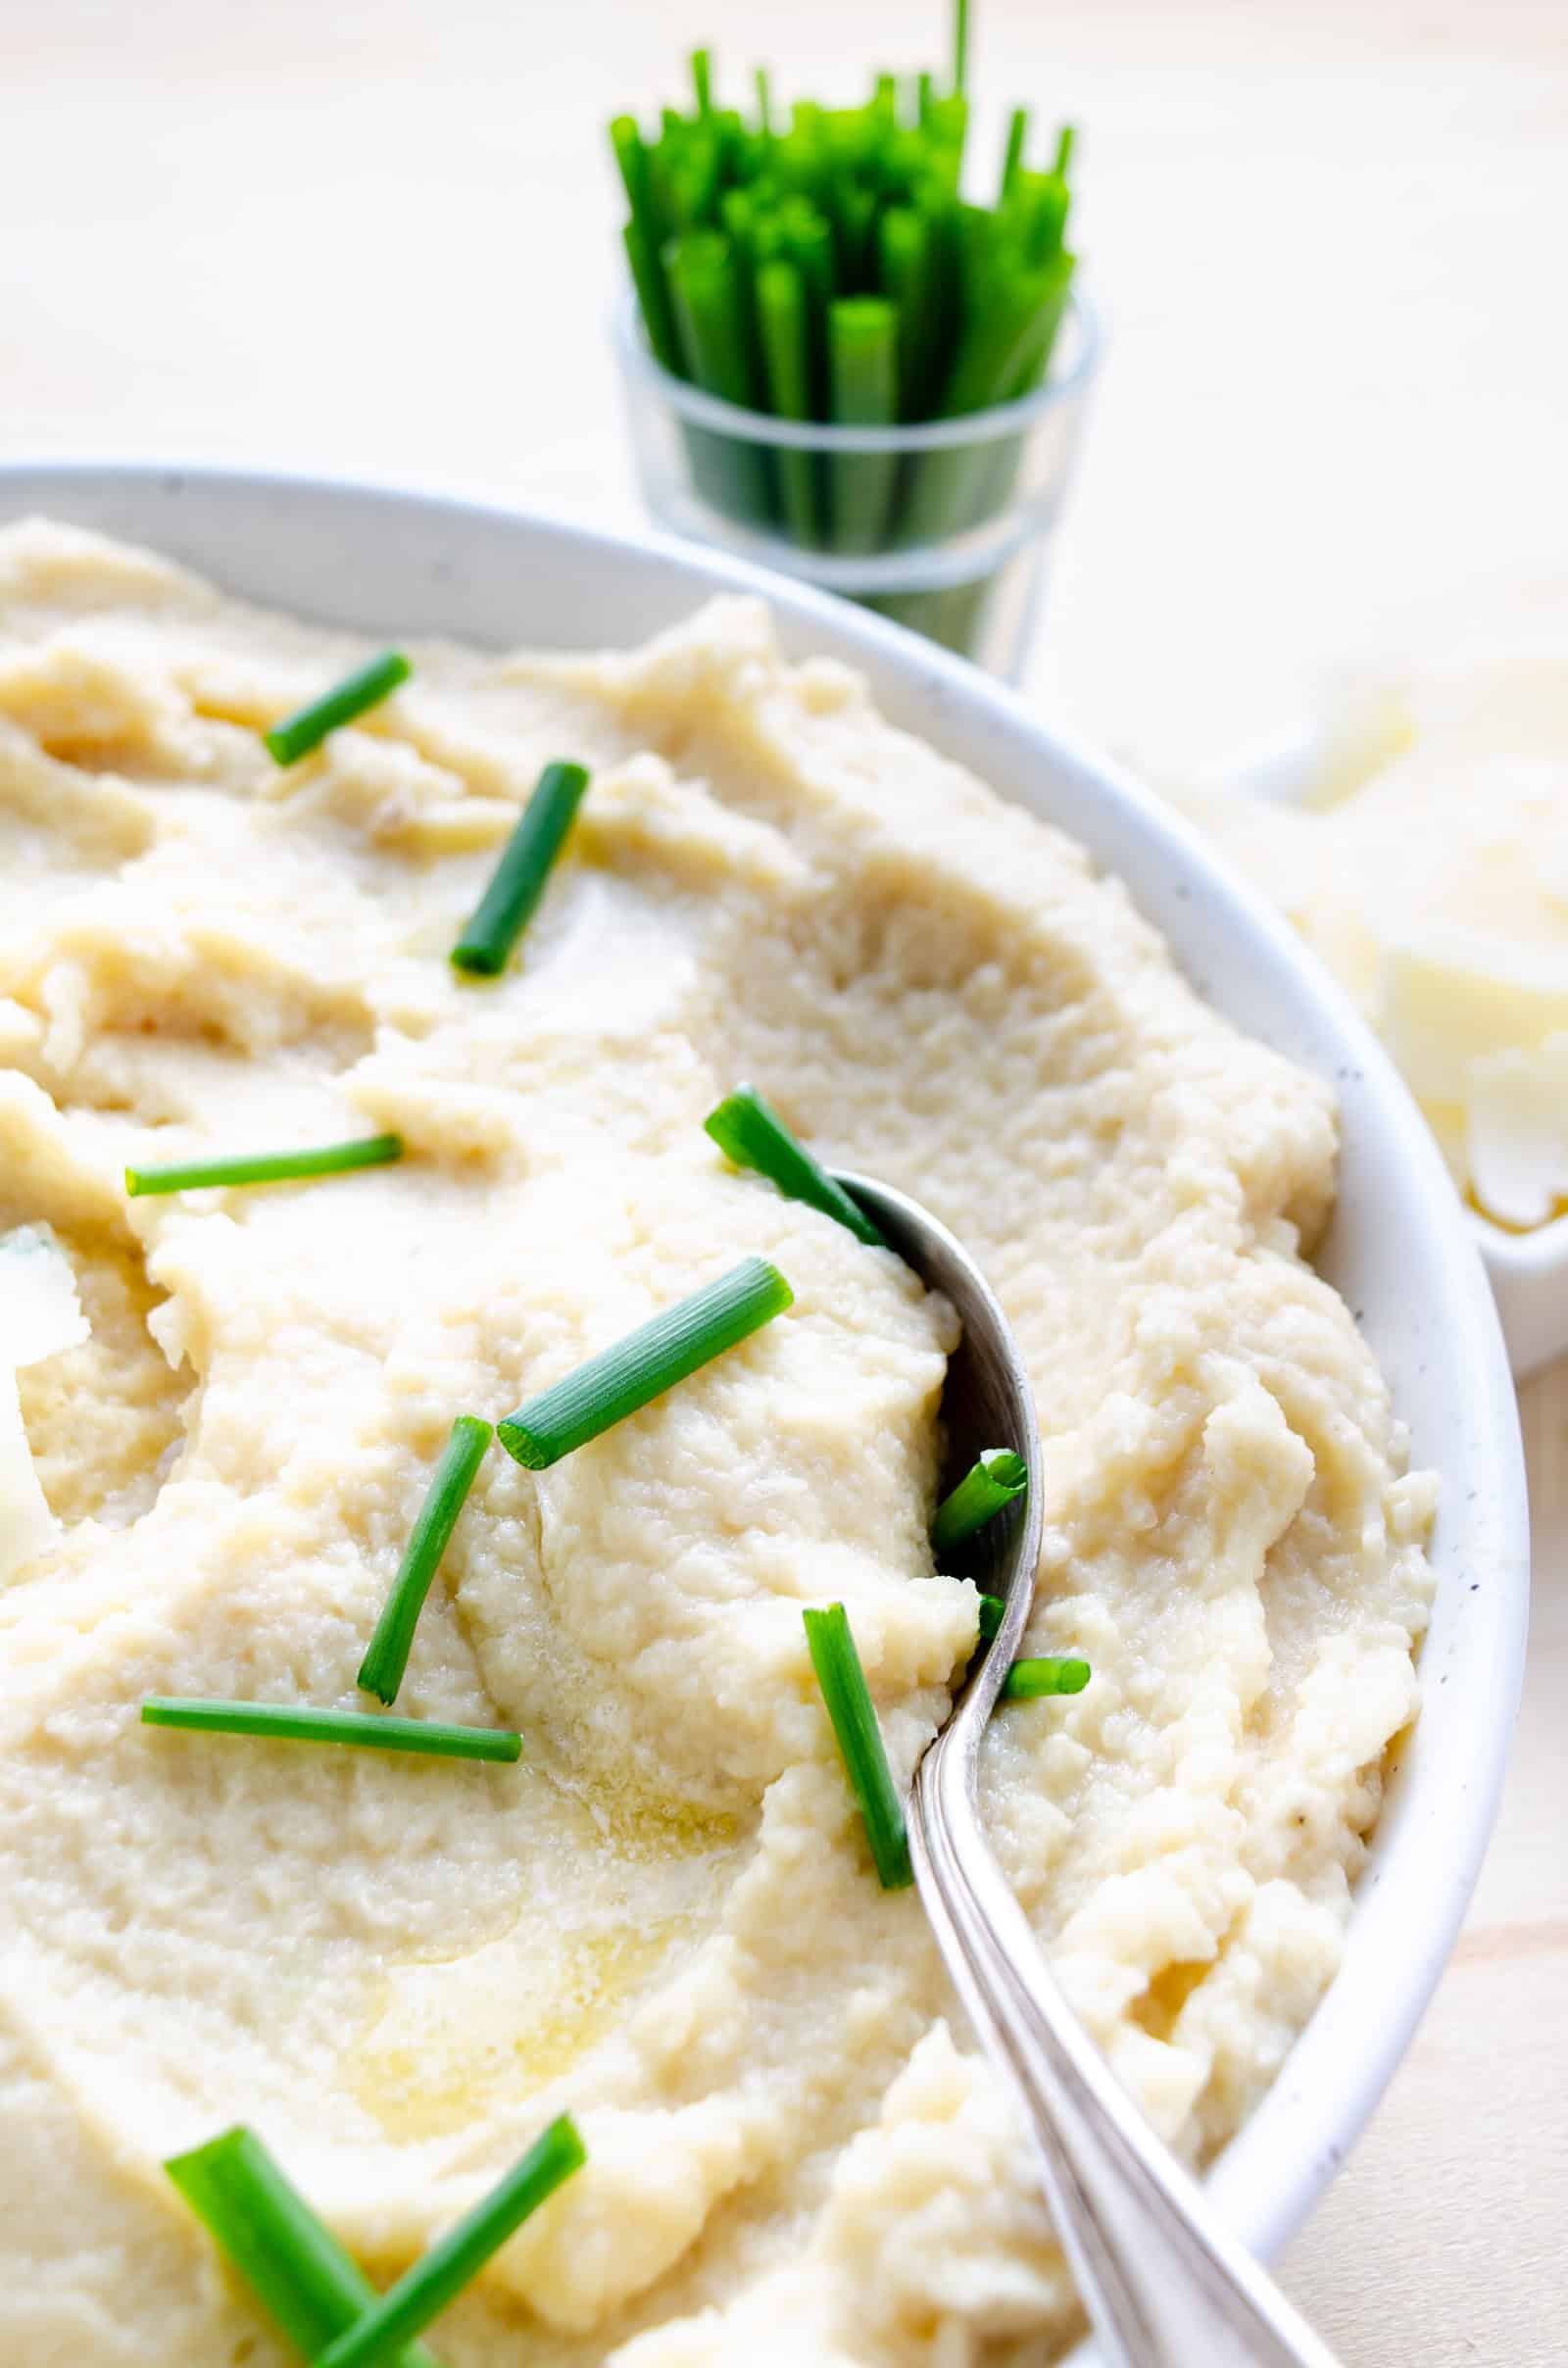
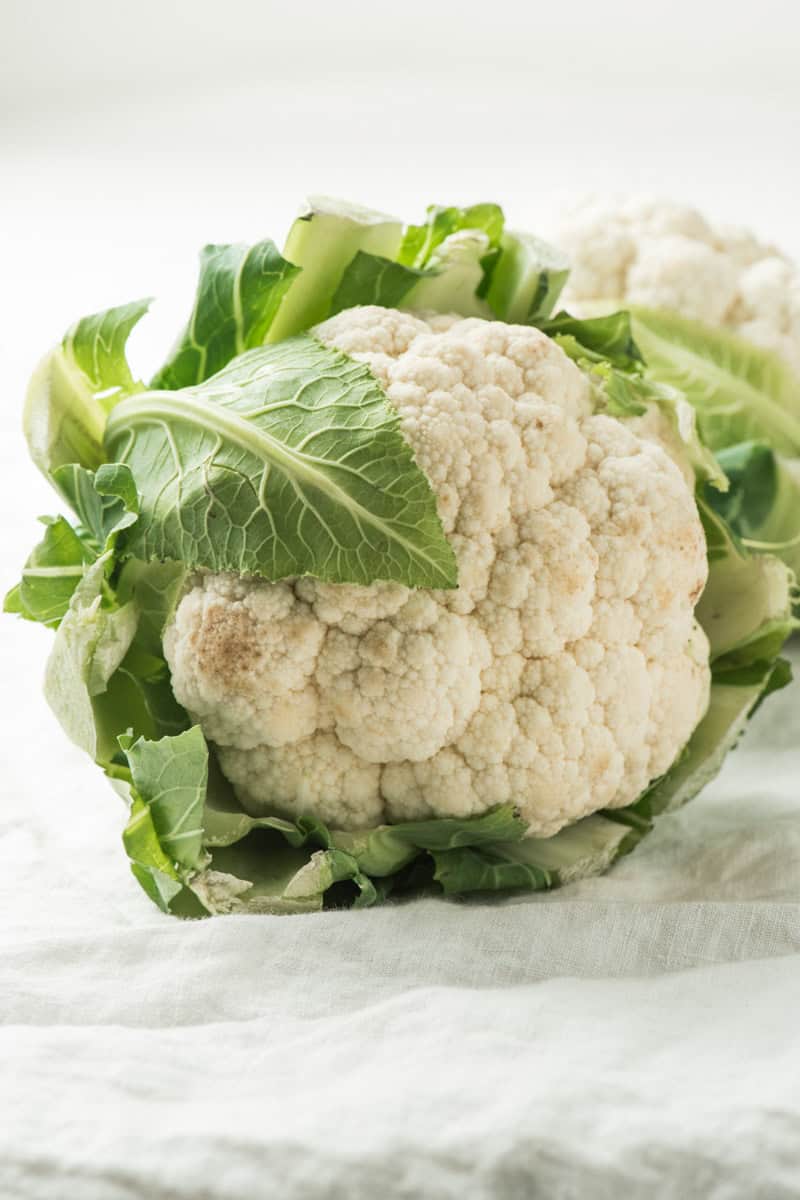
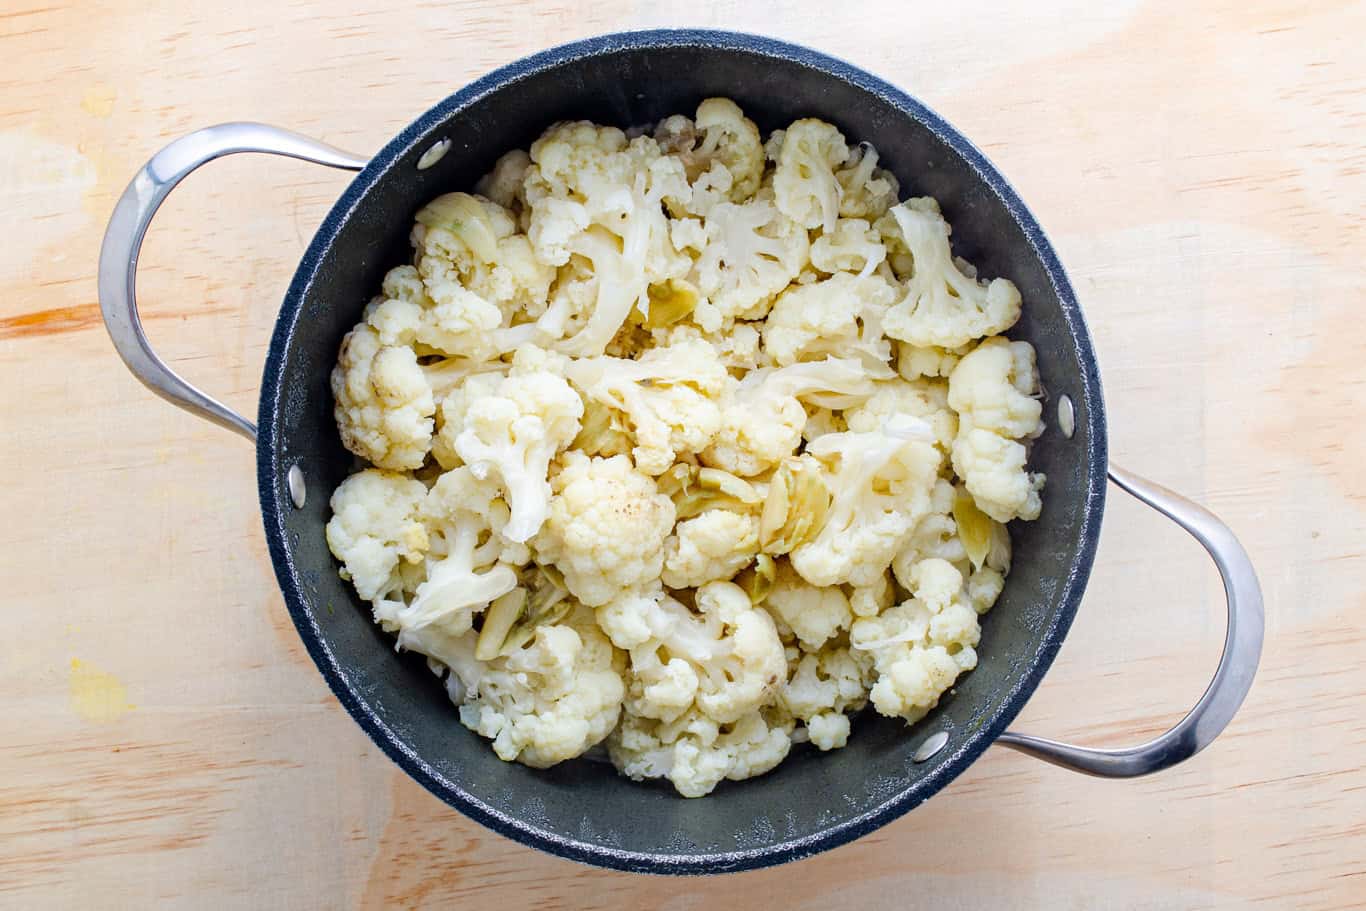
Looking for an AIP Side?

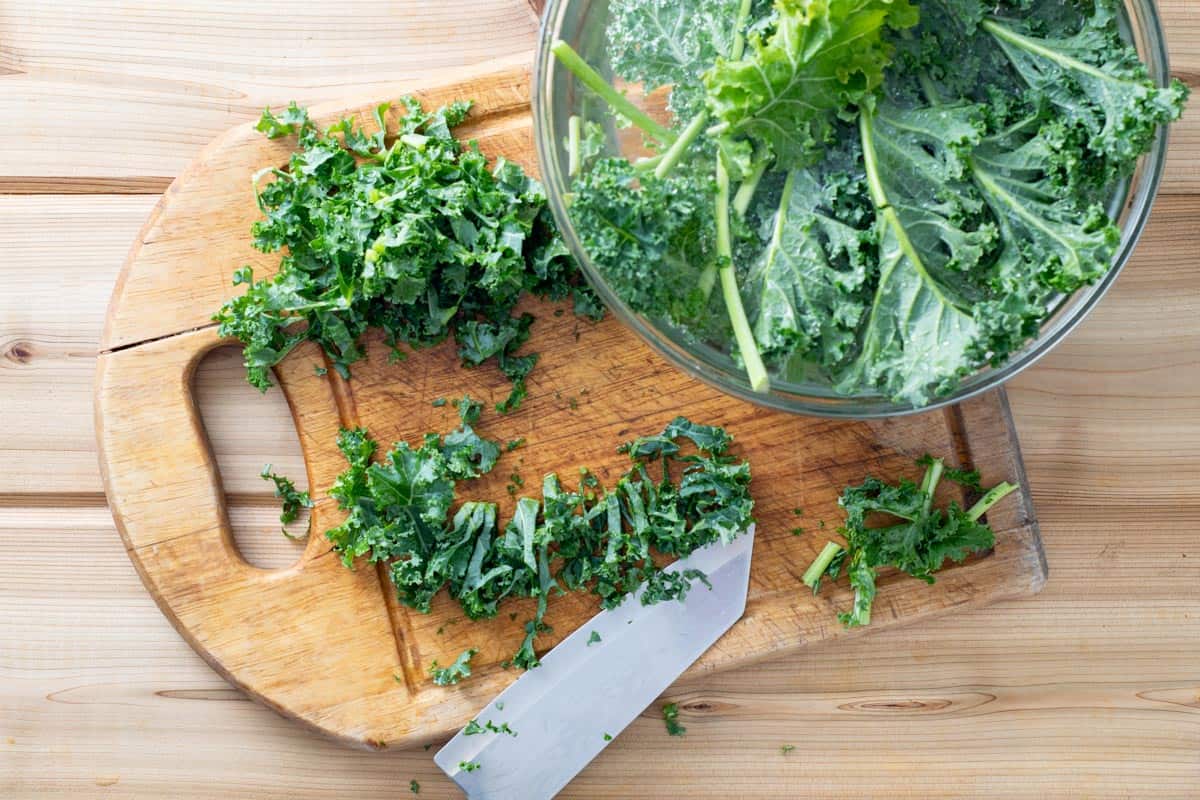
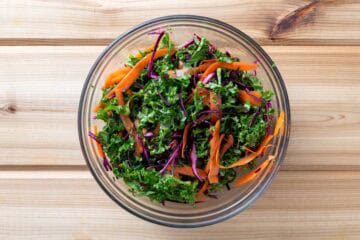
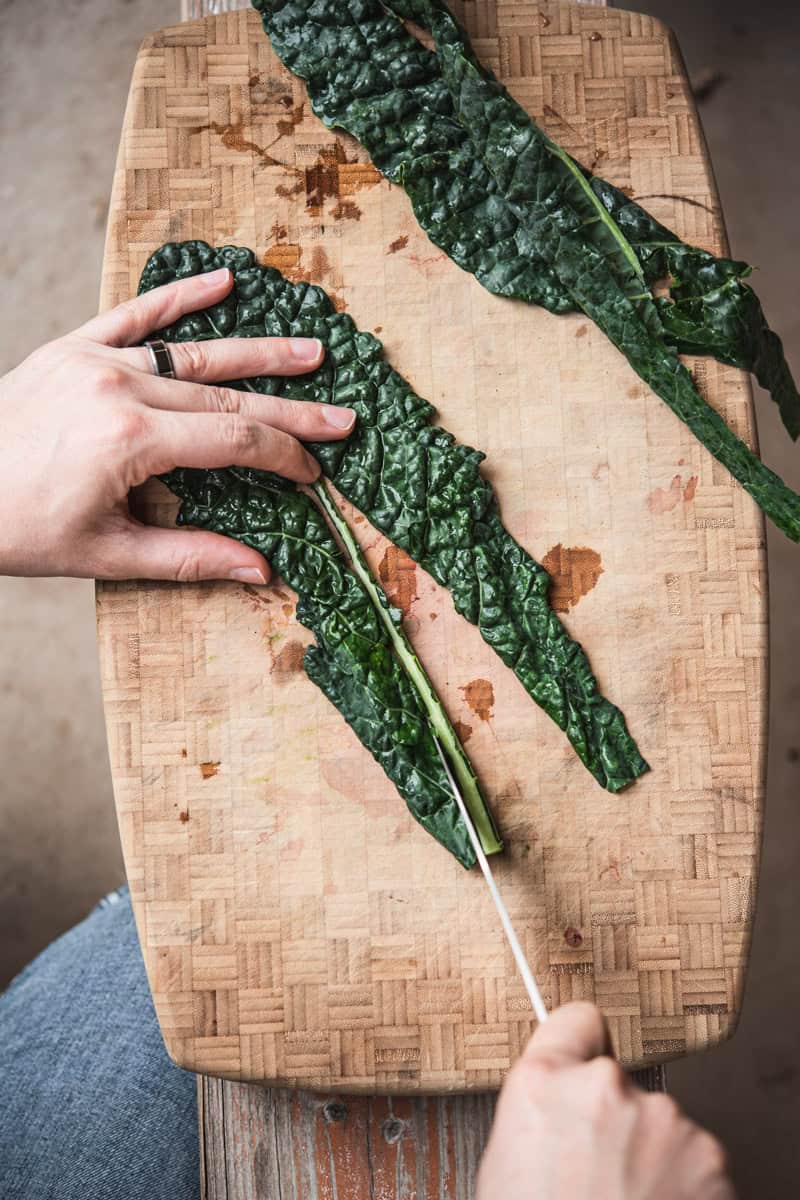
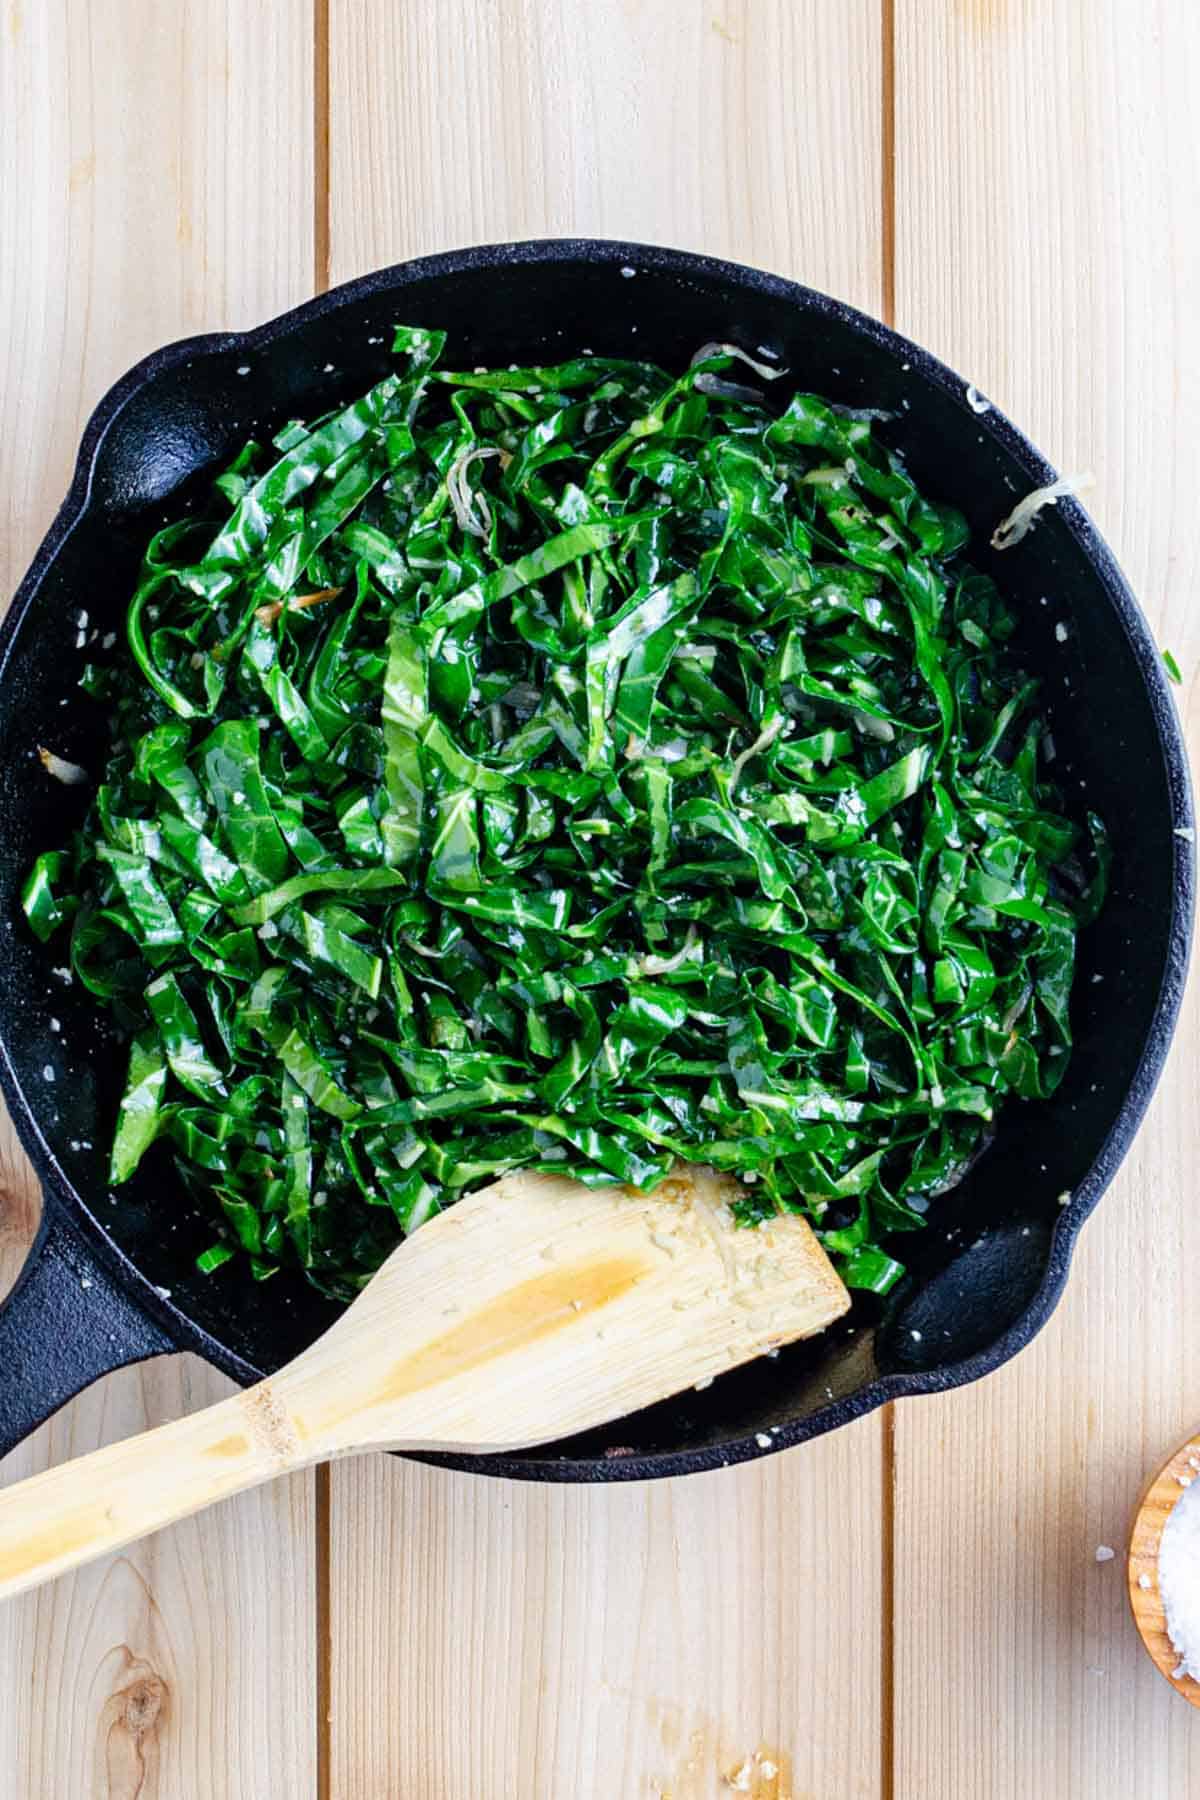
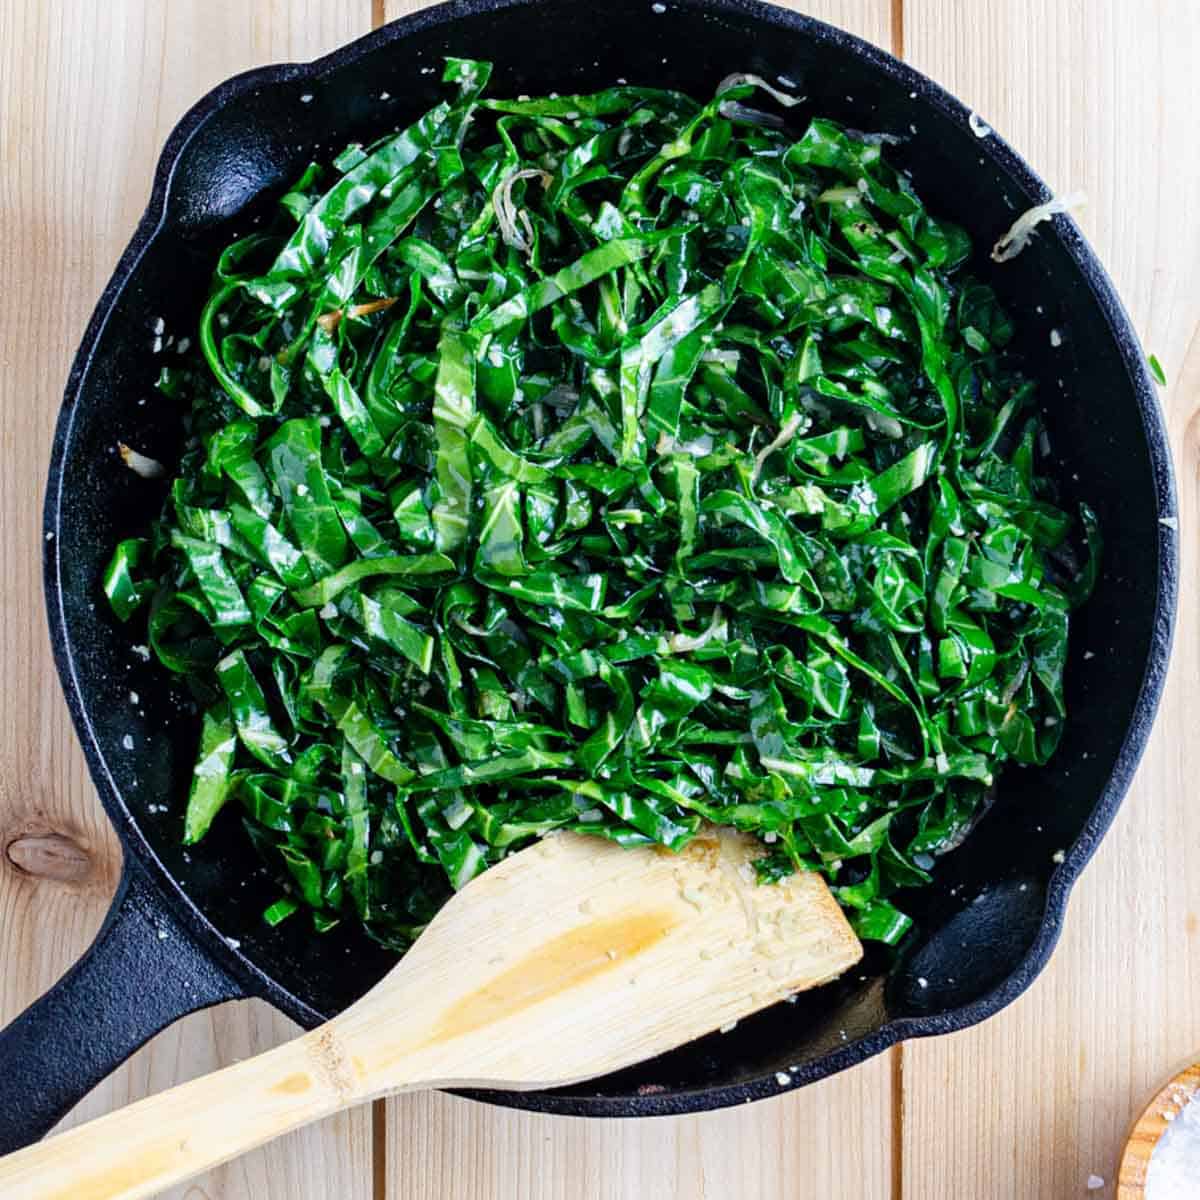
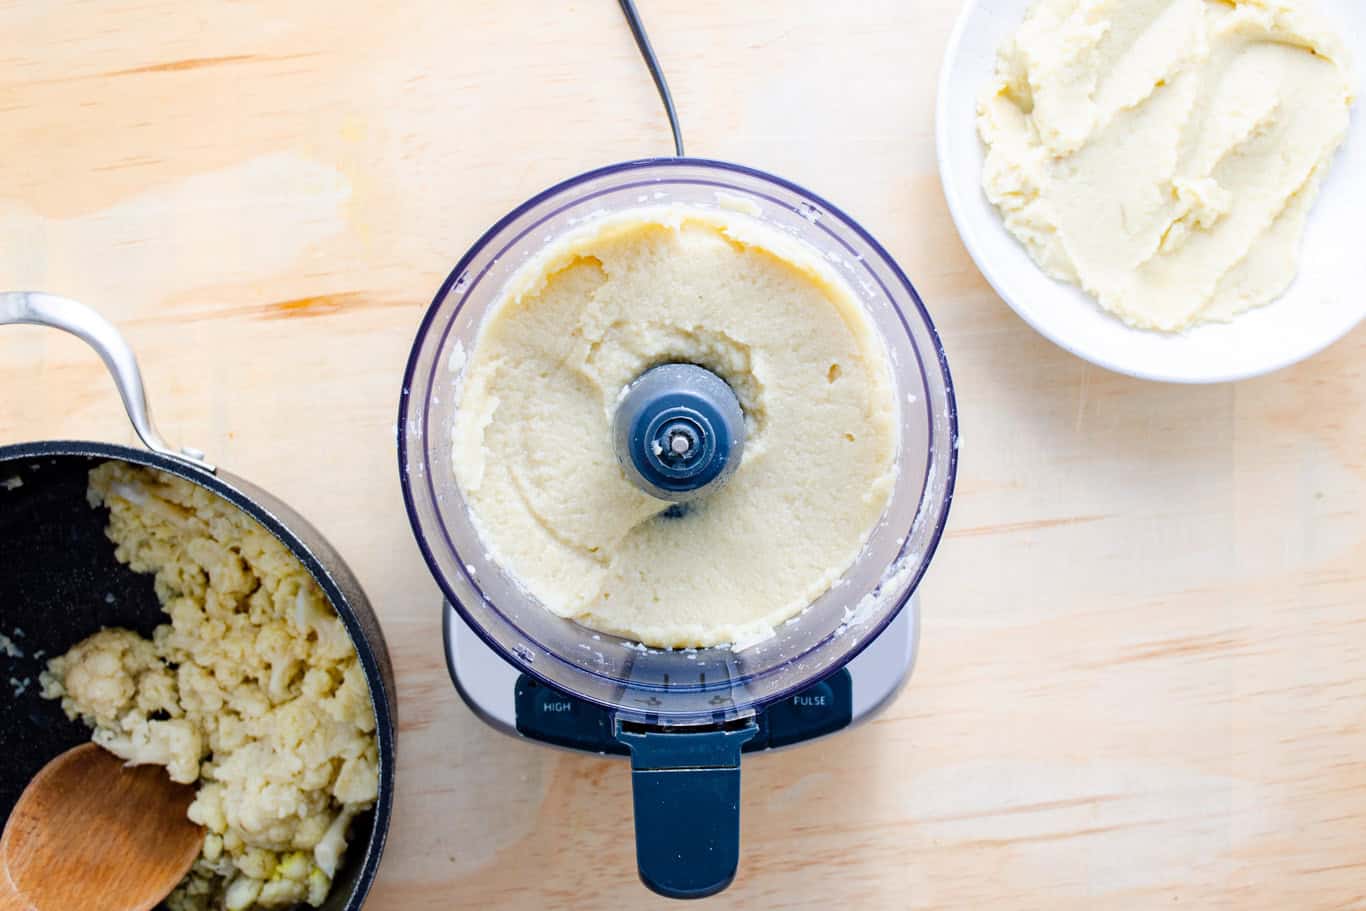
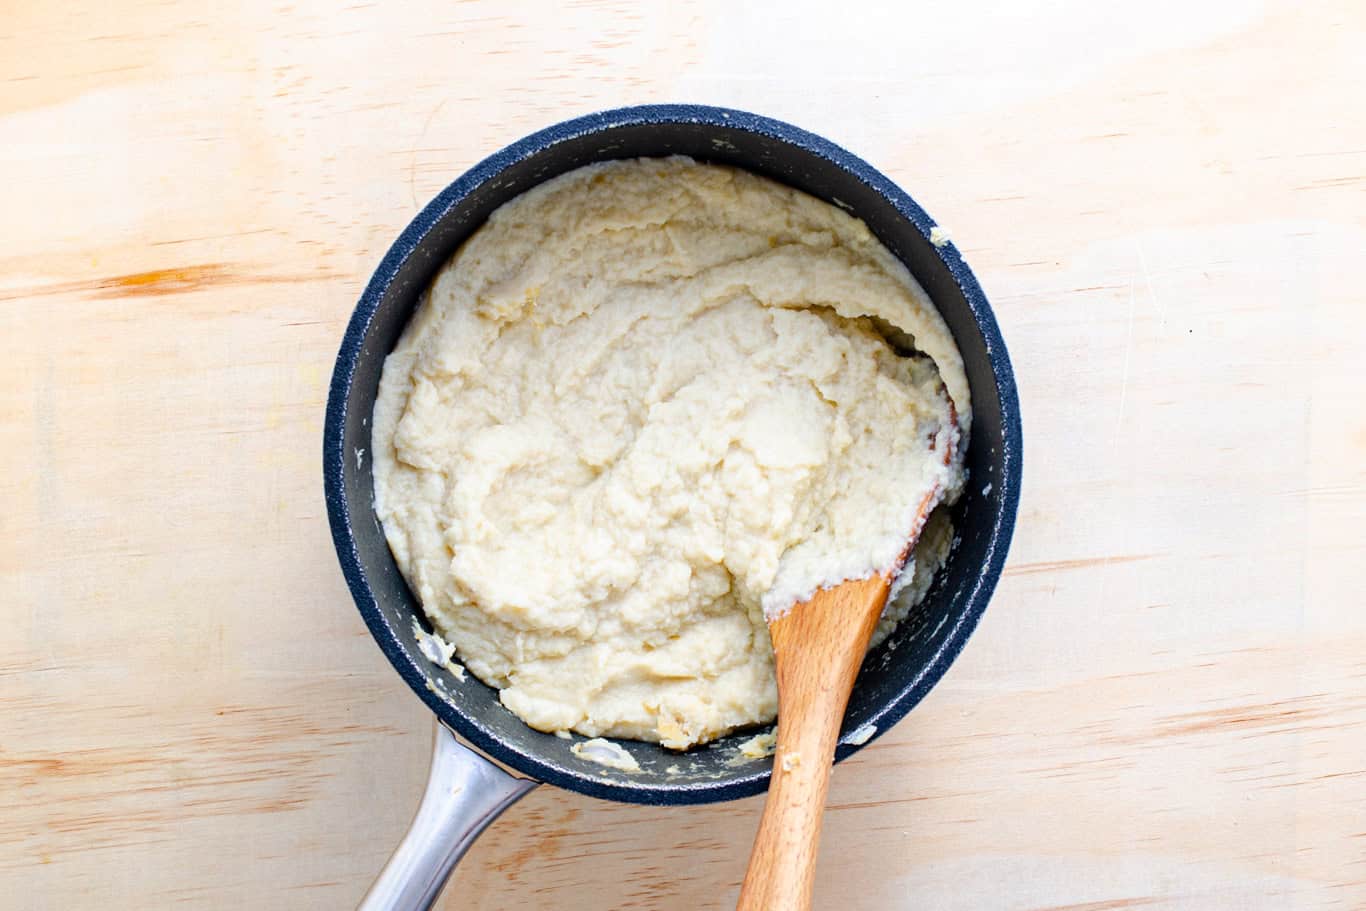
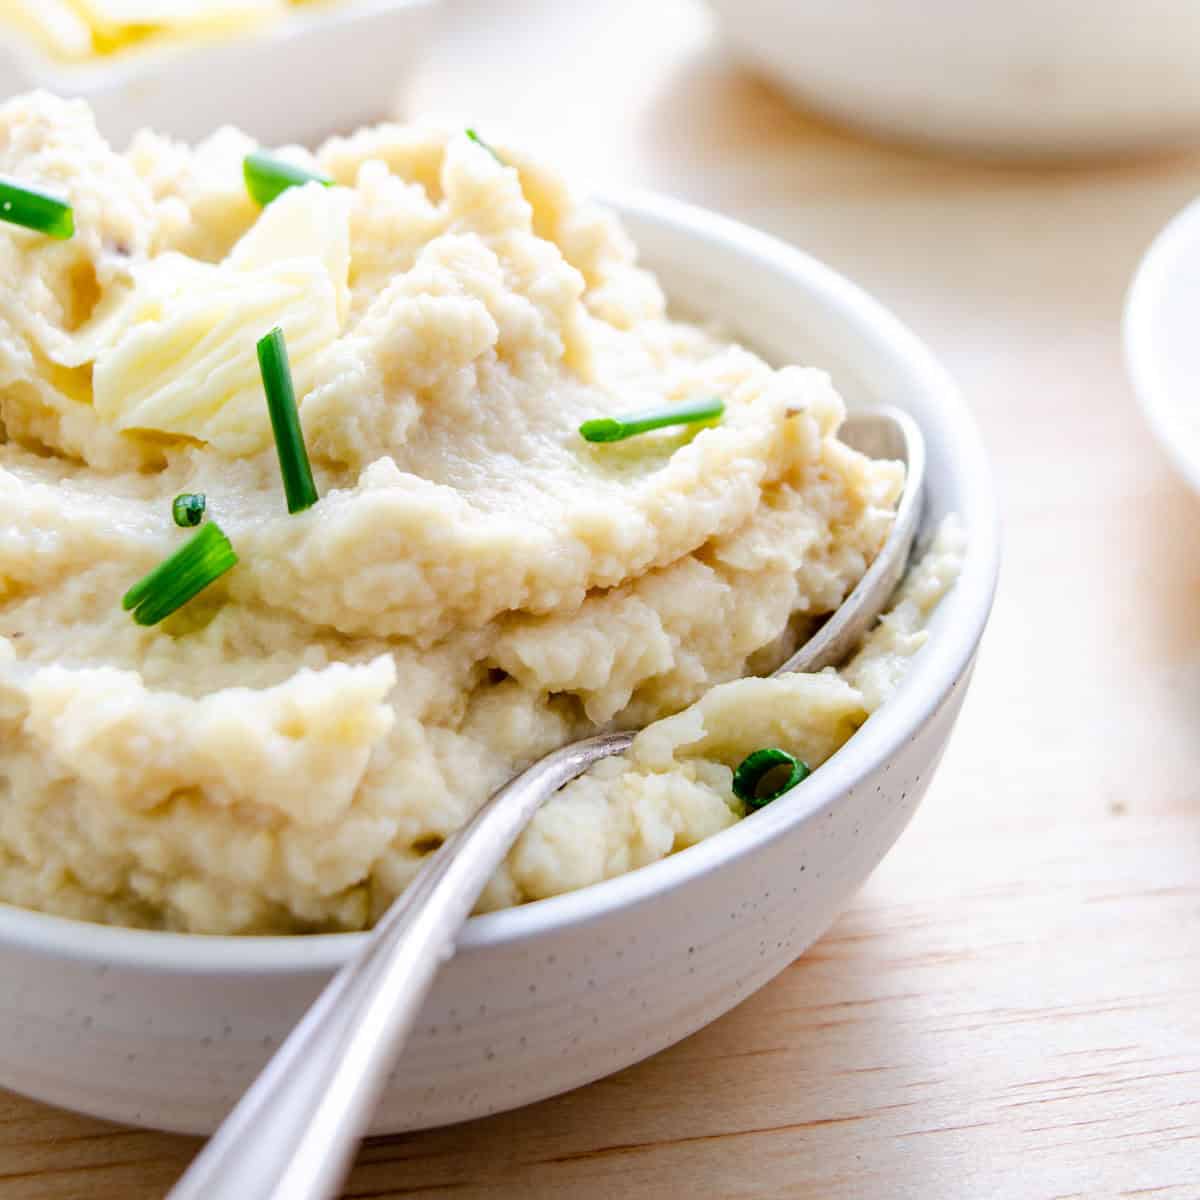
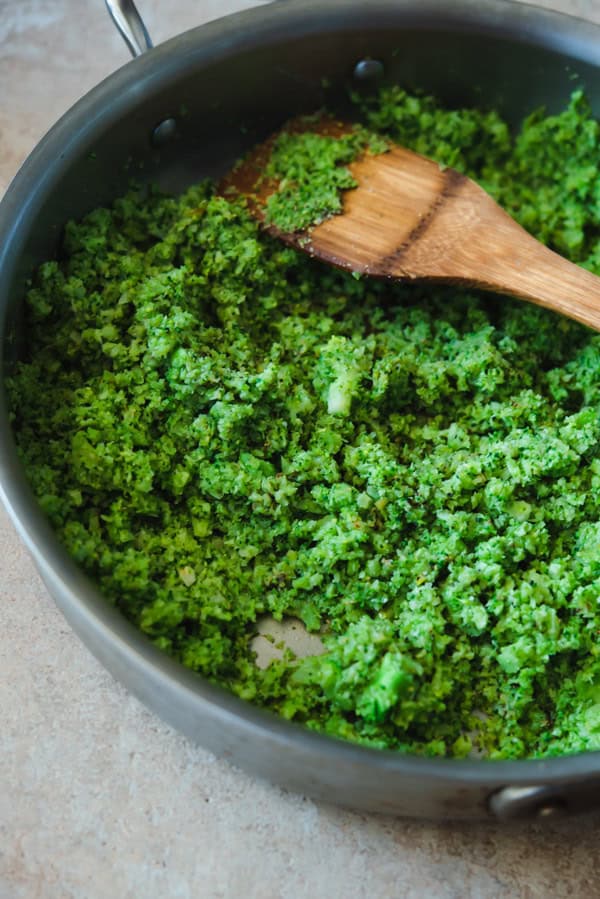
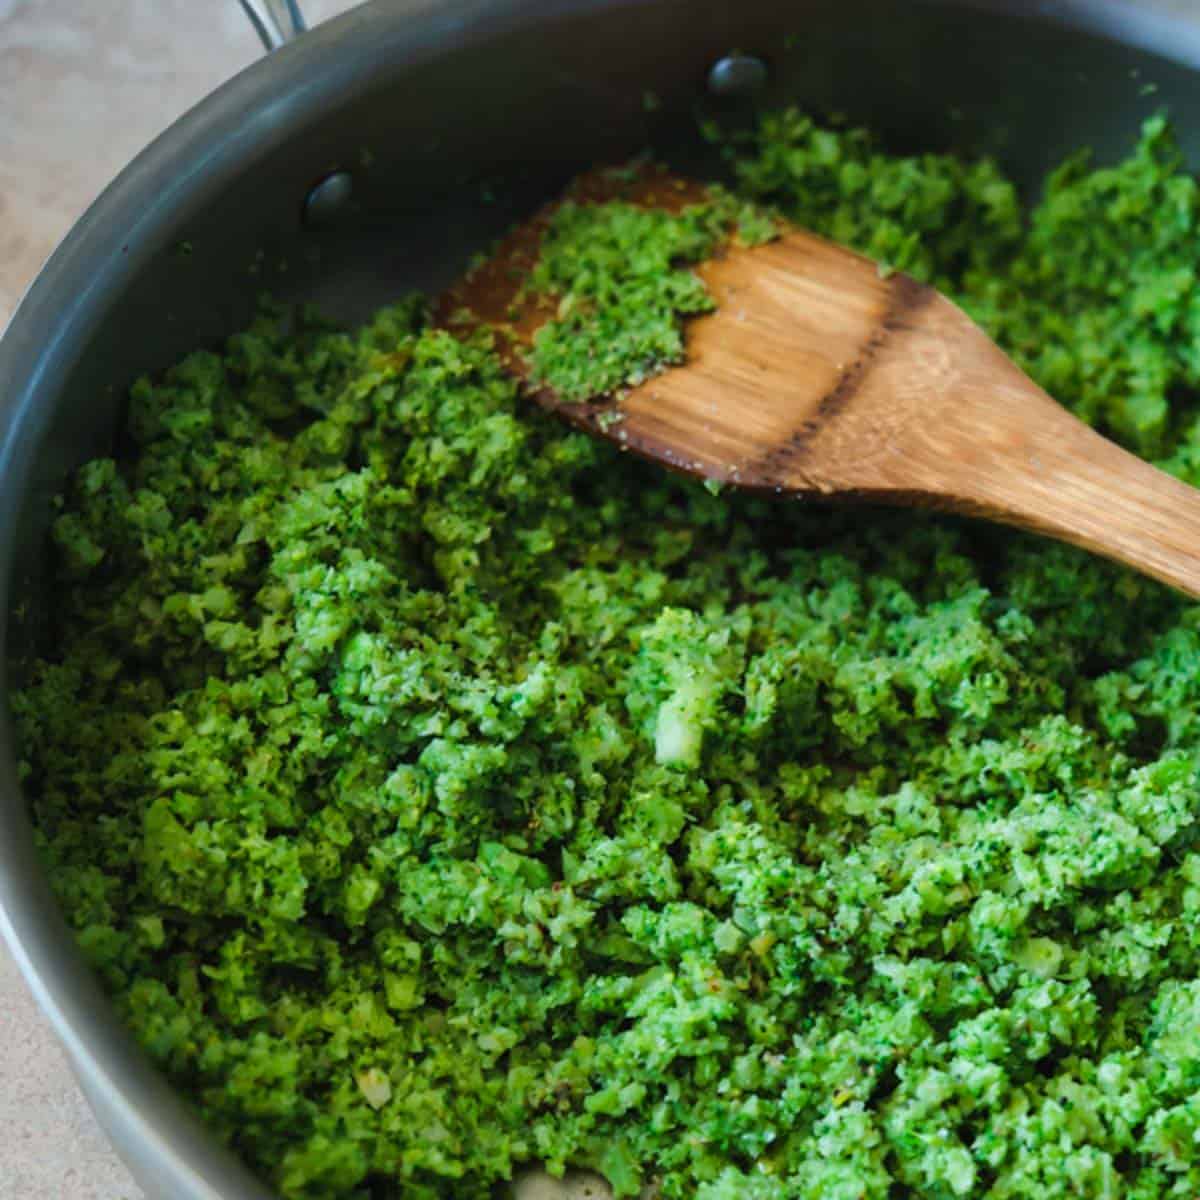
Cauliflower is a great vegetable side because it's not over-powering and you can try a puree or mashed cauliflower to go underneath these scallops. A quick sautéed kale would also go nicely with the flavors of lemon, orange, and ginger in this dish.

This scallop recipe was developed for my sister site The Frayed Apron but originally included butter. If you are reintroducing dairy, you could try this recipe with ghee or grass-fed butter.

AIP scallops

AIP ROAST SCALLOPS WITH CITRUS

No ratings yet
Prep Time: 5 minutes minutes
Cook Time: 20 minutes minutes
Total Time: 25 minutes minutes
Prep Time: 5 minutes minutes
Cook Time: 20 minutes minutes
Total Time: 25 minutes minutes
Servings: 2 people
Calories: 248kcal
Rate
Pin
Share
Print
Serves 2/ Prep time: 5 minutes / Cook time: 20 minutes
Seafood is one of the highlights of any autoimmune restrictive diet because it's an ingredient that really shines with just salt, olive oil, and fresh lemon. Plus, it's a great source of omega-3s, which are anti-inflammatory. In this recipe, it's best to find the large scallops because that way you can achieve some browning whereas the small scallops will cook too quickly to develop any color.

Ingredients

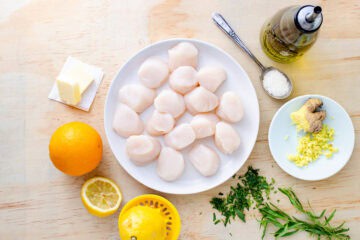
  • 16 large sea scallops approximately 2 pounds
  • 2 tablespoon avocado oil or olive oil
  • Sea salt to taste
  • 1 small orange zested and juiced*
  • 1 small lemon juiced
  • 1 tablespoon fresh ginger grated finely then squeezed for juice*
  • Fresh tarragon or parsley finely sliced for garnish

Instructions

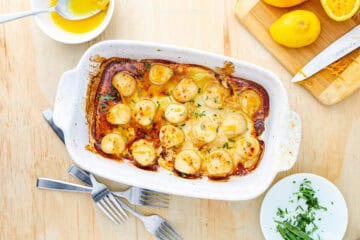
  • Roast the scallops. Preheat the oven to 425F. Pat the scallops dry with paper towels and put them in a bowl. Toss with oil and a couple pinches of salt. Place coated scallops on a sheet tray in a single layer with some room between each scallop. Roast until slightly golden on top, about 20 minutes.
    large scallops, olive oil, sea salt, lemon
  • Garnish and serve. In a small bowl, combine the orange zest and juice, lemon juice, and ginger juice. Spoon over the scallops and serve with fresh tarragon or parsley.

Notes

Zesting: Use a microplane and be sure to avoid scraping too deeply (the white pith layer is bitter). You only want to include the orange zest in this recipe.
Juicing ginger: Ginger can have a hair-like texture that’s pretty off-putting. The trick to getting juice from a small quantity of ginger is to use a microplane or finely grate over a sheet of parchment for easy lifting. Hold the finely shredded ginger between your fingers and squeeze. Even a few drops of ginger is potent.

Nutrition

Serving: 8scallops | Calories: 248kcal | Carbohydrates: 15g | Protein: 16g | Fat: 15g | Saturated Fat: 2g | Polyunsaturated Fat: 2g | Monounsaturated Fat: 10g | Trans Fat: 0.01g | Cholesterol: 29mg | Sodium: 472mg | Potassium: 422mg | Fiber: 3g | Sugar: 6g | Vitamin A: 123IU | Vitamin C: 54mg | Calcium: 41mg | Iron: 1mg

Comforting AIP Whole Roast Chicken with Garlic and Herbs

March 21, 2026 by sara Leave a Comment

A member of the AIP community told a story about how she roasted chicken thighs at 400 degrees with vegetables on a sheet tray and everything turned out poorly because the vegetables created a pool of liquid and just steamed the chicken.

That got me thinking about why this chicken recipe works. I think the reason we can cook the chicken directly over the vegetables and everything still gets that golden flavor is two-fold: height (meaning the chicken towers over the vegetables) and a longer overall cook time. Vegetables do release steam and so it's important that the chicken skin have plenty of time to get exposed to dry heat for those crispy, not soggy, results.

AIP chicken over roasted root vegetables

At the end of the day, crispy chicken skin is about dry heat and will guarantee you get maximum flavor with as few ingredients as fat+salt.

And in case you were wondering, if you are working with chicken thighs, it's best to separate the chicken from the vegetables (but that's a recipe for another time).

Roasting a whole chicken over top of root vegetables with a garlic-herb rub reminds me of the comforts of a bowl of homemade chicken soup. You can use any herbs you wish, but I love parsley, thyme, and oregano--those same savory flavors you'd find in a bowl of soup.

What makes this recipe autoimmune friendly is the minimal seasoning (salt) and the fat (olive oil). Chicken is an affordable and healthy option when cooked in your own kitchen.

AIP whole roast chicken sliced on cutting board

It's easy to assume that a chicken from the store is healthy, but the truth is, most people with leaky gut issues and autoimmune conditions need to eliminate known trigger foods over a period of weeks, months, or even years in order to slow inflammatory processes.

I know for my husband, when he ate chicken from the store, he would consistently become symptomatic whereas he would not when eating chicken at home. We determined in his case, he was sensitive to the cooking oil. Cooking meals at home with olive oil became a way of achieving a baseline between flare ups that often coincided with so-called convenience decisions.

To get foolproof results, you only need a thermometer but this recipe is pretty hard to mess up so if you don't have one, you can cook the chicken until you see the skin turn golden and it's pretty much done. Unlike turkey, chicken is pretty forgiving and tends to be juicy as long as you let it rest out of the oven before slicing it.

You can even cook the chicken over a layer of root vegetables for added flavor. The drippings season the vegetables and the vegetables release steam and keep the chicken just a tad moist on the bottom. It's truly a gardener's dream because you can always use whatever root vegetables and herbs you want.

AIP roast chicken

AIP Whole Roast Chicken with Garlic and Herbs

No ratings yet
Prep Time: 15 minutes minutes
Cook Time: 1 hour hour 20 minutes minutes
Resting Time: 10 minutes minutes
Total Time: 1 hour hour 45 minutes minutes
Prep Time: 15 minutes minutes
Cook Time: 1 hour hour 20 minutes minutes
Resting Time: 10 minutes minutes
Total Time: 1 hour hour 45 minutes minutes
Servings: 4 people
Calories: 567kcal
Rate
Pin
Share
Print
The gist with this whole roast chicken recipe is to apply olive oil or avocado oil to the skin to avoid inflammatory fats. AIP is all about meat and vegetables and so this is a staple centerpiece in my family. We love to cook the chicken over top of rutabaga and sometimes turnips.

Ingredients

  • 2 root vegetables such as turnips, rutabagas, or sweet potato
  • 6 garlic cloves
  • 3 tablespoons olive oil avocado oil or tallow work, too
  • 1 whole chicken 4- to 5-pound
  • sea salt
  • lemon and fresh herbs optional for garnish

Instructions

  • Preheat the oven to 425℉. Peel the root vegetables (if desired) and cut into ½-inch cubes (large dice). Spread the vegetables in the bottom of a Dutch oven or large baking dish along with the whole garlic cloves. Toss with 1 tablespoon olive oil and a pinch of salt.
    root vegetables cut large dice in baking dish with olive oil
  • Pat the chicken dry with a paper towel and brush with the remaining 2 tablespoons of the olive oil. Season with salt and transfer on top of the root vegetables. Note: If using lemon or fresh herbs, you may stuff them inside the cavity of the chicken or place under the skin.
  • Roast for 1 hour 15 minutes or until the internal temperature registers 165℉ (or higher) and the skin is golden and crispy. Allow the chicken to rest for about 10 minutes. Carve the chicken on a cutting board and serve with pan juices and roasted vegetables.

Nutrition

Serving: 1serving (4 total) | Calories: 567kcal | Carbohydrates: 15g | Protein: 37g | Fat: 39g | Saturated Fat: 10g | Polyunsaturated Fat: 7g | Monounsaturated Fat: 20g | Trans Fat: 0.2g | Cholesterol: 143mg | Sodium: 142mg | Potassium: 669mg | Fiber: 4g | Sugar: 4g | Vitamin A: 267IU | Vitamin C: 18mg | Calcium: 57mg | Iron: 2mg

Grass-Fed Burger with Umami Sauce and Tempura Zucchini Fries {AIP, Dairy-Free}

October 26, 2025 by sara Leave a Comment

All-American burger (50 grams of protein) and AIP special sauce (caramelized onion, sweet potato, and nutritional yeast) with cassava-battered tempura zucchini fries.

grass-fed beef and AIP umami sauce with zucchini fries
[feast_advanced_jump_to]

There are not many things I can eat repetitively but this? It's beefy, saucy nostalgic and oh-so-filling. It's definitely OMG-good.

Emphasize Quality Protein on the AIP Diet

When you are battling an autoimmune condition, your body needs an incredible amount of high quality protein and so I just love this as an approachable lunch option because it's ready in under 30 minutes.

burgers with nutritional yeast sauce on top and zucchini tempura fries

Grass-fed, organic beef has superior flavor and the best omega-3 to omega-6 ratio (1:3 to 1:2 versus 1:15 of conventional beef). This is important because we need to really prioritize the omega-3s to reduce inflammation. That said, I know not everyone can afford organic beef so just know that it's ok to buy conventional because you just want to get that protein. You can always supplement with omega-3s.

Culinarily, grass-fed beef (or bison) is on the lean side and thus prone to dryness. This is an easy fix though because we can just pair the burger with a velvety, cheesy sauce made from white sweet potato, caramelized onion, and nutritional yeast. It's phenomenal!

How to Make An AIP All-American Burger with AIP Sauce

This recipe can be summarized with the following photo:

In just one pan, you cook your burgers and the components for the sauce: sliced white sweet potato and sliced onion. Throw your cooked sweet potato and onion into the blender along with the nutritional yeast and some water. Season with salt and blend until you have a thick cheese-like sauce.

If your sauce isn't thick like mine, you can bring it to a low simmer in the same sauté pan then ladle it over the burgers. Top with some finely chopped green garlic or whatever fresh herbs you like.

How to Make Zucchini Tempura AIP Style

Cut the zucchini into spears and then dip them in coconut milk followed by cassava flour seasoned with salt. Pan fry until crispy in a skillet with some avocado oil. Serve hot and salt them to taste. Note, the batter will try to fall off, so just do your best to keep everything together.

AIP burger with AIP cheese sauce and tempura zucchini fries

Grass-Fed Burger with Umami Sauce and Tempura Zucchini Fries {AIP, Dairy-Free}

No ratings yet
Prep Time: 5 minutes minutes
Cook Time: 10 minutes minutes
Total Time: 15 minutes minutes
Prep Time: 5 minutes minutes
Cook Time: 10 minutes minutes
Total Time: 15 minutes minutes
Servings: 2 people
Calories: 733kcal
Rate
Pin
Share
Print
Make the burgers first then blend the sauce. While the burgers are resting, make the zucchini fries (you can reheat the umami sauce at the very end).

Ingredients

  • 1 tablespoon olive oil
  • 1 pound grass-fed organic beef or bison
  • sea salt
  • 4 slices white sweet potato
  • ¼ cup onion chopped (red, white, or yellow)
  • 2 tablespoons nutritional yeast
  • ½ cup water
  • 1 small zucchini cut into fries/wedges
  • ¼ cup coconut milk optional (helps flour stick to zucchini)
  • ½ cup cassava flour
  • 1 stalk green garlic finely chopped (for garnish), optional

Instructions

  • In a large skillet over medium heat, add the oil. Shape the beef into patties and season well with salt. Place onto the hot oil. Add the sweet potato slices and onion into the pan. Cook the burgers for several minutes without moving them so they brown. Turn the potatoes and onion--caramelize and soften a bit but don't allow to burn. Flip the burgers and cook until medium-well.
  • Transfer the potatoes and onions once soft and you see some browning to a blender. Add the nutritional yeast, water, and a pinch of salt. Blend until very smooth.
  • Plate the burgers and add more oil to the skillet. Dip the zucchini wedges into the coconut milk (in a small bowl) and then dredge in cassava flour (on a plate). Pan-fry over medium heat until crispy. Turn carefully as the batter is fragile. If it comes off, just do your best to remove it all and serve together.
  • Since this dish is best hot, you can now reheat the umami sauce until it simmers and serve it over top of the burgers. Place the zucchini on the side. Garnish the burger with green garlic if you can.

Nutrition

Serving: 1burger | Calories: 733kcal | Carbohydrates: 33g | Protein: 39g | Fat: 49g | Saturated Fat: 21g | Polyunsaturated Fat: 2g | Monounsaturated Fat: 21g | Cholesterol: 120mg | Sodium: 183mg | Potassium: 1018mg | Fiber: 3g | Sugar: 3g | Vitamin A: 402IU | Vitamin C: 14mg | Calcium: 82mg | Iron: 8mg

Burger Pairings

If you want to go all out, make my AIP ice cream and serve it as a milkshake. If you'd like to try something other than zucchini, you can make these banana fries instead or try my umami sauce with these chicken nuggets. For a nice side salad, you could take some romaine lettuce and chop it up and toss it with some dairy-free ranch dressing.

Seasonal Sautéed AIP Greens

October 26, 2025 by sara Leave a Comment

Sautéed AIP Greens should be a part of any AIP meal plan because otherwise the strict diet can lack contrasting tastes like spicy and bitter flavors--vital to enjoying food. Kale and most bitter greens have a natural pepperiness to them, and I love this combination of Lacinato kale, shiitake mushrooms, grated ginger, green garlic and lemon. It's good, healthy stuff.

Jump to Recipe
kale chopped, lemon and green garlic in skillet

AIP is all about eating anti-inflammatory foods from the rainbow and this side dish is all about green which hints at things like vitamins A, C, and K, minerals like magnesium, potassium, and iron, as well as fiber and antioxidants.

While I love kale, you can substitute any bitter green here. For example, mustard greens have a spiciness that will remind you of the condiment; whereas collard greens are more earthy and grassy.

sauteed kale with shiitake mushrooms, ginger, and green garlic in skillet

I'm pretty confident in recommending kale to anyone because even my 2-year-old eats it willingly.

How to Prep Shiitakes and Ginger

Fresh shiitake mushrooms have a fabulous meaty texture and deep savory, umami flavor. You always remove the stems (discard or save for stock) and slice the top thinly. Most shiitakes are pretty clean but you can give them a quick rinse if you have any doubt.

Fresh ginger has a heat to it that I sometimes prefer as a break from garlic cloves. To start, peel your ginger then either mince or grate and use the juice or the pulp. Notice that I'm combining ginger with fresh green garlic, which is significantly milder than the clove. FYI, green garlic loses most of it's flavor when cooked, so do try to add it at the very end right before serving so you get to enjoy how special it is.

Of course, if you can't use green garlic, a good substitute would be to use a single garlic clove (minced) that you add right at the end and stir in for just 30 seconds or so.

How do you know when bitter greens are cooked enough?

As you cook bitter greens, like kale, they become less bitter and the fibers soften, making them easier to chew. Heat does cause greens to lose nutrients and so I prefer to sauté my greens for only a few minutes total. That way, when you add a spritz of fresh lemon, they're still a deep verdant green, a sign of their nutritional value.

What to Serve with Sautéed Kale:

You can roast or grill chicken, steak, pork, or fish. Any protein or meatloaf would pair well with this dish. If you happen to have some cauliflower puree, this would also make an excellent side dish. As a final showstopper, add a scoop of vanilla ice cream with a rhubarb crisp, AIP of course.

sautéed kale with shiitake ginger and garlic

Seasonal Sautéed AIP Greens

No ratings yet
Prep Time: 5 minutes minutes
Cook Time: 5 minutes minutes
Total Time: 10 minutes minutes
Prep Time: 5 minutes minutes
Cook Time: 5 minutes minutes
Total Time: 10 minutes minutes
Servings: 4 servings
Calories: 82kcal
Rate
Pin
Share
Print
Looking for a fast AIP side dish that's healthy as can be? Try sautéed bitter greens like this and you'll get hooked.

Ingredients

  • 1 tablespoon olive oil tallow, avocado oil, or lard work well, too
  • 1 cup shiitake mushrooms stemmed and thinly sliced
  • 1 bunch Lacinato kale, roughly chopped or mustard greens, curly kale, collard greens, or chard
  • 1 pinch sea salt
  • 1 knob fresh ginger peeled, grated (about 1 teaspoon)
  • 2 stalks green garlic roughly chopped or minced
  • 1 lemon juice added to taste

Instructions

  • The first step is to heat a sauté skillet over medium-high heat. Once hot, add your oil and shiitake mushrooms. Do not stir. Allow to cook for 2 minutes.
  • Stir the mushrooms then add the kale and stir to coat the leaves with the oil. Sprinkle with salt and continue cooking for 2 minutes. Add the fresh ginger. Stir and cook for another minute.
  • Just before serving, you can add the green garlic and stir it in to distribute the flavor. Portion onto plates and add just a touch of lemon juice (to taste) and watch that green color become even brighter. Enjoy!

Nutrition

Serving: 1side serving | Calories: 82kcal | Carbohydrates: 9g | Protein: 4g | Fat: 5g | Saturated Fat: 1g | Polyunsaturated Fat: 1g | Monounsaturated Fat: 3g | Sodium: 51mg | Potassium: 445mg | Fiber: 5g | Sugar: 3g | Vitamin A: 6749IU | Vitamin C: 77mg | Calcium: 180mg | Iron: 1mg

Strawberry-Rhubarb Crisp {AIP, Paleo}

October 8, 2025 by sara Leave a Comment

This AIP strawberry-rhubarb crisp is effortless and as good or better than pie! It's comforting, crowd-pleasing and takes ingredients you have in the pantry and garden.

Strawberry-rhubarb crisp in Dutch oven bubbly filling

This was my first year growing rhubarb, and I can't believe how big and healthy it looked. From spring to fall, the plant kept giving me stalks. It was very good to me.

So as I had quite a bit of rhubarb on hand, I sampled lots of crisp toppings and settled on this one because the texture and flavor resembles a streusel topping I used to make out of oats. This one is grain-free and allergy-friendly (so no oats and it's gluten-free, dairy-free, nut-free).

[feast_advanced_jump_to]

Key Ingredients in Rhubarb Strawberry Crisp

  • Rhubarb: Use fresh rhubarb stalks, leaves discarded, cut into 1-inch pieces
  • Sugar: You'll need autoimmune friendly sweetener like maple syrup or honey for the filling and maple syrup for the topping.
  • Arrowroot: A little starch helps thicken the filling.
  • Shredded coconut, tigernut flour, arrowroot starch, and coconut flour: Make a streusel topping with this AIP-friendly combo of nutrient-dense flours.
  • Coconut oil: Refined or unrefined for the fat.

Baking Tip:

As you can see, this rhubarb gets pre-cooked in the oven first and that's because they cook at a different rate than the strawberries (those get added later).

bowl of AIP strawberry-rhubarb crisp

Variations to Try

  • A splash of vanilla extract? Yes, please.
  • A pinch of lemon/orange zest? Sure.
  • Strawberry-rhubarb ratios: Swap as much of the rhubarb with strawberries or make it 100% rhubarb.
  • Apple-rhubarb crisp: Swap the strawberries with peeled, cored apples, cut into chunks.
fresh strawberries and rhubarb in Dutch oven

Make-Ahead and Storage Tips

  • Make ahead: The crisp topping can be made and frozen up to 2 months in advance. Store it in a zip top freezer bag and add the topping (frozen) to your filling and bake.
  • Storage: Leftovers will keep, covered with the Dutch oven lid in the refrigerator up to 4 days. Serve at room temperature or re-warm in a low oven for 20 minutes.
AIP strawberry rhubarb crisp baked in Dutch oven

If you'd like to try this filling in a pie crust or try this crisp with blueberries, I've got a blueberry pie recipe you could play around with.

strawberry rhubarb crisp

Strawberry Rhubarb Crisp

No ratings yet
Prep Time: 15 minutes minutes
Cook Time: 1 hour hour 5 minutes minutes
Total Time: 1 hour hour
Prep Time: 15 minutes minutes
Cook Time: 1 hour hour 5 minutes minutes
Total Time: 1 hour hour
Servings: 6 bowls
Calories: 488kcal
Rate
Pin
Share
Print
This tangy, sweet crisp will make your day. Pop some vanilla AIP ice cream on top and you've got the perfect hot summer snack or light dessert. This crisp topping can be crumbled or shaped a bit more. It's decadent and so, so good.

Ingredients

For the Filling:

  • 3 cups diced fresh rhubarb
  • ½ cup water
  • ½ cup honey or maple syrup
  • 3 tablespoon coconut oil
  • 1 tablespoon arrowroot starch
  • 1 tablespoon fresh lemon juice
  • 1 pinch sea salt
  • 3 cups fresh strawberries quartered

For the Topping:

  • ¾ cup shredded unsweetened coconut
  • ⅓ cup tigernut flour
  • ¼ cup arrowroot starch
  • 1 tablespoon coconut flour
  • ¼ teaspoon ground cinnamon
  • 1 pinch sea salt
  • ¼ cup coconut oil
  • ¼ cup maple syrup

Instructions

  • Preheat the oven to 350℉.
  • Pre-cook the rhubarb first. Place the rhubarb, water, honey, coconut oil, arrowroot, lemon juice and salt in a Dutch oven. Bake for 20 minutes.
  • To the pre-cooked rhubarb, add the strawberries.
  • To make the topping: In a large bowl, stir together the dry ingredients.
  • Add wet ingredients and stir until a dough forms. Use your fingers to press or sprinkle the dough over the top of the filling. Bake uncovered for 45 minutes or until you see the topping has crisped and the filling is bubbly.
  • Let cool before serving. Refrigerate leftovers.

Nutrition

Serving: 1bowl | Calories: 488kcal | Carbohydrates: 73g | Protein: 4g | Fat: 26g | Saturated Fat: 17g | Polyunsaturated Fat: 0.4g | Monounsaturated Fat: 1g | Sodium: 24mg | Potassium: 316mg | Fiber: 31g | Sugar: 35g | Vitamin A: 48IU | Vitamin C: 33mg | Calcium: 66mg | Iron: 14mg

Blueberry Pie with Cassava Crust (AIP, Paleo)

September 17, 2025 by sara 1 Comment

This AIP Blueberry Pie is straight blueberries enhanced with just lemon and vanilla. Good pie needs little else! You will need fresh or frozen blueberries or try a combination of berries. And because there's no point in pie filling without the crust, I've included my cassava crust instructions in the recipe card below.

homemade AIP blueberry pie with strawberries and cassava crust

About This AIP Blueberry Pie Recipe

Cultivating timelessness is something I strive for in my adult life, so when my family lost all sense of time picking blueberries in the mountains of Alaska, hours passed like minutes again as it once did for me as a girl. We foraged until we had a gallon of blueberries and crow berries (tart and less flavorful than blueberries) combined and I decided to fire up the oven and make pie.

[feast_advanced_jump_to]
picking blueberries in Hatcher's Pass Alaska

Wild blueberries vary in size and have a slightly tarter flavor than the blueberries you find in the produce section. When making this pie, go ahead and taste the filling and increase the amount of honey called for in the recipe if you want a sweeter pie.

wild picked blueberries

Why This Recipe Works:

Pre-cooking the blueberry filling ensures that the final texture will be thick and not runny with excess juices. Arrowroot starch acts as a thickener as well, so any liquid becomes gel-like and the texture improves even more after refrigeration.

How to Make An AIP Crust

AIP crust is actually do-able and this one is pretty close to perfect. Surprisingly, you only need cassava flour and a few pantry staples. If you're new to Cassava flour, a lot of resident AIPers swear by Otto's brand, but I personally am a fan of this one.

Just like traditional crust-making, you need a pastry cutter to cut the palm shortening into the flour (though if you don't own one, you can actually make crust in the food processor).

**If you'd like to skip the crust and make this into a cobbler instead, you could use the topping I share in my strawberry-rhubarb crisp.

Ingredient Substitution Tips: Please try this recipe with palm shortening (since I've tested it). If you are allergic or only have lard (animal-based) or coconut oil (plant-based) on hand, you should try those since they are similarly solid at room temperature and can create a tender, somewhat flaky texture.

Based on my experiences working with those fats, you might find that the crust needs to be pressed by hand (as opposed to rolling it out). Also, you might notice more cracking when you go to serve it (as opposed to the crust holding together).

AIP cassava crust

What do I do if the crust tears?

You can use oiled fingers to smooth over cracks. You can see that my crust is far from perfect, which is just fine with me. It just shows that it is, in fact, handmade and not storebought.

stovetop cooked blueberries in pot and AIP pie crust in baking dish

When making the crust, you do not need to pre-cook the crust. You will pre-cook the filling though which removes some moisture and thickens the filling so your crust won't get overly saturated during the baking process.

pre-cooked blueberries in pie crust

As you can see, this is actually a blueberry pie with a few strawberries added. I love how the berries maintain their shape and are visible! Don't crush your berries!

baked until bubbly blueberry pie

See? Beautiful intact berries.

blueberry and strawberry pie slice on plate

Serving Ideas

I love a warm slice of pie with a scoop of vanilla ice cream (AIP version). If you are serving this pie as-is, I'd recommend serving it room temperature or chilled on a chilled plate because the pie is easier to cut into pretty slices when it's cold. Another option is to make vanilla flavored coconut whipped cream and serve with a dollop of that on top. Enjoy your pie!

This recipe is based on my own memorized all-berry pie recipe (the filling) and the crust is an adaptation from Wendi's AIP Kitchen where I have made a few suggestions and changes based on my training in pastry-making (ex. adding coconut milk in the last few minutes of baking and the option to use a food processor).

blueberry pie with strawberries on plate

Blueberry Pie {AIP, Paleo}

5 from 1 vote
Prep Time: 15 minutes minutes
Servings: 8 slices
Calories: 375kcal
Rate
Pin
Share
Print
This adaptable blueberry pie recipe has a thick filling with plump berries married with a tender cassava crust. It has a nice tart taste and is minimally sweetened with honey. It's such a sweet way to end summer.

Equipment

  • 1 9" pie tin

Ingredients

Cassava Pie Crust:

  • 1 ½ cups cassava flour 225 grams
  • ¾ teaspoon sea salt *plus an extra pinch
  • 1 tablespoon gelatin
  • ¾ cup solid palm shortening (do not melt)
  • 1 tablespoon apple cider vinegar
  • 1 ½ tablespoons ice cold water

Blueberry Filling:

  • 6 cups blueberries* fresh or frozen
  • ¼ cup honey or maple syrup (taste and add more if you like)
  • ½ teaspoon vanilla extract
  • ¼ teaspoon sea salt
  • ¼ cup arrowroot starch flour
  • 2 tablespoons water for the slurry
  • 1 lemon finely zested (yellow part only) then halved and juiced
  • coconut milk optional for brushing

Instructions

  • Make the crust. In a large mixing bowl, whisk the cassava flour, salt, and gelatin. Use a pastry cutter using a pressing up and down motion to cut in the palm shortening. After several minutes, it will come together like cookie dough (note: if it looks dry, keep cutting). Add the vinegar and cold water. Working with quick hands, gather to form a dough ball but avoid working the dough any more than that as you don't want to melt the fat with your warm hands.
  • Roll dough. Place the dough between two sheets of parchment and with a rolling pin, press down and roll outward. Turn and repeat until you achieve a thickness of ⅛" or about 12" in diameter to account for the sides of your pie dish. Slowly remove the parchment and place the inverted pie tin on top, flip quickly but gently. Use your fingers to smooth any cracks and crimp the top. Poke holes in the crust with a fork and refrigerate.
  • Preheat the oven to 350℉. Pre-cook the berries in a pot--combine the blueberries, honey, vanilla and salt. Set heat to medium-low. In a ramekin, create a slurry out of arrowroot starch and water. Stir to combine then add to the pot. Bring to a simmer and stir gently being careful not to break too many berries. Note: Arrowroot will only thicken if brought to a simmer.
  • Remove from the heat after you see bubbles forming and add the lemon juice and zest. Stir and pour the berry mixture into the pie shell. Bake for 30 minutes. Brush the top with coconut milk (if using) and return to the oven. Continue baking until you see the blueberry filling get bubbly. Cool on the counter for 1 hour then cover and refrigerate.
  • To slice, use a knife and offset spatula. Consider topping with AIP ice cream!

Notes

*If you don't have 6 cups, you can use a combination of whatever berries you have. I have a few strawberries and some crow berries in my blueberry pie.

Nutrition

Serving: 1slice | Calories: 375kcal | Carbohydrates: 48g | Protein: 2g | Fat: 21g | Saturated Fat: 10g | Polyunsaturated Fat: 2g | Monounsaturated Fat: 8g | Sodium: 296mg | Potassium: 116mg | Fiber: 4g | Sugar: 21g | Vitamin A: 63IU | Vitamin C: 19mg | Calcium: 47mg | Iron: 2mg

Red Velvet Cupcakes {AIP, Paleo}

September 8, 2025 by sara Leave a Comment

These AIP cupcakes are totally deserving of the name "red velvet" because they're chocolate-like, moist, fluffy, and indulgent. They're gluten, dairy, egg, and refined-sugar free (paleo and AIP compliant).

AIP chocolate cupcake with vanilla frosting

Did you know, you can use freeze-dried beet powder for color/nutrition in the cake portion and yogurt for a bit of tang in the frosting? These two ingredients are optional but help capture the red velvet concept which typically contains red food dye added to chocolate cake batter and cream cheese added to frosting.

[feast_advanced_jump_to]

Chocolate AIP Cupcakes

I recently started the AIP elimination diet, which got me craving red velvet cupcakes (of all things) so I decided to create this carob version and totally nailed it.

If you are here because you've been dying for an AIP allergen-friendly cupcake, this is for you! These will totally make your diet easier and more celebratory for birthdays or those chocolate cravings sans the actual chocolate.

AIP chocolate cupcakes with tangy vanilla frosting

For eggless cupcakes, these sure do have a moist, substantial texture which is pretty difficult to achieve in AIP bakes. This is because the recipe uses both banana and banana flour in a few ways (details and photos below).

mashed banana in bowl

Ingredients for AIP Cupcakes

For the dry ingredients:

  • Green banana flour-I've used this flour in a handful of recipes and consider it to be a great bread-like flour for all-purpose baking.
  • Tigernut flour-One of my pantry staples for good reason! I use this in baking, pancake and waffle recipes, even AIP "peanut" butter. It's nut-free, as tigernuts are tubers, not nuts as the name suggests.
  • Carob-This is a love it or hate it ingredient that replaces cocoa powder but is slightly sweeter than actual chocolate. Carob is a true pantry staple that makes the rounds here on the blog. There's these chocolate chip cookies, tigernut and carob bars, and this carob pudding.
  • Arrowroot starch-Although the green banana flour and and tigernut flours provide starch, I generally like the way arrowroot helps with texture in egg-free baking.
  • Gelatin-I personally use grass-fed Vital Proteins Beef Gelatin.
  • Baking soda-As soon as you add and mix this in, you will have a reaction occur that helps these cupcakes rise. Note, the rise effect only lasts about 20 minutes so be prepared to bake these once mixed.
  • Salt-Crucial in enhancing flavors in recipes where there is no butter and especially to enhance sweet and savory flavors which is important in AIP baking since they tend to be less sweet/savory compared to traditional standard American diet counterparts.
  • Freeze dried beet powder-This is optional and provides some color as well as nutrients (beet powder link here). It does not impact the flavor much. This is a similar idea to adding strawberry powder to frosting in my strawberry cupcake recipe.

Now, for the wet ingredients:

  • Bananas-In egg-free baking, bananas help bind and keep cupcakes moist, as well as provide a whole foods sweetener. For best results, be sure to blend your banana so that it is very smooth.
  • Coconut oil-When in doubt, coconut oil (refined or unrefined) should be treated as you would butter. That is, it should be soft. I like to melt half of my coconut oil, then to my measuring cup, add the remaining solid coconut oil to achieve the perfect texture and measurement.
  • Maple syrup-Unparalleled in AIP baking for flavor in baking recipes.
  • Vanilla extract-Pure, gluten-free vanilla extract.
  • Apple Cider vinegar-Provides acid so that the baking soda gets activated and helps these cupcakes rise.

And the frosting (everybody's favorite part):

  • Palm shortening-This fat tends to be solid at room temperature and so it holds up well when mixed with liquids for frostings.
  • Maple syrup-Provides the best flavor profile compared to honey.
  • Coconut butter-Provides a savory, rich shortbread-like flavor that is reminiscent of actual butter and gives the frosting some dimension and aids in a creamy texture.
  • Vanilla extract or vanilla powder-Simply adds enough flavor to over-power and "taste" that you might not love about palm shortening.
  • Plain coconut yogurt (optional)-This ingredients is meant to mimic a cream cheese type frosting but I think the frosting tastes really good even without it. I like Cocojune.
Vanilla Frosting mixed with palm shortening, maple syrup, vanilla, and coconut yogurt

AIP Cupcake Batter Texture

Although time consuming, I try to document the process of my bakes for you so you can visualize the steps. As you can see below, the batter is thick and difficult to mix. You can see that I did not mash my banana enough and have included in the instructions a recommendation to blend the wet ingredients for this reason.

carob cupcake texture

This is a solid cupcake recipe, but the world will never know if you don't comment or rate the recipe. Please leave a star rating and any notes about your experience. Thank you for being here!

If you are interested in supporting the blog, you can follow any links to my affiliate amazon recommendations. These tulip cupcake liners are what you see pictured, and they really help AIP cupcakes rise and look amazing.

Appearance Note: I just wanted to add a note that my photos are of a tested version where I only added 1 teaspoon of beet powder. In the recipe, I call for 2 teaspoons so the red color comes through.

red velvet chocolate cupcake with AIP vanilla frosting

Carob Red Velvet Cupcakes {AIP, Paleo}

No ratings yet
Prep Time: 10 minutes minutes
Cook Time: 30 minutes minutes
Total Time: 40 minutes minutes
Prep Time: 10 minutes minutes
Cook Time: 30 minutes minutes
Total Time: 40 minutes minutes
Servings: 6 cupcakes
Calories: 241kcal
Rate
Pin
Share
Print
These "chocolate" cupcakes are totally deserving of the name "red velvet" because they're moist, fluffy, and indulgent. They're gluten, dairy, egg, and refined-sugar free (paleo and AIP compliant). You can use freeze-dried beet powder for color/nutrition in the cake portion and yogurt for a bit of tang in the frosting. These two ingredients are optional but help capture the red velvet concept which typically contains food dye and cream cheese frosting.

Ingredients

Dry Ingredients:

  • ⅓ cup green banana flour
  • ⅓ cup tigernut flour
  • ¼ cup carob powder
  • ¼ cup arrowroot starch
  • 2 tablespoons gelatin
  • 1 ½ teaspoons baking soda
  • ¼ teaspoon sea salt
  • 2 teaspoons freeze dried beet powder optional for color and nutrition

Wet Ingredients:

  • 2 medium bananas mashed
  • ⅓ cup coconut oil softened
  • ¼ cup maple syrup
  • ½ teaspoon vanilla extract
  • ½ teaspoon apple cider vinegar

Frosting Ingredients:

  • ½ cup palm shortening
  • ¼ cup maple syrup
  • 2 tablespoons coconut butter
  • ½ teaspoon vanilla extract or vanilla powder
  • 1 tablespoon plain coconut yogurt cocojune (optional)

Instructions

  • Preheat the oven to 350℉ and line a cupcake tray with 6 cupcake liners.
  • In a large bowl, combine then whisk all the dry ingredients. Set aside.
  • In a separate mixing bowl, combine and whisk all the wet ingredients.
  • Pour the dry ingredient mixture into the wet ingredient mixture and stir until combined. The batter will be very thick.
    AIP cupcake batter mixed in bowl
  • Divide the batter into the cupcake liners and bake for 30 minutes. Allow to cool before frosting.
  • Using a blender, food processor, immersion blender, or egg beaters, whip the frosting ingredients on high speed until well combined. This frosting can be refrigerated for up to 20 minutes but will solidify if left longer and need to be brought to room temperature to frost.
    Vanilla Frosting mixed with palm shortening, maple syrup, vanilla, and coconut yogurt
  • For best results, add cool or room temperature frosting to room temperature or cooled cupcakes. Enjoy!

Nutrition

Serving: 1cupcake | Calories: 241kcal | Carbohydrates: 31g | Protein: 3g | Fat: 14g | Saturated Fat: 11g | Polyunsaturated Fat: 0.3g | Monounsaturated Fat: 1g | Sodium: 379mg | Potassium: 216mg | Fiber: 7g | Sugar: 15g | Vitamin A: 26IU | Vitamin C: 3mg | Calcium: 36mg | Iron: 3mg

Strawberry Cupcakes with Strawberry Frosting {AIP, Paleo}

August 28, 2025 by sara Leave a Comment

Paleo and AIP Strawberry Cupcakes are a special treat for a spring or summer birthday celebration because they're made with sweet, tart strawberries throughout. There's freeze-dried strawberry powder in the cupcake batter and the "buttercream" frosting. There's even a fresh strawberry for garnish.

Spring and Summer and Strawberry Cupcakes

Before starting a new 30-day AIP challenge, I made a list of all the things I might crave. To ensure success, I ordered freeze dried strawberry powder and tulip cupcake liners. So when my little guy happened to ask for cupcakes, I created these on the spot. They were a huge hit!

As you can imagine, it certainly feels encouraging to stick with an already strict diet when you feel like you get to indulge every now and then.

One thing to note about gluten-free, whole foods baking is that you are working with some textural challenges. It's normal for cake batters to be thick and dense and it's especially helpful if you invest in some tall cupcake liners (more height).

These liners would work best inside of a cupcake tray--turns out, mine spread out quite a bit as they were baked on a flat tray.

Dairy-Free Strawberry Buttercream Frosting

There's no butter in this recipe but the frosting is “buttercream” like in texture because palm shortening is pretty solidified at room temperature and when you add freeze-dried strawberry powder, you don't need any thickeners. That's right. This frosting is just palm shortening, strawberry powder, and a touch of honey and salt.

How to Make Strawberry Cupcakes with Strawberry Frosting

These cupcakes are pretty easy to make and you can find all the detailed instructions in the recipe card below.

  1. You mix the dry ingredients in a bowl first then add the coconut oil and maple syrup. Mix.
  2. Make a gelatin egg and mix that into the batter. It will be very thick (don't thin it out).
  3. Spoon the batter into the cupcake liners and bake.
  4. Whisk all the frosting ingredients then top the chilled cupcakes. Garnish with fresh strawberries and serve.

*Just wanted to add a note that if you want a "chocolate" cupcake base instead of this tigernut version, I highly recommend using the strawberry frosting below with these carob "red velvet" cupcakes.

AIP strawberry cupcake with fresh strawberries

Strawberry Cupcakes with Strawberry Frosting {AIP, Paleo}

No ratings yet
Prep Time: 1 hour hour
Cook Time: 25 minutes minutes
Total Time: 1 hour hour 25 minutes minutes
Prep Time: 1 hour hour
Cook Time: 25 minutes minutes
Total Time: 1 hour hour 25 minutes minutes
Servings: 6 cupcakes
Calories: 584kcal
Rate
Pin
Share
Print
Sweet, tart, and moist strawberry cupcakes made with whole foods and unrefined sweeteners.

Ingredients

FOR THE CUPCAKES

  • 1 cup tigernut flour 121 g
  • ¼ cup tapioca starch 30 g
  • ¼ cup freeze-dried strawberry powder
  • ¼ teaspoon baking soda
  • ½ cup coconut oil (partially melted) 112 g
  • ¼ cup maple syrup 80 g
  • 1 Gelatin Egg see instructions

FOR THE FROSTING

  • ⅔ cup palm shortening 139 g
  • 3-4 teaspoons honey
  • ¼ cup freeze-dried strawberry powder
  • 1 pinch sea salt
  • fresh strawberries (optional) for garnish

Instructions

  • Preheat the oven to 350℉ and line a cupcake tin with 6 tall liners. Set aside.
  • In a large bowl, whisk the tigernut and tapioca flours, strawberry powder, and baking soda. Add the melted coconut oil and maple syrup. Stir to combine.
  • Prepare the gelatin egg according to the instructions below and add to the mixture, stirring well to form a thick batter. Spoon into the liners until ⅔ full. Bake until a toothpick inserted into the center comes out clean, about 25 minutes.
  • Allow the cupcakes to cool to room temperature then set in the refrigerator for 20 minutes.
  • To make the frosting: In a medium bowl, whisk the palm shortening, honey, strawberry powder, and salt until creamy and smooth. Transfer to a piping bag and place in the fridge (only for up to 15 minutes).
  • For the garnish: Remove the green portion of the strawberries and cut them in half. You can use them as-is or you can place them in a bowl with a bit of honey and salt if you'd like them to release some juices.
  • Top the prepared cupcakes with frosting and a fresh strawberry (plus strawberry juices) and serve right away.

Notes

Gelatin Egg
¼ cup (60 ml) water
1 tablespoon (7 g) grass-fed gelatin (powder)
  1. Place the water in a small saucepan. Slowly pour in the gelatin and whisk to break up clumps. Let sit (bloom) for 3 minutes until the mixture solidifies.
  2.  Turn the heat on and cook over low-heat for 1-2 minutes until the gelatin melts. Remove from heat and immediately whisk hard until frothy. Immediately add according to the instructions in the recipe above.

Nutrition

Serving: 1cupcake | Calories: 584kcal | Carbohydrates: 47g | Protein: 1g | Fat: 47g | Saturated Fat: 28g | Polyunsaturated Fat: 3g | Monounsaturated Fat: 10g | Sodium: 54mg | Potassium: 303mg | Fiber: 16g | Sugar: 24g | Vitamin C: 241mg | Calcium: 19mg | Iron: 11mg

AIP Waffles with Cassava, Tigernut & Coconut Flour – High-Protein, High-Fiber Paleo Recipe

June 22, 2025 by sara Leave a Comment

These AIP waffles are made with a nourishing blend of autoimmune pantry staples: cassava, tigernut, and coconut flours. Even without the grains, dairy, and eggs, these wholesome waffles are satisfyingly crispy on the outside and fluffy on the inside. Plus, they’re high in fiber and naturally sweet so you can start the day with energy without the afternoon crash.

holding a cooked AIP waffle
[feast_advanced_jump_to]

🥣 Thriving In Chaos: A Waffle Story

My mom worked mornings and so I experimented a lot in my youth preparing breakfast for myself before school. One day I asked for a waffle-maker. To this day, I find myself reminiscing about what fun it was making waffles for my mom and sister on the weekends.


It's funny how first jobs prepare you for your life even when you think they won’t.

My 17-year-old self worked a diner job at Waffle House. On Sundays, I’d drive my ‘97 Mustang to work and eat breakfast at 5:30 before my 6am shift. I ate my way through the entire menu that summer and even created some off-menu orders: a waffle smeared with butter, an over-medium egg on top.

Diner work defined hard work for me at the time. There were always tables to bus, orders to call out, dishes to wash, and hot food to serve. With Redneck Woman playing over the swell of multiple conversations, I found myself focusing in on the waffle batter and the way it sizzled then steamed on the hot iron. It was sweet, sticky chaos, and I learned to thrive in it.

I suppose if my diner days taught me anything, it’s the importance of a workflow.

Decision fatigue has been the hardest part about the Autoimmune Protocol (AIP) and why I started with a pantry make-over. With a well-stocked AIP pantry, I feel like I can shift my workflow to batch cooking.

When my toddlers ask for waffles, I’ve got ingredients at a minimum and maybe, just maybe, a pre-made waffle in the freezer.

AIP waffles in freezer bag

AIP Waffles - Eat Now or Freeze for Later

Why This Recipe Works: Working smarter not harder, this is a recipe for 9 plate-size waffles. I don't know about you but waffles are always welcome in my freezer because they reheat in a flash and last for months. No dinner plans? How about Chicken and waffles?

Ingredients

Cassava flour, tapioca flour, collagen peptides, coconut flour, salt, and cinnamon in mixing bowl

You will need 13 pantry ingredients to make the batter, which can be used to make waffles or pancakes.

  • cassava flour: proportions matter and cassava flour plays the largest role in making these waffles/pancakes taste light like traditional waffles
  • arrowroot or tapioca starch: it's always important with AIP flours to account for the amount of fiber and protein and adding a starch really is important to the final texture; use the arrowroot or tapioca starch interchangeably (both work well!)
  • tigernut flour: there's quite a lot of fiber and protein in tigernut flour and this flour adds a slightly sweet, slightly nutty taste
  • coconut flour: very absorbent and important to how work-able this recipe is; without coconut flour, this recipe would be too delicate and the waffles/pancakes would likely tear
  • collagen powder: this is like an egg-replacer and a source of protein that helps these hold shape when cooking; downside: it gives the final mouthfeel a slight grittiness but it's not the end of the world
  • ground cinnamon: optional but adds a little more dimension
  • baking soda: this is the leavener that helps the batter rise and gives a fluffiness to the texture
  • sea salt: you'll notice I call for ¼ teaspoon plus an extra pinch; without butter, salt is really nice for flavor
  • avocado oil or coconut oil: both are healthy, high-heat oils (if using refined or unrefined coconut oil, you will have to melt them first)
  • maple syrup: a high quality unrefined sweetener that also adds a rich taste and helps give these a golden color when cooked
  • full-fat canned coconut milk: must be guar gum free for AIP but it’s very expensive and so I have always opted to buy the brands with guar gum (but made this decision believing I am not sensitive to it)
  • apple cider vinegar: activates the baking soda and helps the batter rise and fluff during cooking; white vinegar could be substituted in these small quantities
  • vanilla extract: really helps distract from the fact these are missing eggs; without vanilla, I'd expect these to be bland; for AIP vanilla, you want vanilla beans, alcohol or water listed in the ingredients (no sugar, no flavorings, no glycerin)

Let’s dive into how to reimagine a classic--paleo style!

Step-by-Step Paleo Waffles

If you're AIP minted, you’ve probably eaten your share of gummy pancakes and fall-apart waffles. To replicate my results, all you need to do is follow the recipe to a T because this recipe is written and tested by your personal 👩🏻‍🍳 chef.

Pro Tip: Spoon and level off dry ingredients as I do with ALL the recipes on this site.

dry ingredients whisked in bowl

Since we are using collagen peptides powder as one of our egg replacers, it's important to whisk the dry ingredients well so that everything is distributed evenly. You'll want a large bowl so you don't spill over.

AIP pancake and waffle mixture with wet ingredients added in bowl

After the dry ingredients are mixed, you can add the maple syrup and the oil (*melt the coconut oil, if using). You'll need more liquid...

coconut milk and water added to mixture in bowl

One thing I actually do in my own kitchen to reduce costs is take a can of full-fat coconut milk and stretch it further by filling the empty can with water (so 14-ounces coconut milk plus 14-ounces of water go into the bowl).

waffle batter in mixing bowl

Adding in the apple cider vinegar and vanilla extract, we stir to combine then use the whisk to really break up those remaining lumps.

Your batter should look smooth, thick and fluffy.

waffle batter on waffle iron

Place about ¾ cup of the batter in the middle of a preheated waffle iron then close the lid.

cooked waffle on waffle iron

After a few minutes, the waffle will appear golden and will be firm to the touch. You can easily remove it at this point and transfer it to a plate. This is what dreams are made of.

Toppings

As I shared earlier, my ideal topping is something rich and fatty mixed with syrup. For AIP though, I go for a blend of maple syrup and tart berries sometimes adding coconut whipped cream on top.

To make coconut whip: Select the "cream" or take the full-fat canned coconut milk, refrigerate it, and then scoop out the solidified cream (not the liquid that separates from the fat). Place the solidified coconut cream in a bowl and whisk it until fluffy. Use right away while it's still cold.

AIP waffles plated with coconut cream

Parting Thoughts

Whatever the topping, these waffles are a reminder that even with new ingredients and changing needs, the comfort of a warm breakfast never has to be lost. It just takes a little care—and an open mind.

If you are in the market for a waffle iron for meal prep, I recommend small Ego waffle shapes because they fit in the toaster and are a good size for kids and adults, alike. Bare in mind, they are MORE filling than traditional waffles.

**If you have a waffle iron that you love for meal prep or your family, share it in the comments. I'd definitely like to upgrade to one where I can cook several waffles at a time.

***Some testers commented that they didn't miss the gluten at all but they noticed some grittiness in a few bites. This is likely from the collagen which can get gritty or form clumps when mixed with liquid. Weigh-in if you notice it or not in the comments.

P.S. Tell me what breakfasts you want me to make next here on Autoimmune Pantry. I love hearing from you!

plating waffles with coconut cream

AIP Waffles

No ratings yet
Prep Time: 15 minutes minutes
Cook Time: 30 minutes minutes
Total Time: 45 minutes minutes
Prep Time: 15 minutes minutes
Cook Time: 30 minutes minutes
Total Time: 45 minutes minutes
Servings: 9 waffles
Calories: 552kcal
Rate
Pin
Share
Print
This is a thick batter that works as waffles or pancakes. Note: You will need to measure carefully and follow the recipe as-written.

Ingredients

  • 3 cups cassava flour
  • ½ cup arrowroot or tapioca starch
  • 1 cup tigernut flour
  • ½ cup coconut flour
  • 4 tablespoons collagen powder
  • ½ teaspoon ground cinnamon
  • 1 ½ teaspoons baking soda
  • ¼ teaspoon sea salt plus 1 pinch
  • ½ cup avocado oil or coconut oil melted
  • ½ cup maple syrup
  • 1 can coconut milk plus fill can with water
  • 2 teaspoons apple cider vinegar
  • 2 teaspoons vanilla extract

Instructions

  • In a large bowl, stir together the cassava flour, starch, tigernut flour, coconut flour, collagen powder, cinnamon, baking soda, and salt.
    dry ingredients whisked together in bowl
  • Add the oil and maple syrup and stir to combine.
    oil and maple syrup in bowl with dry ingredients
  • Stir in the entire can of coconut milk (plus an entire can filled with water) and vinegar, whisking until fully combined. Stir in the vanilla extract. The batter will be lumpy at first but will eventually be smooth, fluffy, and very thick.
    coconut milk plus water added to mixture in bowl
  • Preheat the waffle iron and coat with oil.
  • Place a ladle full of batter in the center of the waffle iron. Close and cook per the manufacturer's instructions until the waffle is golden brown. Use a fork to gently remove the waffle. Repeat with remaining batter.
    batter on waffle iron
  • To serve the waffles, top with whipped coconut cream and maple syrup warmed with frozen or fresh mixed berries.
    plating waffles with coconut cream

Notes

Your waffle iron will release a lot of steam while cooking and you can check after several minutes but keep an eye to ensure they don't over-cook. If the waffle sticks or tears, it is under-cooked.
Frozen waffles are best reheated in the oven, toaster, or toaster oven and can be cooked frozen or defrosted the day before, then cooked until warm.

Nutrition

Serving: 1waffle | Calories: 552kcal | Carbohydrates: 73g | Protein: 7g | Fat: 28g | Saturated Fat: 12g | Polyunsaturated Fat: 2g | Monounsaturated Fat: 9g | Sodium: 278mg | Potassium: 154mg | Fiber: 21g | Sugar: 13g | Vitamin A: 0.3IU | Vitamin C: 2mg | Calcium: 91mg | Iron: 13mg

FAQS

Can I make substitutions?

You can make a few. I talk about substitutions in the Ingredients section of the post.

I have a coconut allergy. Can I swap out coconut milk or flour?

No. Coconut milk and flour are stabilizing the entire recipe.

Does this recipe work as waffles and pancakes?

Yes. Waffles are the better use case for work-ability. Pancakes must be made in a non-stick skillet, and they need to be heated slowly over low heat with oil added to assist in flipping with an offset spatula.

Why is my batter thicker than yours?

You probably forgot to add the can of water. You can add up to 2 cups water.

Tigernut Butter {Nut-Free, Paleo, AIP}

April 25, 2025 by sara Leave a Comment

Tigernut butter has a smooth, creamy texture and comes together in a few minutes. Make this 2-ingredient, allergy-friendly recipe or customize it and make it your own.

smooth creamy tigernut butter on spoon
[feast_advanced_jump_to]

Why You'll Love Homemade Tigernut Butter:

  • You only NEED 2 ingredients to make Tigernut butter that tastes similarly nutty like a plain peanut or almond butter spread.
  • You can use this tigernut butter as a 1:1 substitute in your favorite recipes. For example, these chicken-skewers get grilled then coated in an Asian-inspired tigernut butter sauce and these Tigernut Butter Protein Bars will remind you of the popular Tiger's Milk bars.
  • It's nutritious! Tigernut butter is a healthy, filling AIP snack that you can enjoy over AIP pancakes with bananas and honey or enjoy right off the spoon!
  • You can customize your own jar of tigernut butter easily. Try flavoring with maple syrup, vanilla extract, carob powder, raisins, cinnamon, or coconut butter.
  • This recipe is Paleo, Grain-Free, Gluten-Free, Nut-Free, Dairy-Free, Vegan, and AIP.
tigernut butter in ramekin

What is Tigernut Flour?

Tigernuts are tubers native to Africa and the Mediterranean region that grow as nodules underground. They are rich in fiber and protein and are naturally allergy-friendly.

They contain potassium, magnesium, fiber, and iron and have a natural sweet, nutty flavor.

Tigernut flour is essentially ground tiger nuts. It performs a lot like almond or oat flour in AIP or gluten-free recipes. Since it is a high-fiber, high-protein flour, it works best when combined with a starch like tapioca or cassava flour.

Recipe Steps Using Tigernut Flour

While I initially thought to grind whole tigernuts in my blender, I realized that the tiger nut tubers are rock hard and better suited for granola or enjoying as a snack. I decided to try the tigernut flour route instead.

As it's already ground into a powder, Tigernut flour is far more convenient for small batch tigernut butter because it only needs to be rehydrated and then blended into a smooth texture.

After testing a few methods, here's the best way:

STEP 1: WARM OIL IN A POT OVER MEDIUM HEAT.

You can use palm oil, avocado oil, or coconut oil (refined or unrefined). **By warming the oil first, I find that you get a slightly creamier texture.

STEP 2: COMBINE THE WARM OIL WITH THE TIGERNUT FLOUR IN THE BLENDER OR FOOD PROCESSOR. BLEND ON HIGH FOR 1 MINUTE.

Scrape the sides of the blender or food processor if needed. Taste and increase the amount of oil if you need a thinner consistency. You can add a pinch of salt, to taste.

STEP 3: BLEND FOR ANOTHER 1 MINUTE OR UNTIL SMOOTH AND CREAMY.

STEP 4: STORE IN A JAR WITH A LID AT ROOM TEMPERATURE.

Remember, this is a plain ol' Jane recipe that can be adapted to your tastes. If it needs something, try adding a little salt or maple syrup until it tastes just right.

homemade AIP tigernut butter

Tigernut Butter {AIP, Paleo, Nut-Free}

No ratings yet
Prep Time: 3 minutes minutes
Total Time: 3 minutes minutes
Prep Time: 3 minutes minutes
Total Time: 3 minutes minutes
Servings: 16 people
Calories: 88kcal
Rate
Pin
Share
Print
Rich, smooth, creamy and nutty in taste. You won't believe this tigernut butter contains zero nuts. It's made with tigernut flour and your favorite oil.

Equipment

  • 1 blender or food processor

Ingredients

  • 1 cup tigernut flour
  • ¼ cup coconut oil or avocado oil or palm oil
  • 1 pinch sea salt plus more to taste

Instructions

  • STEP 1: WARM OIL IN A POT OVER MEDIUM HEAT.
    You can use palm oil, avocado oil, or coconut oil (refined or unrefined). By warming the oil first, I find that you get a slightly creamier texture.
  • STEP 2: COMBINE THE WARM OIL WITH THE TIGERNUT FLOUR IN THE BLENDER OR FOOD PROCESSOR. BLEND ON HIGH FOR 1 MINUTE.
    Scrape the sides of the blender or food processor if needed. Taste and increase the amount of oil if you need a thinner consistency. You can add a pinch of salt, to taste.
  • STEP 3: BLEND FOR ANOTHER 1 MINUTE OR UNTIL SMOOTH AND CREAMY.
  • STEP 4: STORE IN A JAR WITH A LID AT ROOM TEMPERATURE.
    Tigernut butter shelf life is 2 weeks (room temp) or 1 month (fridge).

Notes

For a neutral taste, use refined coconut oil (unrefined coconut oil tastes like coconut).
Stir before use. The tigernut butter will thicken if refrigerated. Thaw before using if chilled.

Nutrition

Serving: 1tablespoon | Calories: 88kcal | Carbohydrates: 10g | Protein: 1g | Fat: 7g | Saturated Fat: 4g | Polyunsaturated Fat: 0.1g | Monounsaturated Fat: 0.2g | Sodium: 2mg | Potassium: 5mg | Fiber: 10g | Calcium: 0.04mg | Iron: 5mg

FAQs

What does tigernut butter taste like?

It's like a cross between almond and peanut butter.

What are tiger nuts and what do they taste like?

They have a shriveled, round appearance and a sweet, nutty flavor. They are very hard to chew because they are extremely dense.

Are tiger nuts good for you?

Yes! They are nutrient dense and contain vitamins and minerals as well as fiber and protein.

What is AIP?

The Autoimmune Protocol Diet that consists of anti-inflammatory foods. Eating this way aims to reduce inflammation, pain and discomfort caused by autoimmune diseases, such as Hashimoto's Thyroiditis.

Can I make this crunchy?

If you have a way of grinding down whole tiger nuts, you can add some to your batch. Note, tiger nuts can be extremely hard (like rocks) so please be careful.

Can I use olive oil?

While I have tried olive oil, I think it has a bit of a taste and don't recommend it. You can use coconut, avocado oil, or palm oil 1:1.

Can I just stir this or do I need to use in a blender/food processor?

Yes! If you don't mind a grainy, gritty texture, then by all means just stir it in the pot with the warmed oil.

Tigernut Butter Protein Bars {AIP, Paleo}

April 19, 2025 by sara Leave a Comment

Tigernut butter protein bars are a protein packed, sweet, and nutty AIP snack or meal replacement. They take 15 minutes to make (another 2 hours to chill)—then they’re ready to devour! They will remind you of a Tiger’s Milk bar, only these are nut-free, dairy-free, and refined sugar-free.

carob coated tigernut butter protein bars stacked

Behold these beauties!

AIP tigernut butter bars cut into squares

After 6 months of AIP vegetable smoothies, smoked chicken, and sautéed kale, something was missing. I just needed a "normal" snack and so I scoured the internet for AIP protein bars. At the end of my quest, I took a chance and made my own.

I’m so glad I did.

tigernut butter bars cut into squares and stacked tall with carob
[feast_advanced_jump_to]

Packed with protein, heart healthy fats, and natural sugars, these paleo AIP bars are ready to sustain you on-the-go.

They feature tigernut butter (made from tiger nut tubers); it's a nut-free miracle that passes for peanut butter in taste and texture.

p.s. These Chicken Skewers with Tigernut Sauce are to die for.

Tigernut Butter Carob Protein Bars (VIDEO)

These protein bars require zero baking and are easy to make. I love making them both ways, so I show you two methods in this video.

Key Nutritional Aspects of Tiger Nut Butter:

Fiber: Tiger nuts contain triple the fiber found in peanuts, so expect these bars to make you feel full longer and aid in digestion.

Healthy Fats: Tiger nut butter also contains monounsaturated fats, which help to lower LDL (bad) cholesterol, potentially reducing the risk of heart disease.

Prebiotics: Tiger nuts are a source of resistant starch, a carbohydrate that benefits the gut microbiome by feeding beneficial bacteria.

Vitamins and Minerals: Vitamin C, B6, iron, magnesium, zinc, potassium, and calcium

tigernut butter, carob powder, maple syrup, vanilla extract protein powder, palm oil, coconut butter, coconut sugar, and coconut oil

🧾10 Ingredients for Paleo Protein Bars

Note that the recipe ingredients are grouped into the filling and carob coating. See the recipe card below for the ingredient measurements.

For the Protein Filling mixture, you will need:

  • coconut flour: coconut flour is desiccated coconut with a fine, flourlike texture that's available in the baking aisle next to gluten-free flours.
  • protein powder: Use any type of protein powder that you like. Double check that there's no gluten or dairy if you follow a gluten and dairy-free diet. For AIP, I like Hydrolyzed beef protein AI Paleo by Rootcology or Equip Prime Protein which is unflavored and unsweetened. Note: If your protein powder is sweetened, you will want to decrease the amount of maple syrup a bit.
tigernut butter in bowl
  • tigernut butter: For the smoothest texture, I recommend buying smooth tigernut butter online (you will need 2 cups for the recipe). **However, I did also test this recipe with homemade tigernut butter using the following ratios (1 ½ cups tigernut flour plus ½ cup plus 1 tablespoon avocado oil); this homemade tigernut butter worked and was more economical but the texture was a bit gritty.
  • maple syrup: grade A or grade B work equally well in this recipe

For the Carob Coating, you will need:

  • palm shortening: I found a big tub of Palm shortening and enjoyed how easy it was to scoop and measure. Note, you can use refined or unrefined coconut oil 1:1 as a substitute.
  • coconut butter (not oil): Coconut butter or whole coconut puree provides some necessary fat and is reminiscent of cacao butter in that it’s solid at room temperature and will help your carob coating firm up.
  • coconut sugar or maple sugar provide sweetness but coconut sugar is unrefined and won't completely dissolve; if you want your carob coating smooth, go with maple sugar.
carob powder and measuring spoon
  • carob powder: I've only ever worked with Chatfield carob powder because it's usually available in the baking aisle.
  • pure vanilla extract: just be sure to read the label to ensure you are buying gluten-free pure vanilla extract with no funny ingredients
  • sea salt (leave out if adding flake salt for garnish)

🍽 Recommended Tools

When chilling and setting the bars, I recommend either glass Tupperware container(s), a silicone bar mold, or a baking dish lined with parchment paper (where you slice after chilling).

How to Make Tigernut Butter Protein Bars

STEP 1. WHISK PROTEIN POWDER AND COCONUT FLOUR IN A LARGE BOWL.

protein powder mixed in bowl with coconut flour

STEP 2. WARM TIGERNUT BUTTER AND MAPLE SYRUP THEN COMBINE WITH DRY MIXTURE TO FORM A PASTE.

The texture of the paste should look like this (see below). If it is not the texture of thick cookie dough, you may need to add more maple syrup/avocado oil (if it looks too dry) or protein powder (if it looks too wet).

dry and wet ingredient mixture combined in bowl to form a paste

STEP 3: PRESS PROTEIN PASTE INTO A PREPARED CONTAINER.

Chill until firm, then make the carob mixture.

STEP 4: CUT INTO BARS (if dipping into carob mixture).

Carob Mixture Steps

STEP 5: MELT PALM OIL AND COCONUT BUTTER.

STEP 6: ADD THE COCONUT SUGAR. STIR. REMOVE FROM HEAT. WHISK IN CAROB POWDER, VANILLA, AND SEA SALT.

STEP 6: COVER WITH CAROB MIXTURE AND REFRIGERATE

Pour the warm carob over the pre-cut protein bars (or simply pour over the uncut bars), making sure to spread across with a spoon to coat evenly. Return to the fridge to chill another 20 minutes or until the carob sets.

STEP 7. REMOVE FROM FRIDGE

Once the carob hardens, remove from the fridge and cut into squares (see below).

carob layered over protein bars

STEP 8: SERVE

Top with sea salt flakes (Maldon) if desired and enjoy! Store in the fridge until ready to enjoy.

just dipped tigernut protein bar in carob mixture

Enjoy these dairy-free, gluten-free protein bars as a quick breakfast, a post work-out snack, or like a healthy candy bar.

📋 Recipe

This recipe was inspired by the popular Tiger's Milk bar which is made with peanut butter and features a carob coating.

protein bar cut open with tigernut butter filling

TIGERNUT BUTTER PROTEIN BARS

No ratings yet
Prep Time: 10 minutes minutes
Cook Time: 5 minutes minutes
Chill Time: 2 hours hours
Total Time: 2 hours hours 15 minutes minutes
Prep Time: 10 minutes minutes
Cook Time: 5 minutes minutes
Chill Time: 2 hours hours
Total Time: 2 hours hours 15 minutes minutes
Servings: 8 bars
Calories: 944kcal
Rate
Pin
Share
Print
Since Tigermilk bars are nostalgic for me, I created a healthier version with a similar carob-nutty flavor and a texture you can really sink your teeth into and chew.

Ingredients

Protein Bar Ingredients:

  • ½ cup coconut flour
  • 1 ½ cups protein powder I like Hydrolyzed beef protein AI Paleo by Rootcology
  • 2 cups tigernut butter can purchase or diy with 1 ½ cups tigernut flour plus ½ cup plus 1 tablespoon avocado oil
  • ½ cup maple syrup

Carob Coating Ingredient:

  • 1 cup palm shortening
  • 1 cup coconut butter not oil
  • ¼ cup coconut sugar or maple sugar
  • ⅔ cup carob powder
  • 2 teaspoons pure vanilla extract
  • ¼ teaspoon sea salt leave out if adding flake salt for garnish

Instructions

  • Get ready. Use silicone bar mold or line a glass Tupperware or baking dish with parchment paper and set aside. For thicker bars, use an 8 x 8-inch pan. For thinner bars or bark, use any size bigger.
  • Whisk the protein powder with the coconut flour. In a large mixing bowl, whisk the coconut flour and protein powder.
    protein powder mixed in bowl with coconut flour
  • Melt the tigernut butter with the maple syrup.
    In a small pot over low heat, melt the tigernut butter with the maple syrup until you can stir until smooth.
  • Combine the wet and dry mixtures.
    Use a spatula to combine the dry and wet mixtures to form a very thick, sticky, smooth paste.
    *Troubleshooting: If the mixture seems dry and crumbly (it should be moist, sticky, and very thick) then you need to add more liquids, try 1 tablespoon maple syrup and 1 tablespoon avocado oil (or coconut oil) until you reach the desired texture.
    IF you mixture is too wet, consider adding more protein powder.
    dry and wet ingredient mixture combined in bowl to form a paste
  • Press protein paste into prepared container. Transfer the protein bar paste into the prepared pan and press firmly in place. Refrigerate or freeze until firm.
    protein paste pressed into pan lined with parchment paper
  • After the bars are firm, it's time to make the carob mixture. In a small saucepan over medium-low heat, melt the palm shortening and coconut butter.
    melted palm oil and coconut butter in pot
  • Add the coconut sugar (or maple sugar) and stir frequently to distribute evenly (remember, coconut sugar will not completely dissolve). To avoid scorching, remove promptly from the heat and whisk in the carob powder, vanilla, and sea salt.
    melted carob mixture in pot
  • Working rather quickly, make the bars! You should get 8 large bars or 10 to 12 smaller ones.
    Easy Way: Drizzle the carob coating over the top of the protein and refrigerate. Once set, use a knife to shape into squares or bars.
    Hard Way: Cut into bars first and dip the protein bar into the carob mixture to cover.
    protein bar dipped in bowl of liquid carob mixture
  • Refrigerate to allow the shell to harden. Serve when carob coating is firm and set.
    carob dipped bars on parchment paper

Video

Notes

If you want to sprinkle with Maldon flake salt, you should omit the salt in the recipe so that the bars won't be overly salty.

Nutrition

Serving: 1large bar | Calories: 944kcal | Carbohydrates: 48g | Protein: 33g | Fat: 74g | Saturated Fat: 21g | Polyunsaturated Fat: 11g | Monounsaturated Fat: 30g | Cholesterol: 34mg | Sodium: 144mg | Potassium: 646mg | Fiber: 16g | Sugar: 25g | Vitamin A: 56IU | Vitamin C: 0.4mg | Calcium: 341mg | Iron: 5mg

FAQs for Protein Bars

Can I make tigernut butter?

Yes! You can make homemade tigernut butter by mixing tigernut flour with avocado oil and a bit of maple syrup (to taste) but you will have a slightly runnier, grittier consistency and you should absolutely consult the video to see what texture you need. If your tigernut butter looks too thick, for example, try warming it or adding extra avocado oil.tigernut butter in bowl

What nut butters work instead of tigernut butter?

While nuts are not AIP, they are paleo and healthy as long as you don't have a sensitivity. Peanut, hazelnut, almond, or cashew butters make great alternatives to tigernut butter (so does sunflower butter).

How can you store these?

Store in an airtight container or sealed bag in the refrigerator to maintain shape and firmness up to 4 days. Portion then freeze between layers of parchment paper up to 2 months.

Can cocoa powder replace carob powder?

Cocoa is not AIP but can replace carob powder 1:1 in this recipe, if desired.

What consistency should protein dough be?

The mixture's ideal texture is like a thick, cookie dough. If it's too dry, add a bit more drippy tigernut butter (or avocado oil) or maple syrup.dry and wet ingredient mixture combined in bowl to form a paste

Can I customize these bars?

Yes! Include a pinch of cinnamon for a warming Fall twist or try adding bits of freeze dried strawberries. You can also shape these really small and roll into balls for protein balls.

My carob is too thick.

Thin the carob by adding 1 tablespoon of palm/coconut oil to thin it out. It's best not to heat it again because the carob can burn easily.

How can I wrap these?

You can wrap in parchment paper, plastic wrap, or store in a Tupperware container in the fridge.

AIP Cantaloupe Cucumber Salad

April 14, 2025 by sara Leave a Comment

AIP Cantaloupe Cucumber Salad - This simple summer fruit salad comes together in 5 minutes with ripe cantaloupe melon, refreshing cucumber, mint, onion, and lime. Easy breezy sunshine in a bowl.

Jump to Recipe
cantaloupe melon with cucumber in bowl

If you can find a perfectly ripe cantaloupe melon (or watermelon, summer melon, or honeydew), this is a really beautiful way to prepare a side salad on the autoimmune protocol.

Since fruit on the AIP is considered an ok-to-eat-in-moderation food, this salad is a nice way to balance the sweetness of the melon with some cucumber, mint, and red onion. It makes for a lovely AIP side dish or breakfast.

AIP cucumber melon salad in bowl

🥒Ingredients and Instructions for Melon Salad

As you can see, I like to use a melon baller for scooping the cantaloupe melon and then just slice the baby Persian cucumber into coins (English cucumber works, too).

Red onion needs to be sliced really thinly and soaked for about 20 minutes in cold water to remove the bite. I always soak raw red onion when using in salads.

Fresh mint adds a refreshing, unexpected element and so does fresh lime juice.

cantaloupe cucumber mint and red onion in a salad bowl

When I first created this recipe (and photographed it), I was following the AIP diet with my husband but we did not omit black pepper. Later in the timeline, when I was diagnosed with Hashimoto's, I ultimately eliminated black pepper during the elimination phase and so I'll let you decide whether to include it here.

Since black pepper is a seed and an immune stimulant, it can trigger reactions (ie symptoms) in those with autoimmune conditions. For those looking to include flake salt (as I do), I really enjoy Maldon.

AIP Cantaloupe Cucumber Salad

No ratings yet
Prep Time: 5 minutes minutes
Total Time: 5 minutes minutes
Prep Time: 5 minutes minutes
Total Time: 5 minutes minutes
Servings: 4 people
Calories: 21kcal
Rate
Pin
Share
Print
A thirst-quenching, summery melon salad with cucumber slices and cantaloupe. This recipe comes together in a few minutes with a melon baller.

Ingredients

  • 1 small red onion
  • 1 ripe melon (such as cantaloupe or honeydew)
  • 1 oz fresh mint leaves
  • 1 lime
  • ½ teaspoon flaked sea salt

Instructions

  • Start by slices the red onion very thinly - you only need about 10 slices total. Submerge the onion under water for up to 20 minutes to dull the bite.
  • Cut the ripe melon in half and scoop out the seeds with a spoon. Using a melon baller, scoop the flesh into a bowl or use a knife to cut into chunks about 1" by 1".
  • Mix into the mellon: freshly torn mint leaves, red onion, the juice of 1 lime, and sprinkle with salt just before serving.

Nutrition

Serving: 1bowl | Calories: 21kcal | Carbohydrates: 5g | Protein: 1g | Fat: 1g | Saturated Fat: 1g | Sodium: 4mg | Potassium: 98mg | Fiber: 2g | Sugar: 1g | Vitamin A: 301IU | Vitamin C: 9mg | Calcium: 29mg | Iron: 1mg

🥗 Side dishes

Since this is a seasonal summer side, I'd pair it with a simply seasoned protein.

  • Healing AIP Chicken Soup
  • Smoked Chicken Thighs {AIP, Big Batch, Budget Friendly}
  • Crisp AIP Chicken Tenders and Kale Slaw

AIP Meatloaf with Sweet and Sour Glaze

April 13, 2025 by sara Leave a Comment

Meatloaf without nightshades? Meet ketchup's cousin and your new favorite autoimmune protocol glaze: sweet and sour sauce. This Asian-ingredient meatloaf recipe pairs apricot preserves with vinegar, ginger, and garlic giving this AIP meatloaf that savory/sweet/sour contrast we all crave in a really good meatloaf.

Jump to Recipe
meatloaf sliced on cutting board with sweet and sour sauce on top

This handsome meatloaf is such a centerpiece for family dinner.

meatloaf with sweet and sour glaze sliced on cutting board

This recipe disappears too quickly! And, since those thick juicy slices taste even better as leftovers, you might want to grab your spare meatloaf pan and double this recipe (eat one, freeze one).

[feast_advanced_jump_to]
meatloaf ingredients: ground beef, onion, garlic, cilantro, and coconut milk

🥘 Meatloaf Ingredients

For this meatloaf, you will be working with a few ingredients found in Asian cooking (namely, cilantro, ginger, and coconut).

  • ground beef, 85% lean: since there are no eggs in this recipe, I recommend 85% lean because it has enough fat to keep the meatloaf moist; if substituting a leaner meat, like bison, be sure to monitor your meatloaf's internal temperature so as not to over-cook
  • yellow/white onion, medium, finely chopped = ½ cup
  • 4 garlic cloves, minced = 4 teaspoons
  • coconut aminos: also using this ingredient in the sauce; adds a savory/sweet depth of flavor like soy sauce
  • fresh cilantro, minced
  • fresh Thai basil leaves, optional
  • coconut milk - canned, full fat (this adds fat and moisture, similar to an egg/milk in classic meatloaf)
  • sea salt or Himalayan salt
  • fresh ginger - peeled and minced or grated (including juice and meat), *also using this ingredient in the sauce (below)

Sweet and Sour Sauce Ingredients: What makes this sauce OMG-good is the incredible flavor of fruit preserves, which is just really concentrated.

  • avocado oil, coconut oil, or olive oil work equally well for the sauce
  • ginger - use fresh ginger that's peeled and either minced or grated (juice and meat)
  • garlic - fresh minced garlic or pre-minced garlic
  • preserves (no added sugar) - apricot or plum work great; I like the Crofter's brand because they tend to be really clean and apple concentrate sweetened
  • coconut aminos - this is the AIP equivalent to soy sauce (only sweeter); as a staple pantry ingredient, you can buy coconut aminos in bulk or find a smaller bottle next to condiments in your grocery spice aisle
  • apple cider vinegar, white wine vinegar, or champagne vinegar - you want a cooking vinegar that has a ph of 2-3 (avoid white distilled vinegar)
  • sea salt or Himalayan pink salt

🔪 Instructions

To make meatloaf, the process begins with a ground beef mixture (beef and finely chopped aromatics).

ground beef with chopped onion, garlic, ginger in bowl

Mix and assemble meatloaf in an 8.5 x 4.5-inch standard meatloaf pan. 

meatloaf mixture in parchment lined baking dish

You can smooth the top of the loaf with your finger tips.

⏲️ Baking time

You will be baking the meatloaf in 2 stages: naked and sauceless followed by sauced.

Stage 1: You bake your naked meatloaf at 375F for 40 minutes (it will be partially done at this point).

Stage 2: As pictured below, you spoon the sweet and sour sauce over the par-baked meatloaf and return it to the oven so the sauce gets sticky, hot.

partially baked meatloaf with apricot mixture spread on top

You will remove the meatloaf after 15 to 20 minutes or when a thermometer inserted in the center reads 160F.

baked meatloaf with sweet and sour glaze

Don't forget to let the meatloaf rest for 10 minutes before slicing. If you slice too early, your meatloaf will lose moisture and will have a dryer texture.

🥣 AIP Sweet and Sour Sauce

To make our well-balanced sweet and sour sauce, we start by sweating some minced ginger and garlic in hot oil (pictured below).

sautéed garlic and ginger

Next, add the preserves, water, coconut aminos and vinegar. Whisk to combine.

sweet and sour glaze in pot

You won't need all the sweet and sour sauce for the meatloaf, so you might have extra for serving.

💭 Top tip

A standard meatloaf pan is typically an 8.5 x 4.5 inch loaf pan, known as a 1-pound loaf pan. Line it with parchment paper (that way you can easily lift it out of the pan). *Switching to a larger pan may dry-out your meatloaf.

sweet and sour glazed meatloaf in baking pan

📋 Recipe

This sweet and sour sauce hails from a class I once taught alongside chef Peter Berley at The Natural Gourmet Institute in NYC, and I've held onto it for a decade, always remembering it's unique flavor. I got the idea to try it with an Asian meatloaf as a mash up of another experience I had with Asian meatballs.

AIP meatloaf with sweet and sour sauce

AIP Meatloaf with Sweet and Sour Glaze

No ratings yet
Prep Time: 10 minutes minutes
Cook Time: 1 hour hour
Total Time: 1 hour hour 10 minutes minutes
Prep Time: 10 minutes minutes
Cook Time: 1 hour hour
Total Time: 1 hour hour 10 minutes minutes
Servings: 8 people
Calories: 423kcal
Rate
Pin
Share
Print
This is an AIP meatloaf, so there are no eggs, milk, or breadcrumbs. Instead, there are some finely chopped aromatics to add both moisture and flavor. The meatloaf gets partially baked and then glazed and finished in the oven.
{Gluten-Free, Egg-Free, Dairy-Free}

Ingredients

Meatloaf Ingredients:

  • 2 pounds ground beef 85% lean
  • 1 medium yellow onion finely chopped (1 cup)
  • 4 garlic cloves minced (4 teaspoons)
  • 3 tablespoons coconut aminos
  • 2 tablespoons fresh cilantro minced
  • 2 tablespoons chopped fresh Thai basil leaves optional
  • ⅓ cup canned coconut milk full fat
  • 1 ½ teaspoons salt
  • 2 teaspoons fresh ginger minced/grated

Sweet and Sour Sauce:

  • 1 tablespoon avocado oil coconut oil, or olive oil
  • 1 tablespoon ginger minced
  • 2 teaspoons garlic minced
  • 1 cup natural apricot or plum preserves no added sugar
  • ½ cup filtered water
  • ¼ cup coconut aminos soy sauce alternative
  • ¼ cup apple cider vinegar white wine vinegar, or champagne vinegar
  • Sea salt to taste

Instructions

  • Mix and assemble meatloaf in an 8.5 x 4.5-inch standard meatloaf pan. Line loaf pan with parchment paper. Preheat oven to 375F. In a large bowl, combine all the meatloaf ingredients. Mix well with a wooden spoon just until combined. Pour into the prepared loaf pan. Press gently to smooth the top. Bake for 40 minutes.
    meatloaf mixture in parchment lined baking dish
  • Mix glaze and spread over meatloaf then return to the oven. In a small saucepan over medium heat, warm the oil. Add the ginger and garlic and sizzle for 1 minute until fragrant. Do not let the garlic brown or it will overpower the sauce. Add the preserves, water, coconut aminos, and vinegar. Whisk to dissolve the preserves and simmer 2-3 minutes. Add salt to taste. Pour over top (you can reserve some glaze for serving) of the baked meatloaf then return to the oven for an additional 15 to 20 minutes or until the internal temperature is 160F in the center. Rest for 10 minutes before slicing. Serve hot with a garnish of cilantro or thai basil.
    baked meatloaf with sweet and sour glaze on top

Nutrition

Serving: 1slice | Calories: 423kcal | Carbohydrates: 25g | Protein: 20g | Fat: 27g | Saturated Fat: 11g | Polyunsaturated Fat: 1g | Monounsaturated Fat: 11g | Trans Fat: 1g | Cholesterol: 81mg | Sodium: 824mg | Potassium: 398mg | Fiber: 1g | Sugar: 14g | Vitamin A: 94IU | Vitamin C: 5mg | Calcium: 38mg | Iron: 3mg
Asian meatloaf with sweet and sour sauce on plate

🥗 Side dishes

  • Cauliflower Puree {AIP, Gluten-Free, Dairy Free} - has a silky texture and neutral enough flavor (much like mashed potatoes)
  • Sautéed Kale with Garlic and Onions {AIP} - bitter greens make for an elegant, healthy side dish
  • Green Banana Fries {AIP, Nightshade-Free} - save any extra sweet and sour sauce and use a dip for these fries
  • AIP Cantaloupe Cucumber Salad - a really refreshing summer melon salad (5 minutes, 5 ingredients)

📖 Variations

Make it Traditional - Skip the sweet and sour sauce ingredients and substitute your favorite AIP ketchup. For spices, swap the ginger and cilantro for minced celery, garlic and onion powders and parsley (or Italian seasoning).

Mix and Match Preserves - Sugar-free preserves are naturally sweet and sour; consider trying mango, plum, apricot, or whatever you think pairs well with beef.

Allergy Questions - While this recipe eliminates the major allergens (wheat/grains/gluten, soy, dairy, eggs, and nuts), it's possible that you may need to swap an ingredient for your specific needs. Feel free to leave me a question below or consult the "Ingredients" section where I offer substitution ideas

Green Banana Fries {AIP, Nightshade-Free}

April 6, 2025 by sara Leave a Comment

Craving fries sans the potatoes? Green bananas fried until crispy, salty, and totally addicting to the rescue. You won't believe these are actually AIP when you taste them.

Jump to Recipe
green banana fries on a plate with ranch

A lot of people who can't tolerate gluten also can't tolerate white potatoes. Yet, potatoes are seared into our cultural food memories as the quintessential American side dish.

[feast_advanced_jump_to]

Unripe Banana Fries Are the New AIP Potato Side

What makes green banana fries a fantastic potato-free alternative is you-guessed-it: the starch and total lack of sweetness. When fried or air-fried, unripe banana strips get golden, crispy and will rock your AIP world.

Pure magic.

Green banana fries on plate with dairy-free ranch dip

Now, I could push sweet potato fries at you but let's face it, they're too dang sweet. Sometimes a girl just needs a savory side.

Plantain or cassava fries are decent savory (not sweet) options but can be tricky to source for some people and are slightly more difficult to process.

unripe banana cut into strips tossed with olive oil and salt in bowl

Green bananas on the other hand are reasonably easy to source and easy enough to work with.

🍌 Ingredients

You only need 3 ingredients to make this recipe:

  • 4 unripe, green bananas (*must be completely green): If you don't see green bananas, ask your grocery store if they have any green bananas in the back.
  • avocado oil, olive oil, refined coconut oil, lard, or tallow are great AIP-friendly choices
  • fine sea salt: I always salt at the beginning of the cooking process and then make adjustments at the end; that way, you get the best flavor and less salt is often needed
peeling green bananas and slicing into French fries

🔪 Instructions

Unripe bananas are about as difficult to peel as yellow plantains. You want to take the tip of your knife and make vertical cuts lengthwise (after removing either pointed end) every quarter turn (so 4 slices total per banana). These sections give you more leverage to work your way around the banana, hopefully without causing too much damage to the part we want to use.

To cut into fry shapes, you simply cut into planks approximately ¼-inch to ½-inch thick, then cut those planks into batons (picture a French fry shape) about 4-inches long (see process shots).

🧂 Seasoning

Just salt, baby.

If you want to get fancy, I think it would be fun to play with finishing flavors like minced garlic, parsley or maybe a good quality truffle oil or truffle salt.

green banana fries cooking in air-fryer

🍽 Equipment

You can make these fries easily in the oven or air-fryer. If you like your fries more crunchy, I'd recommend a thinner fry shape (or thicker for a softer fry).

Air Fryer - Note that you will need to work in batches as the fries require space to brown evenly. Preheat to 400F then air-fry for 10 minutes, flipping halfway through (if using a tray) or use a basket so you don't have to flip.

Oven - Preheat the oven to 400F and line two baking sheets with parchment paper (for easy clean-up). Spread fries out in an even layer on the trays. Roast for 20 minutes, turning with tongs halfway through.

air-fried green banana fries on plate with chicken and ranch

While I'm all about an AIP snack, my favorite fry companion award goes to these Crispy Chicken Nuggets with Vegetables {AIP, Gluten-Free, Paleo} and this Healthy Ranch Dressing {Dairy-Free, AIP}.

Please, if you experiment and try a good nightshade-free ketchup, let us know all the details. While I've never actually purchased AIP ketchup, I made an extremely delicious nomato ketchup out of rosehips that we collected from our property.

📋 Recipe

In the past, I've always worked with green plantains but have had an easier time finding green bananas where I currently live in the Pacific Northwest. Unripe bananas remind me of green plantains or regular potato fries, which is great because I was extremely sensitive to potatoes for the first 6 months of doing the AIP diet.

green banana fries on plate

Green Banana Fries {AIP, Nightshade-Free}

No ratings yet
Prep Time: 5 minutes minutes
Cook Time: 20 minutes minutes
Total Time: 25 minutes minutes
Prep Time: 5 minutes minutes
Cook Time: 20 minutes minutes
Total Time: 25 minutes minutes
Servings: 4 people
Calories: 167kcal
Rate
Pin
Share
Print
These fries are addicting! If you can get your hands on some entirely green, unripe bananas, DO IT! You won't believe these aren't potato fries.

Equipment

  • 1 Air Fryer

Ingredients

  • 4 green bananas (must be completely green/unripe)
  • 2 tablespoons avocado oil or other high-heat oil
  • ½ teaspoon fine sea salt plus more to taste

Instructions

  • How to remove the green peel: Trim both ends of each green banana and score lengthwise every quarter turn (so 4 slits per banana). It will be tough and difficult to remove but do your best to remove the peel.
  • Cut into batons. Slice the banana lengthwise into thin fries of roughly equal sizes (about ¼-inch thick by about 3-inches).
    peeling green banana and slicing into fries
  • Season well. Place in a large bowl and drizzle with avocado oil and sprinkle with sea salt. Toss gently with your hands to coat evenly.
    unripe banana cut into strips tossed with olive oil and salt in bowl

Cook the fries then serve hot.

  • Air Fryer Instructions: Place the first batch of fries into a lightly oiled basket. Fry at 400F for 10 minutes, turning halfway through. Repeat with remaining batches. While hot, sprinkle with more salt until you like the taste. In chef vernacular, you want your fries to be "salty like a potato chip."
    green banana fries cooking in air-fryer
  • Oven Instructions: Preheat oven to 400F. Line two baking sheets with parchment paper and spread the fries in an even layer. Bake for 20 minutes, flipping with a spatula halfway through. Remove the fries from the oven and immediately season with salt to taste.

Video

Nutrition

Serving: 1side serving | Calories: 167kcal | Carbohydrates: 27g | Protein: 1g | Fat: 7g | Saturated Fat: 1g | Polyunsaturated Fat: 1g | Monounsaturated Fat: 5g | Sodium: 292mg | Potassium: 423mg | Fiber: 3g | Sugar: 14g | Vitamin A: 76IU | Vitamin C: 10mg | Calcium: 6mg | Iron: 0.3mg

FAQs for Green Banana Fries

Can I make these with mostly green bananas?

You can. We actually could only find green bananas that had some slight yellowing for our photos. As you can see, the starch converts more to sugar when you see yellowing and it's the sugars that brown more quickly. Try your best to select bananas as green as in the photos or 100% green for the very best golden, savory results.

Can I pan-fry these?

I did test this method for you and here are my notes: Increase the amount of fry oil (about ½ cup) and use medium heat. Banana fries are more fragile than potatoes which is the reason I recommend baking or air-frying. Pan-frying works ok, but you might break some fries when flipping. Instead of tongs, use an offset spatula to flip because it's gentler.

Can I substitute green plantains?

You can but the plantains will be even more difficult to peel and you will have to use a bit more oil and cook them slightly longer.

Why are potatoes a problem for autoimmune conditions?

1) Potatoes convert to sugar in the body and elevate your blood sugar and 2) The body treats potatoes like gluten and so how sensitive you are to potatoes depends a lot on whether you currently have leaky gut.

🥗 Side dishes

  • Crispy Chicken Nuggets with Vegetables {AIP, Gluten-Free, Paleo}
  • Crisp AIP Chicken Tenders and Kale Slaw
  • Vanilla Bean Ice Cream {AIP, Dairy Free, Egg Free}
  • A pan-seared, oven-finished ribeye for steak frites!
  • A burger in an iceberg lettuce bun

Healthy Ranch Dressing {Dairy-Free, AIP}

April 6, 2025 by sara 2 Comments

Creamy, herb-speckled ranch dressing that's allergy-friendly: AIP, Dairy-Free, and Gluten-Free can be whipped up in mere minutes in the blender. Serve this fresh, homemade ranch as a dressing or dip.

Jump to Recipe
Dairy Free Ranch Dip on spoon

My family honestly likes this dairy free ranch dressing better than the original goop because homemade tastes so much fresher (especially when you can use fresh herbs straight from the garden).

fresh herbs

💭 Top tip

Since dry herbs are more concentrated than fresh, use triple (3x) the amount of fresh herbs called for in the recipe. Fresh herbs give the very best flavor!

ranch dressing made with dried herbs in jar

Whether you opt for dry or fresh herbs, this homemade ranch comes together really quickly (about 10 minutes total) in the blender or food processor so there's no need for a cutting board. Just throw everything in the blender and let it whirl.

dairy free ranch dip in ramekin on plate with fries

How to Make Non-Dairy Ranch Taste Traditional

Since this is dairy free, there's no buttermilk which is traditionally used to make ranch. To get that added tang we all love, I include lemon juice (or apple cider vinegar) added to coconut milk as a stand in. I also call for unsweetened coconut yogurt as a thickener, which also adds some depth of flavor.

🧂 Ranch Seasoning (Dried Herbs vs Fresh)

To make ranch seasoning or dressing, you can use triple the amount of fresh herbs or follow the recipe below which gives the proportions of dried herbs: chives, parsley, and dill. You will also need garlic and onion powder.

Where to Source Ingredients

You can find guar gum-free coconut milk online but if you can tolerate the guar gum, it's fine to use any brand in this recipe that you like. You can check for Harmless Harvest or Forager plain, unsweetened coconut yogurt in the refrigerated section of your grocery store. Be sure to check ingredients for allergens.

*While I recommend the yogurt stay in the recipe as a thickener, you can leave it out and replace with extra coconut milk if you must.

How to Store

Fridge: In an airtight container or jar, this ranch dressing will keep for up to 10 days in the refrigerator.

Dairy Free Ranch Dressing on spoon

Ranch Dressing {Dairy-Free, AIP}

No ratings yet
Prep Time: 10 minutes minutes
Total Time: 10 minutes minutes
Prep Time: 10 minutes minutes
Total Time: 10 minutes minutes
Servings: 8 people
Calories: 119kcal
Rate
Pin
Share
Print
Whip this dairy-free, AIP ranch dressing up in the blender in minutes! Even though this is made with coconut milk, the signature ranch herbs and the tang from the coconut yogurt give this that traditional ranch flavor. You can use it the same way you would ranch dressing for salads or as a dip for veggies, chicken strips, or fries!
Yield: About 1 ½ cups
AIP | DAIRY-FREE | VEGAN | GLUTEN-FREE | SOY-FREE

Equipment

  • 1 bullet blender or regular blender

Ingredients

  • ½ cup canned full fat coconut milk
  • ½ cup plain coconut yogurt
  • ¼ cup avocado oil not olive oil*
  • 1 ½ tablespoons apple cider vinegar or lemon juice
  • 1 tablespoon dried chives fresh herbs work, too
  • 1 tablespoon dried parsley
  • 1 teaspoon dried dill
  • 1 teaspoon garlic powder
  • 1 teaspoon sea salt
  • ½ teaspoon onion powder

Instructions

  • In a blender, combine coconut milk, coconut yogurt, avocado oil, and apple cider vinegar and blend on high until fully incorporated. Add dried herbs, garlic, salt, and onion powder to the coconut mixture and pulse to combine. Pour into ramekins for dipping and store leftovers in the fridge in a sealed jar for up to 1 week.

Video

Nutrition

Serving: 13 tablespoon portion | Calories: 119kcal | Carbohydrates: 1g | Protein: 1g | Fat: 13g | Saturated Fat: 6g | Polyunsaturated Fat: 1g | Monounsaturated Fat: 5g | Sodium: 296mg | Potassium: 82mg | Fiber: 0.1g | Sugar: 0.05g | Vitamin A: 29IU | Vitamin C: 1mg | Calcium: 12mg | Iron: 1mg

Recipes To Use Your Ranch Dressing or Dip

  • Crispy Chicken Nuggets with Vegetables {AIP, Gluten-Free, Paleo}
  • Crisp AIP Chicken Tenders and Kale Slaw

Crispy Chicken Nuggets with Vegetables {AIP, Gluten-Free, Paleo}

April 5, 2025 by sara Leave a Comment

These AIP Chicken Nuggets are crispy on the outside and have actual vegetables mixed into the chicken filling making these a flavorful, juicy, and healthy meal for kids and adults, alike.

Jump to Recipe
AIP chicken nuggets with gluten-free paleo crust plated with dairy-free ranch

Traditional chicken nuggets aren't gluten-free (or healthy), but these golden beauties sure are! With a little pork rind panko, you can make allergy-friendly chicken nuggets easily with ground chicken as the filling (even working in some finely grated zucchini, carrot, and spinach, if desired).

paleo chicken nugget crusted with pork rinds dipped into dairy-free ranch dressing

Serve with banana fries for a truly happy meal or make the ultimate snack plate with your favorite dips (I love ranch!).

[feast_advanced_jump_to]
crispy golden AIP chicken nuggets on plate

🧂 Seasoning

Ground chicken is seasoned simply with sea salt, garlic powder, and onion powder for that traditional flavor profile.

ground chicken, vegetables, garlic and onion powder, and pork rind panko

🥘 Ingredients

  • zucchini: one small organic zucchini (yellow or green squash) if possible, finely grated with a grater or the grater of a food processor
  • carrot: one small-medium carrot peeled and finely grated/shredded
  • baby spinach: I recommend baby spinach, which is softer and doesn't have the tough stems that mature spinach has (buy organic if possible); use baby arugula as a substitute
  • ground chicken (or ground turkey): organic if possible
  • avocado oil (olive oil, lard, tallow, or refined coconut oil work, too): a neutral, healthy, high-heat oil works best
  • sea salt or Himalayan pink salt
  • garlic powder or granulated garlic; fresh garlic (x 3) as a substitute, minced
  • onion powder or very finely minced/grated fresh onion as substitute
  • pork panko or pork rinds crushed and ground: a salty, fried pork skin alternative to grain-based breadcrumbs (plantain chips or cassava crackers crushed into a fine powder may be substituted)

🔪 Instructions

Time needed: 45 minutes

You will get about 20 small chicken-veggie nuggets with this recipe. While the pork rind coating may sound unusual, it's definitely delicious and sticks right to the meat mixture.

  1. Make the chicken and vegetable mixture.

    ground chicken mixed with shredded vegetables in bowl

  2. Shape the chicken nuggets.

    chicken mixture shaped into nuggets on parchment lined baking sheet

  3. Dip the chicken nuggets into the pork rind panko.

    Dipping chicken nugget in paleo pork rind panko crumbs

  4. Cook the chicken nuggets in the air fryer (or pan-fry/roast).

    chicken nuggets cooking in air fryer

  5. Serve the chicken nuggets!

    Oh, I do love a sauce selection. Honey is great and so is this AIP Ranch Dip (also including recipe instructions in the notes for convenience).

    AIP ranch dip in jar made with coconut milk and fresh herbs

Also, here's the recipe for the nightshade-free fries that are actually made from green bananas!

Chicken Nugget with veggies inside

If you get a chance to try this recipe, I'd really love it if you'd rate the recipe and leave a review. Thanks for your support!

📋 Recipe

My husband read me an interesting article about protein, and I just started trying to imagine more family and kid-friendly ways to enjoy this essential macro-nutrient. I really wanted a chicken nugget that incorporates actual veggies, too.

AIP gluten-free chicken nuggets with vegetables

CRISPY CHICKEN NUGGETS WITH VEGETABLES {AIP, GLUTEN-FREE, PALEO}

No ratings yet
Prep Time: 15 minutes minutes
Cook Time: 30 minutes minutes
Total Time: 45 minutes minutes
Prep Time: 15 minutes minutes
Cook Time: 30 minutes minutes
Total Time: 45 minutes minutes
Servings: 20 nuggets
Calories: 48kcal
Rate
Pin
Share
Print
By adding some finely grated vegetables, we ensure these chicken nuggets have a tender texture on the inside. For best results, measure the veggies and follow the proportions to prevent excess moisture.

Equipment

  • 1 Air Fryer optional

Ingredients

Chicken Nuggets:

  • ¼ cup grated zucchini from 1 small zucchini
  • ¼ cup grated carrot from 1 medium peeled carrot
  • ¼ cup finely chopped baby spinach
  • 1 pound ground chicken or ground turkey
  • 1 tablespoon avocado oil or olive oil
  • 1 teaspoon sea salt
  • 1 ½ teaspoons garlic powder
  • ½ teaspoon onion powder
  • 1 cup ground pork rinds

Instructions

  • Make the chicken and vegetable mixture. Press the zucchini with a clean dish towel or paper towel to remove excess moisture. In a large bowl, combine the drained zucchini, shredded carrot, chopped spinach, chicken, oil, salt, garlic, and onion powder and mix to combine.
    ground chicken mixed with shredded vegetables in bowl
  • Shape the chicken nuggets. Use your hands to form small nugget-shapes (about 1-inch long by ½-inch wide) and set aside on a tray lined with parchment paper (for easy clean-up).
    chicken mixture shaped into nuggets on parchment lined baking sheet
  • Dip the chicken nuggets into the pork rind panko. Place pork rind crumbs in a shallow bowl and press both sides of each nugget until coated well front to back.
  • Cook the chicken nuggets.
    Stovetop Instructions: Heat a large skillet over medium heat along with two tablespoons of oil. When the oil shimmers, add the nuggets in a single layer and cook until golden, about 3 minutes per side.
    Air Fryer Instructions (Recommended): Place the nuggets into the air fryer basket lightly coated with oil and fry on 400F for 10 minutes, turning halfway through.
    chicken nuggets cooking in air fryer
  • Serve the chicken nuggets with a side of AIP ranch dip or banana fries for a happy meal.
    AIP chicken nuggets served with banana fries and dairy free ranch on plate

Video

Notes

As long as you can fit the chicken nuggets in a single layer with some room around them, you can fit as many as you want. Just avoid over-crowding, and work in as many batches as makes sense.
Ranch Dressing {AIP, Dairy-Free}:
  • ½ cup canned full fat coconut milk
  • ½ cup plain coconut yogurt
  • ¼ cup avocado oil (not olive oil*)
  • 1 ½ tablespoons apple cider vinegar or lemon juice
  • 1 tablespoon dried chives
  • 1 tablespoon dried parsley
  • 1 teaspoon dried dill
  • 1 teaspoon garlic powder
  • 1 teaspoon sea salt
  • ½ teaspoon onion powder
Ranch Dressing Instructions: In a blender, combine coconut milk, coconut yogurt, avocado oil, and apple cider vinegar and blend on high until fully incorporated. Add dried herbs, garlic, salt, and onion powder to the coconut mixture and pulse to combine. Pour into ramekins for dipping and store leftovers in the fridge in a sealed jar for up to 1 week.

Nutrition

Serving: 1chicken nugget | Calories: 48kcal | Carbohydrates: 0.5g | Protein: 5g | Fat: 3g | Saturated Fat: 1g | Polyunsaturated Fat: 0.4g | Monounsaturated Fat: 1g | Trans Fat: 0.01g | Cholesterol: 21mg | Sodium: 157mg | Potassium: 137mg | Fiber: 0.1g | Sugar: 0.2g | Vitamin A: 309IU | Vitamin C: 1mg | Calcium: 4mg | Iron: 0.2mg

FAQS About Paleo Chicken Nuggets

Can I cook chicken nuggets in the oven?

Yes. The trick is to use high heat and coat your baking tray with plenty of oil. I'd recommend 425F for 5-6 minutes (flip) and then cook another 5-6 minutes or until cooked through on the inside and crispy on the outside.

How do I store or freeze chicken nuggets for meal planning?

Fridge: Store in an airtight container for up to 4 days. Reheat in the microwave, oven, toaster oven, or air fryer.
Freeze: Cook through then cool and freeze in an airtight container or sealed plastic bag for up to 3 months. Use parchment to separate stacked layers of chicken nuggets to prevent sticking. For best results, reheat in the oven or air fryer to get crispy/warm through.

Can I use shrimp to make fried, crispy shrimp tempura?

Yes! The only thing I'd alter is to leave out the veggies and just do tail-on, cleaned shrimp (maybe use coconut milk as an egg batter if the coating doesn't stick). You could also try using ground shrimp shaped into balls.

Can I try different vegetables?

So, you want to be careful to keep the veggie proportions in the recipe. Otherwise, you might introduce too much liquid. You should be able to make veggie substitutions as long as you use finely grated veggies. Leave what works (or doesn't) in the comments below.

What variations can I try?

You could try adding some dried oregano or Italian seasoning to the chicken mixture and then serve alongside your favorite nightshade-free marinara sauce.

How do I make my own pork panko from pork rinds?

You can put them in a bag and simply squeeze them to crush into a fine powder or throw them into a food processor to grind down further.

More AIP Chicken Recipes

  • Crisp AIP Chicken Tenders and Kale Slaw
  • Healing AIP Chicken Soup
  • Smoked Chicken Thighs {AIP, Big Batch, Budget Friendly}
  • Chicken Pot Pie with Sweet Potato Biscuits {AIP, Gluten-Free}

Crisp AIP Chicken Tenders and Kale Slaw

April 4, 2025 by sara 2 Comments

Crisp AIP Chicken Tenders made with a high fiber coconut-cassava coating so you can hit your protein goals on the gluten-free, paleo, and autoimmune protocol elimination diet.

Jump to Recipe
AIP chicken tenders on a plate

Craving fast food? These juicy, flavorful, little dippers really hit the spot--that special place between nostalgia and convenience that we all could use on our food allergy journey from time to time.

My toddler food critic tells me these are "crispy, crunchy, and fresh" which brings me to my next point: texture.

Let's face it, crunching down on something from time to time is just plane satisfying, and that texture is hard to come by when you eliminate a lot of snack foods.

It was really that longing for crunch that led me to finally experiment with dipping chicken tenders in coconut milk (I know) followed by a blend of cassava and coconut flours. Those were the ingredients I had in the pantry. Guess what?

It didn't just work, it worked really well! I don't know why I ever delayed. From the flavor, to the texture, the kids and the adults in my life adore these chicken tendies; we've had them with honey, AIP ketchup, ranch, even bbq sauce.

[feast_advanced_jump_to]

🍽 Equipment

During recipe testing and development, we (1) pan-fried (2) air-fried (3) and baked the chicken tenders and only needed to make visual adjustments to cook time (and oil obviously depending on the method).

*One note about the pictures, we did initially include turmeric which gives these a ton of golden color (I've since removed the turmeric because I found the flavor profile too distracting). More important than color, you can easily tell from the photos that there is that coveted crunch layer of goodness whether you pan-fry, bake, or air-fry.

The takeaway? Be sure to preheat your pan/oven/air-fryer; you want the temperature to be high enough that you achieve crispy (not soft) exteriors and properly cooked interiors (165°F-175°F).

⏲️ Baking time

Preheat to 425°F. Grease a baking sheet really generously with avocado or olive oil. Place chicken tenders on top with space in between; if you crowd the tenders, the breading will stay soft. Bake for 7 minutes, gently flip and bake another 7 minutes (14 minutes total).

If your chicken tenders aren't golden/crispy, it's generally ok to cook longer; I find the texture of chicken is still quite succulent at 175°F.

chicken tenders, spices, coconut milk, cassava flour, kale, and cabbage

🥘 Ingredients

To make homemade chicken tenders for the fam-damnly, you will need:

  • chicken tenderloins, preferably organic: you definitely want the tenderloins for chicken tenders because they are naturally a smaller, thinner, more evenly-sized cut of meat. Think, easy to bread and easy to cook, evenly.
  • fresh thyme leaves: feel free to leave this ingredient out or substitute with finely chopped fresh parsley or chives
  • cassava flour: I buy a big bag of cassava flour every 6 months and find it's most similar to all-purpose flour; I like it because it's a more wholesome ingredient than tapioca starch, which we aim for to keep our blood sugar balanced
  • coconut flour: I use coconut flour sparingly because it's highly fibrous and absorbent, which is exactly why it helps so much compared to just cassava flour alone (cassava flour only has a tendency to fall off the chicken)
  • fine sea salt: don't be put off by the amount of salt in the recipe; you are adding it to the flour mixture and so you want to season more heavily
  • onion powder: this ingredient is there for flavor but it actually also helps achieve a crispy texture; interestingly, you might want to leave this one out if you know you want to serve your tenders with honey
  • garlic powder: I personally prefer the combo of onion and garlic powder but if you only have one, you could double the onion/garlic powder to compensate
  • coconut milk: In this application, the coconut milk is really useful as an egg (not AIP) so it's best to use canned, full fat milk because it's relatively thick and sticks to the chicken
  • oil: I like avocado oil the best but often use olive oil or refined coconut oil, too. While I haven't tested lard or tallow, both should work.

🥗 Side dishes

Since this is a site dedicated to healing autoimmune disease, I highly recommend adding something like a raw, fresh salad to the plate.

AIP chicken tenders on plate with kale slaw and AIP ranch dip

To make the slaw, you will need: kale, avocado oil/olive oil, umeboshi vinegar (a Japanese vinegar with a uniquely tangy, salty flavor), thyme (optional), cabbage, and carrot.

🔪 Instructions

Time needed: 1 hour and 20 minutes

While I'm pretty crazy about the utility of this family/toddler-friendly chicken, the Achille's heal is that the crust is fragile. It can fall off if you over-handle the tenders. For this reason alone, I'd recommend air-frying in the basket because it's the cooking method that requires the least flipping. Here's how:

  1. Marinate the chicken. 

    Rub the thyme leaves over the chicken and allow to marinade for 1 hour or overnight in the refrigerator (optional step).chicken tenders with thyme in bowl

  2. Make the gluten-free breading.

    In a large bowl, combine the cassava flour, coconut flour, salt, and spices. In a small bowl, pour your canned coconut milk and stir to combine. For this recipe, you will be coating your chicken in the coconut milk, then grain free flour mixture, and then cooking in an airfryer/a skillet (pan-frying)/an oiled baking sheet in the oven.cassava flour in bowl and coconut milk in bowl

  3. Dredge the chicken.

    Dip the chicken in the coconut milk followed by the cassava-coconut flour mixture.chicken tenders dipped in coconut milk in bowl

  4. Cook the chicken. (Air Fryer Method pictured below)

    chicken tenders dredged in cassava coconut flour in air fryer

That's it! Once the chicken is cooked, you can serve it hot and fresh with lemon wedges or make an AIP sauce such as this Lemon Garlic Sauce {AIP, Dairy Free}.

🧂 Seasoning

Just wanted to quickly mention that you can totally make this recipe with salt as your only seasoning. If you can add thyme, garlic and onion powders, just know that your tendies will really have that restaurant quality.

How to Cut Kale

While the chicken is cooking, I like to remove kale stems and slice thinly into strips for the slaw. It tends to soften as it sits in the dressing. You can find umeboshi plum vinegar online or sometimes with Asian ingredients in the grocery store.

kale sliced thinly on cutting board

📋 Recipe

This recipe came about on a whim because I always stock coconut milk, spices, coconut flour, and cassava flour as an integral part of my literal autoimmune pantry. It turned out so perfectly, I couldn't wait to share it with you.

AIP chicken tenders on plate with sauce and slaw

Crisp AIP Chicken Tenders and Kale Slaw

No ratings yet
Prep Time: 1 hour hour
Cook Time: 20 minutes minutes
Total Time: 1 hour hour 20 minutes minutes
Prep Time: 1 hour hour
Cook Time: 20 minutes minutes
Total Time: 1 hour hour 20 minutes minutes
Servings: 4 people
Calories: 671kcal
Rate
Pin
Share
Print
These AIP chicken tenders are crisped until golden and perfect for a family weeknight dinner.

Ingredients

Chicken Ingredients:

  • 1 ½ pounds chicken tenderloins organic, sliced evenly
  • 2 teaspoons fresh thyme leaves optional
  • ¾ cup Cassava flour not tapioca starch
  • ¼ cup Coconut flour
  • 2 teaspoons fine sea salt
  • 1 teaspoon onion powder
  • ¼ teaspoon garlic powder
  • 1 14- ounce can full-fat coconut milk
  • avocado oil or olive oil used throughout (see individual steps)

Slaw Ingredients:

  • 1 bunch lacinato curly, or red kale
  • 3 tablespoons extra-virgin olive oil or avocado oil
  • 1 tablespoon umeboshi plum vinegar
  • ½ teaspoon fresh thyme
  • ¼ purple cabbage thinly sliced
  • 1 carrot use peeler to get thin ribbons

Instructions

  • Marinate the chicken. Rub the thyme leaves over the chicken and allow to marinade for 1 hour or overnight in the refrigerator.
    chicken tenders with thyme in bowl
  • Make the gluten-free breading. In a large bowl, combine the cassava flour, coconut flour, salt, and spices. In a small bowl, pour your canned coconut milk and stir to combine. For this recipe, you will be coating your chicken in the coconut milk, then grain free flour mixture, and then cooking in an airfryer, a skillet (pan-frying), or on an oiled baking sheet in the oven.
    cassava flour with spices in bowl
  • Dredge the chicken. Dip the chicken in the coconut milk followed by the flour mixture.
    chicken tenders dipped in coconut milk in bowl
  • Cook the breaded chicken until crispy.
    Air Fryer Method: Preheat to 400F. Using the greased basket insert (or tray) Cook in batches 10 to 11 minutes total (optional to turn halfway through) until the chicken is cooked (165F-175F) and crispy on the outside.
    Baked: Preheat to 425°F. Grease a baking sheet really generously with avocado or olive oil. Place chicken tenders on top with space in between; if you crowd the tenders, the breading won't crisp. Bake for 7 minutes, gently flip and bake another 5 to 7 minutes (about 14 minutes total).
    Pan-Fried: In a large pan over medium heat, add about ½ cup avocado oil. Using tongs, transfer 3 to 4 pieces of dredged chicken into the hot oil. Allow to cook 5 minutes before flipping so that each side gets nice and crispy (about 10 minutes total). Use a thermometer to check the inside temperature (165F-175F).
    air fried chicken tenders with golden crunchy crust
  • Make the kale slaw. Submerge the kale in water then lift to drain. Use a knife to remove the bottom couple inches of the thick stem, discarding. Slice the greens into ¼-inch wide ribbons. Place the kale ribbons into a mixing bowl with 3 tablespoons of oil, plum vinegar, and thyme. Add shredded purple cabbage and carrot. Using your hands, massage the slaw until tender. Set aside.
    finely chopped kale, carrot, and cabbage slaw in bowl
  • Plate the chicken with the kale and serve. You can serve the chicken tenders and kale slaw as-is or try adding dips or simply lemon wedges off to the side.

Nutrition

Serving: 1plate chicken tenders and kale slaw | Calories: 671kcal | Carbohydrates: 35g | Protein: 41g | Fat: 42g | Saturated Fat: 26g | Polyunsaturated Fat: 2g | Monounsaturated Fat: 10g | Trans Fat: 0.02g | Cholesterol: 109mg | Sodium: 1421mg | Potassium: 1129mg | Fiber: 8g | Sugar: 8g | Vitamin A: 3776IU | Vitamin C: 42mg | Calcium: 105mg | Iron: 5mg

I really hope you'll try this recipe and aren't too shy about ordering the umeboshi plum vinegar for the kale slaw (it's truly a life changing ingredient). Please ask your questions or drop me a comment below. -Sara

Freezer Instructions

To freeze: Follow the entire recipe start to finish for the chicken (excluding the slaw) and then freeze the tenders in a sealed plastic bag for up to 3 months. To reheat, I recommend baking in the oven at 425F for 15 minutes or until warmed through.

More Fast Food Nostalgic (yet Healthy) Recipes

  • Vanilla Bean Ice Cream {AIP, Dairy Free, Egg Free}
  • Chewy AIP Chocolate Chip Cookies {Paleo, Refined Sugar-Free}
  • Green Banana Fries {AIP, Nightshade-Free}
  • Crispy Chicken Nuggets with Vegetables {AIP, Gluten-Free, Paleo}

Chewy AIP Chocolate Chip Cookies {Paleo, Refined Sugar-Free}

March 27, 2025 by sara 1 Comment

Paleo AIP Chocolate Chip Cookies! Chewy, soft, and made only with AIP pantry staples so you can eat a damn cookie when you want!

AIP chocolate chip cookies with homemade carob chunks

AIP baking is precise, humbling business.

Health supportive cooking experience and culinary degree aside, I've eaten my share of dry, crumbly, wet, no-good cookies. Like a Phoenix rising from the ashes of these expensive cookie fails, there was this one recipe with a coconut-tapioca mixture that I kept resurfacing.

For months I tinkered to get it just right. I'm talking caramelly goodness, crisp edges, a slight chew, and thick, soft centers. My favorite discovery about these cookies, besides the coconut-maple ratios, is actually the carob chunks (which I conveniently make too many of for this recipe so there's always a stash in the freezer).

In This Post: Everything you Need For These Cookies

[feast_advanced_jump_to]
AIP chocolate chip cookies stacked tall

Homemade vs. Store-bought Carob Chips

Carob is as close as we get to chocolate on the AIP diet; it has a similar flavor to chocolate but is sweeter and less bitter, so you may find these cookies could benefit from a smidge of salt or consider serving them alongside a bitter cup of chicory coffee. For the carob chunks, I recommend making your own from carob powder.

Don't get me wrong, carob chips are wonderful but they do contain lecithin which is not AIP. By all means use whatever carob or chocolate chips you love in this recipe!

Troubleshooting Carob Problems

As noted, ready-made carob chips often list soy or sunflower lecithin...

And...guess who now knows why that ingredient is in there? As I've learned, the lecithin helps prevent the chips from melting too quickly, drying up, and scorching. The work-around? Use homemade carob chunks from frozen and add extra chips to top the cookies when they're hot out of the oven. Voila.

If you don't, your cookies will still taste great but will look like this:

baked cookie with carob chunks baked into cookie until dry
Cookie baked with carob chips for 10 minutes, where carob chunks dry out.

Compared to this:

paleo AIP cookie with homemade carob chunks
Cookies baked then topped with additional carob chunks while hot out of the oven.

AIP cookie ingredients measured

🍪Ingredients

To make these bakery-esque gems happen, you'll have to gather up (and measure/weigh) some pantry staples. Anything you don't have, just think of as a practical AIP ingredient for a well-stocked pantry (because let's face it, you'll be making these again!).

  • Cookie Dough Ingredients: tapioca flour also labeled "tapioca starch" not the same as cassava flour, coconut flour (very unique highly fibrous, highly absorbent flour and can't be replaced), sea salt or Himalayan pink salt, baking soda (must be fresh to work), coconut oil or palm shortening both work relatively similarly, maple syrup (really important as it provides a lot of the chew and balances out the intensity of the coconut sugar), pure vanilla extract (the good stuff), and gelatin (the powdered kind, not the sheets).
  • Carob Chip/Chunk Ingredients: palm shortening works best here but refined coconut oil works almost as well (unrefined works, too, it just has a coconut taste), coconut butter (this has no substitute), coconut sugar or maple sugar work equally well with the latter melting better, carob powder, pure vanilla extract (the good stuff), sea salt or Himalayan pink salt

💭Top Tip

There's powdered gelatin in the cookie dough as an egg replacer. It's really important that you add it into the dry mixture and whisk well before combining with the wet ingredient mixture.

How to Make AIP Cookies (Snapshot)

Time needed: 40 minutes

As mentioned, these are as unforgiving as any AIP cookie. They don't spread much and have to be shaped and baked within 1-minute of doneness or else the carob is very prone to burning.

  1. Make the dough.

    You'll mix the dry ingredients in one bowl. In a pot on the stove, you'll melt the coconut oil/palm oil and then add the maple syrup and vanilla extract. Combine the wet and dry mixtures to form a crumbly dough. Bag it and refrigerate to cool for a bit.wet and dry ingredient cookie dough mixture

  2. Let the dough chill. Meanwhile, make the carob chunks.

    Your dough needs to be cool before you add the carob chunks so they don't melt. Once the dough is cool, add half of your carob chunks (from frozen) and reserve the remaining carob chunks for topping the cookies hot out of the oven.melted carob mixture in parchment lined pan

  3. Shape and bake!

    Since these don't spread much, you will be flattening the dough into disks (see below).AIP Chocolate Chip Cookie Dough Shaped on Baking Tray

  4. Top with extra carob chunks and let rest.

    Don't be mad, but the texture really improves if you allow the cookies to cool.baked chocolate chip cookies on a baking sheet

📋 Source notes: I was first inspired to make this carob chip cookie after searching for AIP carob chips online. I found this cookie recipe from Tonja formerly "Flame to Fork," which I adapted to create a chewier texture. I also did extensive testing on how to shape and use the carob chunks and offer lots of tips as well as ingredient weights to help you replicate my results.

paleo AIP chocolate chip cookies with homemade carob chips

Chewy AIP Chocolate Chip Cookies {Paleo, Refined Sugar-Free}

4 from 1 vote
Prep Time: 30 minutes minutes
Cook Time: 10 minutes minutes
Total Time: 40 minutes minutes
Prep Time: 30 minutes minutes
Cook Time: 10 minutes minutes
Total Time: 40 minutes minutes
Servings: 8 cookies
Calories: 535kcal
Rate
Pin
Share
Print
These were the first AIP chocolate chip cookies I ever made, which are memorable because they use tapioca starch and coconut flour as the base. AIP baking is very precise which is why you’ll note that I have an additional tablespoon of maple syrup and instructions on how to flatten the cookies so you get cookies that are chewy, not cakey and spread just a bit.

Ingredients

Cookie Dough Ingredients:

  • ⅔ cup 91 grams tapioca flour
  • ¼ cup 25 grams coconut flour
  • 1 tablespoon 9 grams gelatin
  • ¼ cup 37 grams coconut sugar
  • ½ teaspoon 3 grams sea salt
  • ¾ teaspoon baking soda
  • ¼ cup 45 grams palm shortening, packed or coconut oil
  • ¼ cup plus 1 tablespoon 80 grams maple syrup
  • 1 teaspoon pure vanilla extract
  • *½ cup carob chunks/chips recipe below

Carob Chip/Chunk Ingredients:

  • 1 cup palm shortening or coconut oil
  • 1 cup coconut butter not oil
  • ¼ cup coconut sugar or maple sugar
  • ⅔ cup carob powder
  • 2 teaspoons pure vanilla extract
  • ¼ teaspoon sea salt

Instructions

  • Preheat the oven to 350°F. Prepare a baking sheet with parchment paper for easy clean-up.
  • Dry ingredient mixture. In a mixing bowl, whisk together the tapioca starch, coconut flour, gelatin, coconut sugar, salt and baking soda.
  • In a small saucepan, partially melt the coconut oil/palm shortening then stir in the maple syrup and vanilla extract.
    melted coconut oil and maple syrup in pot
  • Add wet ingredient mixture to the flour mixture and stir until well combined. Refrigerate dough wrapped in plastic (I usually just use a freezer bag).
  • Meanwhile, form the carob chips (if you have a silicone mold) or chunks. In a small saucepan over medium-low heat, melt the coconut oil/palm shortening and coconut butter and immediately turn off the heat so as not to burn.
    coconut oil and coconut butter melted in pot
  • To the oil-coconut butter mixture, add the coconut/maple sugar to the saucepan and stir to distribute evenly (note: coconut sugar will not dissolve completely). Immediately whisk in the carob powder, vanilla, and sea salt until completely combined.
    While the carob mixture is very warm, pour it into a silicone mold (to form chips) or pour into a parchment-lined baking dish. Transfer to the fridge or freezer. When the carob mixture is very firm to the touch, carefully remove and cut the carob bar into small chunks ¼-inch x ¼-inch. Return carob chips/chunks to the freezer until you need them.
  • Divide cookie dough evenly, rolling to form 8 balls. Transfer to the prepared baking sheet then press to flatten until ¾-inch thick.
    unbaked cookie dough pressed on parchment lined baking tray
  • At this point, I like to press a few large, frozen carob chunks into each cookie. Bake on the middle rack until the edges are golden brown, approximately 10 minutes. Note: AIP cookies are fragile when hot so allow them to cool before moving or serving for the best mouthfeel.
    *You can add extra carob chips to the tops of the cookies while they are hot. This is so the carob doesn't melt and dry in the oven. You could even put the cookies in the oven for 1 more minute if you'd like the carob to soften/melt a bit.
    baked chocolate chip cookies on a baking sheet

Notes

Note: If you want to add a pinch of Maldon salt, the best time to do this is when the cookies come out of the oven and are still hot. This is also a good time to add a few additional carob chips, if you like.

Nutrition

Serving: 1cookie | Calories: 535kcal | Carbohydrates: 39g | Protein: 3g | Fat: 44g | Saturated Fat: 32g | Polyunsaturated Fat: 1g | Monounsaturated Fat: 2g | Sodium: 360mg | Potassium: 98mg | Fiber: 8g | Sugar: 18g | Vitamin A: 1IU | Vitamin C: 0.4mg | Calcium: 48mg | Iron: 1mg

💬 I routinely make these cookies and am always observing what works and doesn't to get them just right! (Oh, the sacrifice. Ha!) Please leave me a comment and let me know if there's a question I can answer!

FAQs

My cookies turned out extra thick. Why?

This is because of the flour. It is really important to get the right amount of flour in AIP baking, which is why I provide the weights (if not able to weigh, spoon your flour into your measuring cup then level with a knife).

I measured my palm oil/coconut oil, but I'm getting a different weight. Why?

It's incredibly difficult to accurately measure oils that solidify at room temperature. In testing, I've found that packing the oil while soft (so between a solid and liquid state) into a measuring cup is the best way to measure. If you have a scale, 45 grams of coconut oil or palm oil work best in this recipe. If you happen to test lard in this recipe, please share how it goes for you.

How can I store the dough in the fridge or freezer?

This recipe only makes 8 cookies and it bakes from a cool state but not cold. If you refrigerate the dough, it will crack more when you go to flatten it into discs and you will have to increase the bake time. Here's what I recommend: If working from chilled dough, let it come to room temperature, then proceed with the baking instructions. You would be better off baking the cookies and freezing them than trying to work with the frozen cookie dough.

How do you know if your cookies are done?

When the edges of the cookies have a very slight bit of golden brown color, they are done. You don't want to go far past this point or you risk the carob burning.

What if I need to make a substitution?

Check the "Ingredient" section of this post for details about substitutions that I've personally tested that work. As a general note, these cookies will not turn out if you attempt to wing it (not measure/weigh ingredients) or if you substitute major things (flours or sugars, for example). Trust me, I've tried!

More AIP Desserts

  • Maple Sandwich Cookies {AIP, Tigernut Flour, Refined Sugar-Free} - festive and great even without the frosting in the middle.
  • Carob Avocado Pudding {AIP, Dairy-Free, Egg-Free} - also doubles as an amazing frosting.
  • Vanilla Bean Ice Cream {AIP, Dairy Free, Egg Free} - I've really been wanting to try sandwiching these cookies with this ice cream!
  • Tigernut Butter Protein Bars {AIP, Paleo} - these are like Tiger's Milk bars (basically, candy bars but loaded with protein)

Chicken Pot Pie with Sweet Potato Biscuits {AIP, Gluten-Free}

March 25, 2025 by sara 6 Comments

AIP Chicken Pot Pie with Sweet Potato Biscuits! A mirepoix, thyme, creamy chicken, carrots, and celery all baked under a sweet potato biscuit topping.

Jump to Recipe

This feels like a good time to set the record straight. Biscuits are 100% possible on the AIP and they are really good.

chicken pot pie in Dutch oven with AIP sweet potato biscuits on top

Sautéed vegetables, savory herbs, rich coconut milk all baked under homemade sweet potato biscuits. This is stick-to-your-ribs, humble, and old-fashioned goodness right here. It just feels like love in a bowl.

Chicken and dumplings and pot pie are the very essence of comfort food. And if you are in the thick of AIP, nothing will cheer you up quite like a traditional meal.

In this post: Everything You Need for Chicken Pot Pie

[feast_advanced_jump_to]
chicken pot pie in bowl sweet potato biscuits on top

Why Biscuits for Chicken Pot Pie Crust

I'm sentimental for biscuits and gravy because my momma and grandma made them for me from memory. Compared to pie crust, AIP biscuits are:

  • easier to shape from scratch
  • more forgiving
  • more enjoyable to eat
chicken on plate, mis on place vegetables, chicken stock, celery, carrot

Ingredients

While I maintain that this is easier than traditional pie crust pot pie, there is still time and love that goes into it.

  • Biscuits:  sweet potato, coconut flour, arrowroot, gelatin, garlic powder, sea salt, baking soda, apple cider vinegar, avocado oil/olive oil, the pantry staples.
  • Filling and Sauce: chicken, vegetables, aromatics, coconut milk, broth, olive oil/avocado oil and arrowroot to thicken that delicious sauce.

Now, you've got the gist with ingredients. Let's talk about timing and prep.

How to Make Homemade Chicken Pot Pie with Biscuits

When making AIP biscuits, there are a few important Biscuit things to know.

  1. Use fork-tender sweet potato (🥔: Just use the orange sweet potato variety).
  2. Roll the dough out and then cut straight down with your biscuit cutter--or the rim of a glass if you're improvising.

⏲️ Gravy with vegetables and chicken stock in the Dutch oven, biscuits on top, 20-minutes of oven-lovin' and...

Meet the love of your life -- Pillowy, savory, gravy chicken pot pie.

Now that's what I call feel good eatin' plain and simple.

chicken pot pie with biscuits in a bowl

What to Serve with Chicken Pot Pie

This recipe has everything you need -- veggies, protein, and something to sink your teeth into. Critical on AIP, I know. If you want to go all out on a full course meal, here are even more additions.

  • Salad: You could stretch this meal further by adding a simple kale or arugula salad with a loved by everyone Lemon Garlic Dressing or for something more elaborate try this Roasted Brussels Sprouts with Balsamic.
  • Fruit: This goes great with a cranberry sauce as a side.
  • Drinks: Sparkling water is nice and light and will compliment this heavy meal.

Put it all together and you've got a cozy dinner party.

Chicken Pot Pie: FAQS

Can I bake the biscuits separately?

Absolutely! Baking the biscuits separately is a great idea if you want a drier biscuit texture as the biscuits do get a bit wet if baked into the gravy.

Can I omit the coconut milk?

Yes! Just omit the coconut and use chicken stock in its place if you have a coconut allergy.

How do you reheat chicken pot pie?

You can reheat it in the oven or the microwave. If you want the biscuits to have a crisp texture on top, the oven is the way to go. Heat to 425 uncovered for about 10 minutes until reheated through.

Can I use turkey instead of chicken?

Yes, in fact, turkey has more flavor.

chicken pot pie with aip sweet potato biscuits

CHICKEN POT PIE WITH SWEET POTATO BISCUITS

5 from 1 vote
Prep Time: 20 minutes minutes
Cook Time: 35 minutes minutes
Total Time: 55 minutes minutes
Prep Time: 20 minutes minutes
Cook Time: 35 minutes minutes
Total Time: 55 minutes minutes
Servings: 6 people
Calories: 570kcal
Rate
Pin
Share
Print
Pot pie is the ultimate comfort food right up there with chicken and dumplings. This dish sort of marries the two right inside your Dutch oven with a thick and hearty chicken and vegetable filling and pillowy biscuits that get cooked right on top. Plus, everything is gluten-free and allergy friendly, making this an instant Thanksgiving classic.

Ingredients

Biscuits:

  • 1 large sweet potato
  • ⅔ cup coconut flour
  • ⅔ cup arrowroot starch
  • 2 teaspoons gelatin
  • 1 teaspoon garlic powder
  • 1 teaspoon sea salt
  • ½ teaspoon baking soda
  • 2 teaspoons apple cider vinegar
  • ⅓ cup avocado oil or olive oil

Filling:

  • 2 tablespoons olive oil or avocado oil
  • 1 yellow or white onion diced
  • 4 stalks celery diced
  • 3 carrots sliced into ½-inch rounds
  • 6 boneless skinless chicken thighs or 4 cups shredded chicken/turkey
  • 6 garlic cloves minced or 1 teaspoon garlic powder
  • 2 ½ teaspoons sea salt
  • 1 teaspoon fresh sage or oregano minced
  • 2 teaspoons fresh thyme leaves only
  • 3 cups sodium free chicken stock ensure ingredients are AIP compliant
  • 2 teaspoons arrowroot starch
  • 1 cup full-fat canned coconut milk additive free, optional for richness
  • Chives or parsley thinly sliced for garnish

Instructions

  • Biscuits: Preheat the oven to 425℉. Microwave the sweet potato until very tender. Open with a knife and allow to steam until cool enough to handle.
  • While the sweet potato cools, mix coconut flour, arrowroot starch, gelatin, garlic powder, salt, and baking soda. Add the vinegar, oil and inside of the sweet potato and smash with a fork to bring it all together.
  • Turn the dough out onto a clean counter (or use parchment paper for easy clean-up). Fold over a few times to get it into a 1-2 inch thick layer. Roll into a flat little block and cut 6 to 8 biscuits with a glass or biscuit cutter…or just shape by hand. Let’s not be too precious here.
    biscuit mixture in bowl, biscuits rolled out, biscuits cut into rounds
  • Filling: Make a mirepoix in a large oven-safe Dutch oven or pan: olive oil, onion, celery, and carrot. Sauté over medium heat until the onion is translucent, about 5 minutes. Add the chicken, stirring occasionally to brown. Gradually, add the garlic, salt, sage, and thyme, stirring and resting between each new addition (this is called layering). Lastly, add the sodium free stock along with the arrowroot starch. Stir right away and simmer to thicken, about 10 minutes. Using tongs, carefully transfer the cooked chicken to a plate and shred into small pieces then return it to the pot. Add the coconut milk, if desired.
    mirepoix in Dutch oven, chicken added, chicken shredded, sauce thickened in pot
  • Bake: Arrange the biscuits on top of the filling. Brush with coconut milk for extra color. Bake for 20 minutes, until hot, bubbly, and biscuits are cooked through. Let rest for 10 minutes before serving and season with salt, lemon, or chives to taste.
    biscuit dough over chicken vegetable gravy filling

Nutrition

Serving: 1bowl | Calories: 570kcal | Carbohydrates: 39g | Protein: 30g | Fat: 34g | Saturated Fat: 14g | Polyunsaturated Fat: 3g | Monounsaturated Fat: 14g | Trans Fat: 0.02g | Cholesterol: 107mg | Sodium: 1666mg | Potassium: 769mg | Fiber: 9g | Sugar: 6g | Vitamin A: 10511IU | Vitamin C: 7mg | Calcium: 67mg | Iron: 3mg

More Cozy Comfort Food Recipes

  • Healing AIP Chicken Soup (refreshing comfort food)
  • Baked Pork and Beef Meatballs {AIP, No Egg, No Breadcrumbs} (classic cozy)
  • Cauliflower Puree {AIP, Gluten-Free, Dairy Free} (restaurant-level side dish)
  • AIP Meatloaf with Sweet and Sour Glaze (a family and leftover favorite)

Healing AIP Chicken Soup

March 23, 2025 by sara 1 Comment

Healing AIP Chicken Soup that is limey, salty, and so fresh! Garlic-ginger-coconut-infused broth, chicken thighs, and fresh herbs prove that you don't need hours to prepare a nutritious meal, just fresh ingredients. It's delicious, comforting, and EASY to make now or freeze for later.

chicken soup with coconut and lime in bowl

What I want you to know about this particular soup recipe is that it's full of tender shredded chicken and just sings with fresh limey flavor. Plus, the garlic-ginger-coconut trio is super satisfying. It can (and should be) loaded to the brim with fresh herbs.

[feast_advanced_jump_to]

Knock on wood, but if you have a sore throat, this is so soothing and will totally hydrate you in a way that only electrolytes can. Plus, I'm convinced it's as healing for the body as it is happy for the soul because the flavor pops and it's easily digestible.

If you have a bout of nausea, ginger is always the answer and if you can get on board with cilantro, it's one of the best liver cleansers as it can remove heavy metals from your body.

AIP chicken soup in bowl with cilantro and lime

Tasting Notes

It starts with the standard comforts of homemade chicken broth but also includes:

  • Ginger. Fresh, anti-inflammatory, adds a spicy factor.
  • Garlic and onions. Just the right amount of potency, anti-viral, anti-bacterial.
  • Salty broth.
  • Generous amounts of lime juice and a pinch of zest.
  • A pile of cilantro - or go with fresh mint, Thai basil, kaffir lime, parsley, or rosemary.
  • Coconut milk for richness (think Tom Kha vibes).

It's savory but also bright. Warm and cozy but refreshing. Healthy, yet comforting. Plus, it's easy to make and tastes complex.

💭Top Tip

Keep the garnishes fresh and prepare those at the last moment to get the most out of delicate herbs, like cilantro.

White Chicken Chili Variation

Consider fanning some avocado and minced red onion on top if you'd like a white chicken chili option. Have powdered ginger and garlic? Try swapping those if that's what you've got.

Preparation

Make the entire recipe start to finish or prep and freeze for later.

🔪 Instructions

Cook the chicken until they reach 165°F then set aside.

chicken thighs baked in ceramic pot

Dice the vegetables (medium chop). Use a microplane to grate the peeled ginger.

chopped celery, onion, garlic, and ginger

Sauté or sweat the vegetables until tender.

sweating the chopped vegetables

Add 2 cups of water and shredded chicken to the pot. Let that come to a simmer.

shredded chicken in pot with vegetables and water

Finish the soup with coconut milk, lime juice and zest, and a big pinch of fresh herb magic on top.

coconut milk added to soup with lime juice

Taste the soup and if it needs it, add more salt.

Freezer Options

This soup can be frozen for up to 1 month and I have two options for you.

The Cook-Later Option: See the recipe card notes for instructions on how to prep, freeze, then cook the soup.

The Reheat-It Option: If you would like to cook the soup first, then freeze, you will follow the recipe as written but omit the garnish. Allow soup to cool 20 minutes then portion and transfer to freezer bags or glass containers. Simply microwave to reheat. Garnish and serve.

coconut lime chicken soup frozen in plastic bag

Scaling

If scaling up or down, keep all ratios the same except the salt; add 1 teaspoon sea salt and then add more to taste. When scaling, bare in mind you will need a vessel that can hold roughly 4 cups for the original recipe (so 8 cups if doubling, 12 cups if tripling).

Leftovers

Leftovers? But how? You mean you didn't stand dunking your spoon into the leftovers in the pot? Just me then, okay. You can store any soup leftovers in a sealed container in the fridge for 4 days. The garnish should be stored separately and added after you've rewarmed it.

healing chicken soup in a bowl with spoon

Nutrition, big flavor, and healing whole food ingredients make this a cold-weather (and head-cold) essential. Garlic, ginger, and lime juice? This trio can make it all better.

HEALING CHICKEN 🥣: FAQS

Can you freeze this soup?

Yes! Details can be found in the recipe notes.

How should I save leftovers of this soup?

Just pour any leftovers into a container, seal it, and refrigerate. Of note, you can store fresh herbs in a wet paper towel separately.

Can I use leftover chicken?

Yes! Have some chicken already cooked? If it's fresh, you can use it in place of the thighs here. Of note, cooked chicken lasts for 3-4 days in the refrigerator.

Coconut Chicken Lime Soup in bowl with cilantro

HEALING AIP CHICKEN SOUP

5 from 1 vote
Prep Time: 45 minutes minutes
Cook Time: 7 minutes minutes
Total Time: 52 minutes minutes
Prep Time: 45 minutes minutes
Cook Time: 7 minutes minutes
Total Time: 52 minutes minutes
Servings: 4 people
Calories: 514kcal
Rate
Pin
Share
Print
Fresh, salty, and loaded with lime! Garlic-ginger infused broth, shredded chicken thighs, fresh herbs, and coconut milk come together in the slow cooker or in an oven-safe Dutch oven.

Ingredients

Soup Ingredients:

  • 6 boneless skinless chicken thighs
  • 1 teaspoon sea salt
  • 1 tablespoon olive oil or avocado oil
  • 1 onion diced
  • 3 stalks celery diced
  • 4 garlic cloves chopped
  • 2 teaspoons fresh ginger minced
  • 1 14- ounce can full-fat coconut milk additive free
  • 4 limes remove zest from 1 lime and then extract juice (about ¼ cup)
  • ¼ cup cilantro/mint/thai basil for garnish chiffonade

Instructions

  • Cook the Chicken.
    6 boneless skinless chicken thighs, 1 teaspoon sea salt, 1 tablespoon olive oil or avocado oil
  • Slow Cooker Method: Season chicken thighs with salt and place in slow cooker with the oil. Set to “Bake” mode for 400F for 45 minutes.
    Oven Method: Use an oven-safe pan or Dutch oven at 400F, spread oil and place seasoned chicken thighs in pan. Bake for 45 minutes or until an internal temperature registers 165℉.
  • Meanwhile, prepare the vegetables. Chop the vegetables (onion, celery, and garlic) and transfer them to a large prep bowl as you work to give yourself plenty of room on the cutting board. If you own a microplane, mince the ginger directly over the bowl to capture as much ginger juice as possible (as opposed to just chopping it).
    1 onion, 3 stalks celery, 2 teaspoons fresh ginger, 4 garlic cloves
  • Sweat vegetables and make broth. Use tongs to transfer the cooked chicken to a plate. Allow to rest for 10 minutes so you don't burn your hands and so the chicken can reabsorb surface juices. Combine the vegetables (onion, celery, garlic, and ginger) to the hot slow cooker or Dutch oven. Sauté on high heat for 7 minutes. Stir then add 2 cups of water. Return the shredded chicken (discarding the bones) to the pot.
    1 14- ounce can full-fat coconut milk, 4 limes, ¼ cup cilantro/mint/thai basil for garnish
  • Finish the soup. Bring to a simmer then add coconut milk, lime zest, and lime juice. Allow the soup to warm then serve along with salt to taste. Top with fresh cilantro, mint, or Thai basil for Asian flavors or try adding avocado or red onion for Southwest.

Notes

Freezer Instructions:
FREEZE TOGETHER:
  • 6 boneless skinless chicken thighs
  • 1 teaspoon sea salt
  • 1 tablespoon olive oil or avocado oil
  • 1 onion diced
  • 3 stalks celery diced
  • 4 garlic cloves chopped
  • 2 teaspoons fresh ginger minced
  • 1 14-ounce can full-fat coconut milk (additive free)
  • 4 limes (zest of 1 lime plus ¼ juice)
INSTANT POT: From frozen, add 2 cups water then high pressure for 13 minutes + 10 minutes natural release.
SLOW COOKER: Thaw first, and then cook 6 hours on high.
FINAL STEP: Shred the meat and serve with cassava pasta, baked sweet potato, cauliflower or broccoli rice, zucchini noodles, etc.
If you regularly make batches of smoked chicken thighs, you can simply shred that for a smoky version of this soup.

Nutrition

Serving: 1bowl | Calories: 514kcal | Carbohydrates: 17g | Protein: 36g | Fat: 36g | Saturated Fat: 25g | Polyunsaturated Fat: 2g | Monounsaturated Fat: 6g | Trans Fat: 0.03g | Cholesterol: 161mg | Sodium: 754mg | Potassium: 833mg | Fiber: 5g | Sugar: 6g | Vitamin A: 156IU | Vitamin C: 26mg | Calcium: 69mg | Iron: 4mg

📖AIP Variations

  • boneless skinless chicken thighs: Bone-in, skin-on chicken thighs work, too. Once cooked, you can discard the bones and skin. You can also use a whole chicken in this recipe to replace the thighs.
  • sea salt: Kosher salt, Himalayan pink salt 1:1
  • olive oil: avocado oil or refined coconut oil 1:1 for
  • onion: white, yellow onions work best; use green onion or leaks if that's what you have; use 1 tablespoon onion powder to replace the fresh onion
  • celery: celery root may replace celery
  • garlic: substitute green garlic; use the pre-minced garlic where 4 cloves minced is equivalent to 4 teaspoons; use 1 teaspoon garlic powder to replace 4 cloves fresh garlic; if avoiding garlic, use shallots or asafoetida instead or try removing the green germ from the center of the garlic as some people are sensitive to this
  • fresh ginger: replace with 1 teaspoon ground ginger (must be really fresh as ginger loses flavor after 6 months in the pantry)
  • full-fat coconut milk: you can leave the coconut milk out of this recipe but it does provide a dairy-free richness
  • limes: substitute with lemon to taste
  • fresh herb garnish: use cilantro, mint, Thai basil for an Asian flavor profile or try fresh rosemary, thyme, basil, or parsley for an American flavor profile

Smoked Chicken Thighs {AIP, Big Batch, Budget Friendly}

February 19, 2025 by sara Leave a Comment

Smoked Chicken Thighs! AIP, budget, and family friendly recipe for juicy, flavorful two-ingredient slow smoked chicken.

chicken thighs in smoker

If protein is a priority, you don't have to break the bank or slave away over a hot stove. You can actually buy chicken thighs in bulk and batch cook them 1 day per month and get freezer meals for the month that are gluten-free, autoimmune protocol compliant, and 100% delicious.

I'm not much of a promotor, but I come from a Costco family. My mom worked there for 40 years, and I'm a big fan of their meat selection. Since I live 2 hours from my nearest Costco, we usually have to buy at least a month's worth of groceries to make the drive worth it.

Affordable Paleo Freezer Meals

For practical reasons, it just makes sense to smoke and then freeze as much chicken as will fit in our smoker. We get about 30 meals from this process and average 10 minutes per meal or $4. Practically unheard of combo of time-saving and affordability for paleo/aip diets.

Not going to lie, I regularly burn the heck out on the AIP diet. As in, I get bored of eating the same ol’-same ol’. With work and kids, it’s overwhelming to cook every meal from scratch and these chicken thighs are saving me from that fate.

I can’t tell you how many times I’ve reached into my chest freezer, found a surprise bag of this chicken and felt instant food security and relief. It’s like a total gift to your future self.

Smoked chicken thighs are easy to enjoy frequently. I don’t find them too tiring but since they can be frozen, it’s nice to take breaks between meals and space them out as needed.

Favorite Add-Ons

I love to serve smoked chicken thighs with fresh lime, avocado, and cilantro. You could also make AIP bbq sauce and serve with a side of vegetables.

If you don't currently own a smoker, please noted you can buy them used. We found ours for $50 on Facebook Marketplace. Even if you've never smoked meat, you should be able to figure it out with a little practice and this basic recipe.

*In the comments, share your favorite AIP freezer sides. I usually do whole roasted sweet potatoes.

smoker with wood pellets and chicken thighs
barbecue chicken thighs after 4 hours of cooking low and slow

SMOKED CHICKEN THIGHS

No ratings yet
Prep Time: 20 minutes minutes
Cook Time: 6 hours hours
Total Time: 6 hours hours 20 minutes minutes
Prep Time: 20 minutes minutes
Cook Time: 6 hours hours
Total Time: 6 hours hours 20 minutes minutes
Servings: 30 thighs
Calories: 507kcal
Rate
Pin
Share
Print
A smoker is a great way to meal prep on AIP because you can save time and money shopping for chicken at bulk prices at Costco. The smoke enhances the flavor of the chicken and gives you something to look forward to eating with minimal seasoning. My favorite way to eat this smoked chicken is with fresh lime, cilantro, and avocado.

Ingredients

  • 18 pounds bone-in chicken thighs (approximately 30 thighs) skin on
  • Sea salt

Instructions

  • Season the chicken. Lay out foil for easy clean-up. Set chicken thighs on foil then season with salt. Turn over and salt the other side.
  • Smoke. Place the seasoned chicken skin-side up on the smoker racks. Set the temperature to 270F-300F. Note: We recommend using several handfuls of wood chips (apple, cherry, hickory, or oak) and a water bath in your smoker. For detailed instructions, see our video.
  • Turn halfway through. After about 3 hours, flip the chicken over and rotate the trays to ensure even cooking. While your chicken will likely take 6 hours, you should check the internal temperature to monitor progress. Target an internal temperature of 185F. When the chicken is done, remove from the heat and transfer to freezer containers.

Notes

Reintroduction Notes:
Recipe Test Notes:
6-pack is $19 and $1.79/pound, so a 6-pack is around 10-pounds. We cooked 9 packages and had about 18 pounds of thighs

Nutrition

Serving: 1thigh | Calories: 507kcal | Carbohydrates: 1g | Protein: 38g | Fat: 38g | Saturated Fat: 10g | Polyunsaturated Fat: 8g | Monounsaturated Fat: 16g | Trans Fat: 0.2g | Cholesterol: 227mg | Sodium: 178mg | Potassium: 474mg | Vitamin A: 180IU | Calcium: 19mg | Iron: 2mg

Sautéed Kale with Garlic and Onions {AIP}

November 12, 2024 by sara 1 Comment

Over the summer, I adopted the AIP diet and must have sautéed kale with garlic and onions 50 times! Kale was the one plant that I grew successfully from Spring to Fall, which is great because I honestly never tire of it in salads with some lemon garlic sauce or sautéed as a fast side dish.

Jump to Recipe
side dish of sautéed kale

Over the years, I've learned that the key with bitter greens is to use contrasting flavors. Sautéing kale makes for a hearty, nutritious side that has great flavor with garlic, salt, and onion mellowing the bitterness. My dad actually couldn't believe he was eating kale because it completely lacked the bitterness he was expecting.

bright green cooked kale on fork

As I was cooking my way through 15 kale plants, I stumbled upon many new AIP dinners but one really stood out: cauliflower puree, crispy chicken thighs, and sautéed Lacinato kale with capers and lemon juice. Honestly, I'm a sucker for anything with capers and lemon.

[feast_advanced_jump_to]

🥬Ingredients

  • ¼ cup onion: I like the flavor of shallot and leek but you could thinly slice any onion you have on hand such as red, yellow, or white; if you don't have onion, you could omit this ingredient and just use the garlic
  • fat: you need some type of fat and I almost always have olive oil or avocado oil in the pantry, but you could also use tallow, lard, or coconut oil (all great options for AIP)
  • kale is the star ingredient, but just know that you could really use any greens here or any variety of kale. I really enjoy Lacinato or dinosaur kale which is slightly sweeter and nuttier than other varieties. Kale contains Vitamins A, C, and K and is a smart option if you are trying to balance your blood sugar
  • sea salt: a pinch or two of sea salt or Himalayan salt (no iodized salt) helps to suppress the bitter flavor and soften the texture of the kale
kale, shallot, garlic, sea salt, and olive oil on cutting board

🎥 Sauté Slice Video

Watch how-to cut an onion [Time: 3 minutes]. This "sauté slice" is the best way to cut an onion for you-guessed-it: sautéing!

🔪 Instructions

As you can see, a chef's knife is the best way to remove the stem of your kale. I always just compost the stems because you wouldn't want to use them in broth (yuck).

cutting kale on cutting board to remove stem

Briefly heat the shallot, followed by the garlic, just to release flavor but not necessarily to brown. Be prepared to add the kale quickly.

sautéed onions and garlic in cast iron skillet

I like to cook the kale briefly and remove it from the heat when tender but still vibrant in color so as to preserve as much nutrition as possible.

kale sautéed in skillet

With this base recipe, you can expand and experiment by adding a splash of bone broth. My family really loves lemon juice and capers! Let me know if you try it.

🍳Recipe

This recipe is really just a fundamental cooking technique. It's adapted from a recipe I shared on How to Cook Collard Greens. As I mention, you can substitute any bitter greens for the kale. My favorite is Lacinato kale.

kale sautéed with garlic and shallot in pan

Sautéed Kale with Garlic and Onions {AIP}

5 from 1 vote
Prep Time: 5 minutes minutes
Cook Time: 15 minutes minutes
Total Time: 20 minutes minutes
Prep Time: 5 minutes minutes
Cook Time: 15 minutes minutes
Total Time: 20 minutes minutes
Servings: 4 people
Calories: 94kcal
Rate
Pin
Share
Print
This AIP side dish is quick and healthy as-is, but you should check out the post for variations on this recipe. There are some good ones!

Ingredients

  • 1 shallot thinly sliced or about ¼ cup sliced onion (red, yellow, white, or leeks)
  • 1 tablespoon olive oil or avocado oil
  • 3 garlic cloves minced
  • 1 ½ pounds kale I like Lacinato for it's texture and flavor
  • sea salt to taste

Instructions

  • Prepare the kale. Stack the kale two leaves at a time and use a chef's knife to cut as closely to the stem as you can to remove as much of the stem as you want. You can leave the stem in, but your kale will be much more fibrous. Slice the leaves into thin ¼-inch strips.
  • Sauté in the skillet. In a large skillet, heat the oil over medium heat. Add the shallot and sauté, stirring occasionally for 1 minute until fragrant. Add the garlic and stir for a few seconds just to release some of the flavor. Do not brown the garlic or it will impart a bitter taste. Add the kale and season with a pinch of salt. Stir occasionally and cook just until you see the green color deepen. Serve warm.

Video

Nutrition

Serving: 1½ cup portion | Calories: 94kcal | Carbohydrates: 8g | Protein: 5g | Fat: 6g | Saturated Fat: 1g | Polyunsaturated Fat: 2g | Monounsaturated Fat: 3g | Sodium: 91mg | Potassium: 601mg | Fiber: 7g | Sugar: 1g | Vitamin A: 16993IU | Vitamin C: 160mg | Calcium: 436mg | Iron: 3mg

🍽 Equipment and Scaling

Base Recipe Yield (serves 4): For this recipe, you will need a large sauté pan; I love cast iron and stainless steel cookware. Just be sure to heat the oil before adding the food, that way, it's less likely to stick to the pan.

Scaling Up (x2, x3): I've scaled this recipe and used the sauté setting on my slow cooker (it holds a larger volume of the kale). When scaling the ingredients, just be sure to salt lightly at the beginning and adjust the salt at the end, to taste.

📖 Variations

  • Use whatever greens you have on hand. Arugula, mustard greens, collard greens, spinach, turnip greens, bok choy, or dandelion greens would all work well with onion and garlic and you might just have to play around with increasing or reducing the cook time, depending on how tender the greens are.
raw collard green leaves
  • Saucy and Tangy Kale (a family favorite): Add a splash of bone broth, lemon juice, or capers at the end. You could even thicken the sauce with a slurry (1 teaspoon tapioca starch plus ¼ cup bone broth).
  • Mushrooms: Try adding sliced mushrooms when you cook the onions. They will impart umami flavor and a meaty texture. My personal favorite is morel mushrooms but shiitake (sliced thinly) is incredible, too.
  • Cheesy Kale: Add a large pinch of nutritional yeast right at the end for a cheese-like version that's AIP-compliant.
  • Asian-inspired: You could add a splash of coconut aminos add the end for a Teriyaki flavor. I've also added minced ginger/galangal and turmeric along with the garlic and onions. Lemongrass or Thai basil would be phenomenal, too.

🥗 How to Serve

Bitter greens can be served in many ways, including in soups, pastas, or as sides to proteins. When working with bitter greens, consider adding contrasting flavors:

  • Sweet vegetables: Bitter greens work incredibly well with sweet vegetables like roasted cubed sweet potato or squash.
  • Add acid: As a general rule, the more bitter the green, the more you want to consider pairing it with citrus (like this lemon garlic sauce).
  • Add strong flavors: Balance the bitterness with strong flavors, like spices, garlic, or salty ingredients like bacon, anchovies.
  • Add salt: Salt can help cut through bitterness.
  • Braise: If you want your kale to be very tender, you could braise them in bone broth for 1 hour on low heat. Braising is also a great way to reduce bitterness.

Roasted Brussels Sprouts with Balsamic Vinegar and Honey {AIP}

November 8, 2024 by sara 1 Comment

Why is it that roasted Brussels sprouts are always the first side dish to disappear on Thanksgiving? I guess when people experience the crispy, caramelized bits with honey and balsamic, there's no resisting.

Roasted Brussels sprouts coated with balsamic vinegar and honey plated with beef and cauliflower

Vegan | Gluten-Free | Low Carb | Paleo | AIP | Refined Sugar-Free

Roasted fresh Brussels sprouts only need a little sweetness and acid to take them up a notch--I like honey to mellow the bitterness and balsamic to add a tangy, caramelized flavor. When selecting Brussels sprouts, look for tightly packed, firm, green heads and err on the larger side because that way you can get the leaves to brown nicely. Smaller sprouts are sweeter but have a tendency to cook too quickly when roasted.

Roasting is my favorite meal prep technique for an AIP vegetable side dish and these techniques apply to many vegetables. For more ideas, try roasting cauliflower florets and then making my cauliflower puree.

[feast_advanced_jump_to]

🍯 Ingredients

  • 1 ½ pounds fresh (not frozen) Brussels sprouts
  • extra virgin olive oil or avocado oil
  • sea salt
  • white or dark balsamic vinegar
  • honey (be sure to only add this ingredient AFTER roasting as honey should not be heated as it can burn)

🔪 Instructions

Use a chef's knife to remove the stems and cut the Brussels sprouts in half. It's ok if the sizes are a bit different because I find that getting some extra crispy pieces is desirable.

Brussels sprouts halved and tossed with oil

Directly on a parchment lined baking sheet, toss the halved sprouts with 2 tablespoons of the oil and sprinkle the salt at a great height for even coverage. Roast, stirring every 5 minutes until tender, brown, and you see some of the small leaves getting crispy, about 20 minutes total.

💭 Top tip

Instead of relying on a timer to tell you when your Brussels sprouts are done, use your judgment and only pull them out of the oven when they have brown, crispy leaves on the outside (see below).

Roasted Brussels sprouts with honey and balsamic

Drizzle with oil, balsamic vinegar, and honey. Toss to coat evenly.

Taste and adjust salt, honey, and balsamic to your taste buds. Enjoy!

📋 Recipe

This is an AIP version of my Roasted Brussels Sprouts with Citrus, which contains miso (not AIP-compliant). While I've changed the oven temperature to shorten the cook time, the most important detail (tossing every 5 minutes) is my favorite technique and guarantees perfect Brussels sprouts every time.

Roasted until crispy Brussels sprouts with honey and balsamic

Roasted Brussels Sprouts with Balsamic Vinegar and Honey {AIP}

5 from 1 vote
Prep Time: 5 minutes minutes
Cook Time: 25 minutes minutes
Total Time: 30 minutes minutes
Prep Time: 5 minutes minutes
Cook Time: 25 minutes minutes
Total Time: 30 minutes minutes
Servings: 6 servings
Calories: 117kcal
Rate
Pin
Share
Print
Roasted until crispy and tender, these Brussels sprouts are great on their own but even better with a bit of honey and balsamic vinegar right at the end.
👪 If scaling this recipe, do not increase the salt. Keep in mind, you will still need to roast the sprouts in a single layer, so it may require roasting the sprouts separately (which will increase the overall cook time unless you have multiple ovens).

Ingredients

  • 1 ½ pounds Brussels sprouts halved, stems removed
  • 3 tablespoons avocado oil divided
  • ½ teaspoon sea salt
  • 1 tablespoon balsamic vinegar
  • 1 teaspoon honey

Instructions

  • Preheat the oven to 425℉ and make sure your oven rack is in the center. Line a baking sheet with parchment paper.
  • Directly on the parchment-lined sheet, toss the Brussels sprout halves with 2 tablespoons of the oil and the salt. Roast on the center rack, tossing every 5 minutes until tender, brown, and crispy--about 25 minutes.
  • Drizzle the roasted sprouts with the remaining tablespoon of oil, the balsamic vinegar, and the honey. Toss to coat. Taste and adjust seasoning if needed. Too bitter? Add more honey. Too bland? Add more salt and vinegar.

Notes

*If you have extra large Brussels sprouts, it's ok to quarter them. I don't mind a little uneven cooking because then you will get some extra crispy bits that way.

Nutrition

Serving: 1side serving | Calories: 117kcal | Carbohydrates: 12g | Protein: 4g | Fat: 7g | Saturated Fat: 1g | Polyunsaturated Fat: 1g | Monounsaturated Fat: 5g | Sodium: 223mg | Potassium: 445mg | Fiber: 4g | Sugar: 4g | Vitamin A: 855IU | Vitamin C: 96mg | Calcium: 49mg | Iron: 2mg

📖 Variations

Pork Belly: If you enjoy pork, consider roasting some diced pork belly with the Brussels sprouts. One year I did this for Thanksgiving and was met with rave reviews. For the pork belly variation, you should pre-cook the pork belly until slightly brown then proceed with the recipe (omit the oil altogether as the pork belly will provide plenty of lard).

air fryer: You can easily make this recipe in the air fryer and get a similar result.

bacon and maple syrup: If you'd like to swap the honey for bacon and maple, you can simply toss diced bacon with the halved sprouts (reduce the salt so as not to over-salt) and then toss with the balsamic and maple syrup at the end.

lemon-garlic sauce: This is a bright-tasting, extra saucy version where you roast as instructed and then toss with my lemon garlic sauce just before serving. SO GOOD!

Spice Things Up: If you've reintroduced pepper without issue, feel free to spice things up with some freshly ground black pepper or red chile flakes.

Frequently Asked Questions

How do you roast Brussels sprouts without getting soggy?

Leave plenty of space around the Brussels sprouts and spread them out in a single layer to avoid too much steam. You can even preheat your baking tray if you'd like to get them extra crispy.

Do you have to boil Brussels sprouts before roasting?

No. Brussels sprouts tend to get less bitter after roasting, so there's no need to boil them first.

Is it better to roast Brussels sprouts on foil or parchment paper?

Parchment paper is a better option for roasting because small amounts of aluminum can leach into food when cooking.

Can roasted Brussels sprouts be made in advance?

Yes. You can roast the sprouts according to the recipe and refrigerate them overnight. When serving, simply reheat in the oven at 425℉ to warm through. Serve hot.

Cauliflower Puree {AIP, Gluten-Free, Dairy Free}

October 29, 2024 by sara 1 Comment

When properly salted, cauliflower puree is rich, savory, and under-rated. When looking for an alternative to mashed potatoes, I always recommend cauliflower puree for it's thick, creamy texture and mild taste.

pureed cauliflower
[feast_advanced_jump_to]

White potatoes are not allowed on the Autoimmune Protocol diet because they are considered inflammatory, are high in sugar, and can be cross-reactive for individuals with gluten sensitivity.

While it may be possible to reintroduce them at some point, it's best to avoid them in the beginning. Cauliflower, however, is autoimmune friendly because it's gentle on the gut and won't spike your blood sugar. I've found that it can be difficult to feel full on AIP so it's really comforting to have something thick and filling that pairs well with different types of protein and vegetable sides (for example, these Roasted Brussels sprouts with balsamic and honey).

whole head of cauliflower

🔪 Instructions

To make it, you take cooked cauliflower (boiled is faster; roasted is more flavorful) and pulse it in a food processor. It will get thick and creamy in a way that resembles mashed potatoes.

cooked cauliflower

While most people associate pureed vegetables with fine dining, it's incredibly easy to make it yourself. As you can see, you just blend it, tasting as you go for fat, salt, and acid.

cauliflower pureed in the food processor

You can really make this recipe your own and adjust the thickness depending on how you plan to use it.

thick and creamy cauliflower puree

You can achieve a thick puree following my recipe template but feel free to thin it out a bit by adding chicken stock.

🧂 Seasoning

While salt provides the main seasoning in this recipe, umeboshi paste is a truly magnificent Japanese ingredient that I hope you'll try. In culinary school, we used umeboshi paste in a lot of vegan recipes as a replacement for cheese because it's kind of funky, super salty, and small amounts go a long way to making food taste really good.

For garnish, try:

  • fresh herbs (parsley, chives, green onions, tarragon)
  • crumbled bacon
  • capers
  • freshly shaved horseradish with lemon juice

📋 Recipe

This is adapted from my original Cauliflower Mash, which contains dairy to make it AIP compliant.

cauliflower puree with chives

Cauliflower Puree {AIP, Gluten-Free, Dairy Free}

5 from 1 vote
Prep Time: 5 minutes minutes
Cook Time: 15 minutes minutes
Total Time: 20 minutes minutes
Prep Time: 5 minutes minutes
Cook Time: 15 minutes minutes
Total Time: 20 minutes minutes
Servings: 4 people
Calories: 135kcal
Rate
Pin
Share
Print
Whipped until creamy, this cauliflower puree is practical, indulgent, and a healthy AIP side dish to fish, steak, or chicken.

Equipment

  • 1 Food Processor

Ingredients

  • 1 head cauliflower roughly cut into florets (about 3 pounds)
  • 6 garlic cloves smashed and peeled
  • 3 tablespoons olive oil lard, ghee, avocado, or palm oil as substitutes
  • ½ teaspoon umeboshi plum paste (optional) this is fermented and provides a slightly funky, sour flavor that is meant to resemble the taste of cheese (use lemon instead)
  • sea salt and pepper (if tolerated)

Instructions

Cook the Cauliflower

  • Place the cauliflower and garlic cloves in a Dutch oven or large pot with ½ cup water (or chicken stock for more flavor), two pinches of salt, and olive oil. Cover and poach over medium-high heat until "fall apart" tender, about 15 minutes.
    Note: If you don't cook your cauliflower enough, your puree will be grainy.

Puree the Cooked Cauliflower

  • In a food processor fitted with a metal blade, work in batches to blend the cooked cauliflower and garlic cloves until smooth.

Season and Serve

  • Taste and make adjustments to your taste preferences, adding salt, fat, or lemon, as desired. If you can find umeboshi paste, I love this ingredient for it's fermented, salty flavor because it can sometimes replace parmesan.

Nutrition

Serving: 1scoop | Calories: 135kcal | Carbohydrates: 9g | Protein: 3g | Fat: 11g | Saturated Fat: 2g | Polyunsaturated Fat: 1g | Monounsaturated Fat: 8g | Sodium: 44mg | Potassium: 448mg | Fiber: 3g | Sugar: 3g | Vitamin A: 0.4IU | Vitamin C: 71mg | Calcium: 40mg | Iron: 1mg

🥗 Side dishes

This puree tastes best as a side to protein. It's versatile, so you can try almost anything:

  • Baked Pork and Beef Meatballs
  • Seafood such as salmon, halibut, sea bass, or scallops
  • Thanksgiving turkey with mushroom gravy
  • Grilled steak with greens

📖 Variations

Instead of boiling the cauliflower in water, you can increase the flavor and nutrition by simmering in chicken stock. If you have an extra hour, I recommend roasting the cauliflower, which adds caramelized notes, then pureeing to get a roasted cauliflower puree.

Lemon Garlic Sauce {AIP, Dairy Free}

October 29, 2024 by sara 1 Comment

This smooth sauce is so wonderfully fragrant with lemon and garlic flavor, it's hard to believe it's AIP. It tastes positively amazing on EVERYTHING. It's especially lovely with a few pinches of fresh herbs and can be used as a:

  • salad dressing
  • marinade for any protein or vegetables
  • finishing sauce for pasta or seafood
aip lemon garlic sauce blended
[feast_advanced_jump_to]

Featured Comment

This is my new favorite thing! And so easy. I’ve added it to pasta with some capers and olives with rosemary, thyme and crushed fennel seeds. So good. And used it as a salad dressing. Very versatile.

-Natalie

When I make this sauce, I almost always double the recipe so I have it on hand. It can store for at least a week in the refrigerator. If it separates, you can just run it back through the blender and it will emulsify again without issue. You can even freeze it.

One of the questions I've received often with this recipe is whether this is a sauce for cooking. I HAVE cooked with this sauce, but one thing to be aware of is what can happen to lemons as they cook (they can become bitter). If you are going to heat this sauce, I recommend heating only to warm it briefly; you can even whisk in a teaspoon of tapioca starch to thicken it.

🥘 Ingredients

lemons on cutting board with garlic, avocado oil, and salt

💭 Top tip

Another question I receive frequently is about the oil. I originally made this recipe with olive oil but noticed after some time that the flavor would be incredibly bitter sometimes. Apparently, when you blend olive oil, you aerate it and it becomes super bitter.

Therefore, I only recommend that you blend this recipe with avocado oil, which will remain neutral in taste even after blending.

📖 Variations

If you only have olive oil, it totally works to mix it by hand with a whisk in a bowl. My tip for hand mixing is to turn the garlic into a mince and then use the side of your knife to turn it into a paste. That way, your garlic gets worked into the mixture as best as possible (see video tutorial below).

🎥 Video (Watch 1min50sec How-To Make Garlic Paste)

📋 Recipe

My original Essential Lemon Garlic Sauce contains red chile flakes but I've modified it to be nightshade free for AIP. I've honestly made this sauce on AIP hundreds of times and experimented with every fresh herb with wild success. It's SO GOOD!

Lemon Garlic Sauce {AIP, Dairy Free}

5 from 1 vote
Prep Time: 5 minutes minutes
Cook Time: 0 minutes minutes
Total Time: 5 minutes minutes
Prep Time: 5 minutes minutes
Cook Time: 0 minutes minutes
Total Time: 5 minutes minutes
Servings: 6 servings
Calories: 112kcal
Rate
Pin
Share
Print
My most popular recipe made AIP! Normally, this lemon sauce contains red chile flakes, but here, I've removed the nightshades and show you some ways to incorporate whatever you have on hand.

Equipment

  • blender

Ingredients

  • ½ cup fresh squeezed lemon juice from 1 ½ large lemons or 4 small, depending on the juiciness
  • 2 large cloves garlic smashed into a paste or roughly chopped
  • ½ teaspoon sea salt
  • ⅓ cup avocado oil (olive oil can become bitter when blended, use avocado oil if you want to avoid bitterness)
  • ¼ teaspoon fresh herbs (optional) oregano, rosemary, tarragon, thyme, or parsley

Instructions

  • Combine all the ingredients in a blender. Pulse on high for up to 1 minute until no garlic chunks remain and the dressing is very smooth and pale yellow. Use at room temperature or store in the fridge for up to 1 week.
    Note: If you do not want to blend, you can whisk but you will have to smash the garlic into a paste for the very best texture.

Video

Nutrition

Calories: 112kcal | Carbohydrates: 2g | Protein: 1g | Fat: 12g | Saturated Fat: 2g | Sodium: 196mg | Potassium: 21mg | Fiber: 1g | Sugar: 1g | Vitamin A: 25IU | Vitamin C: 8mg | Calcium: 2mg | Iron: 1mg

🥗 Side dishes

I highly recommend combining the flavors of this sauce with broccoli rice or a chiffonade salad made of collard greens or lacinato kale. Another side I love is air fried sweet potato fries or a burger served in a lettuce bun with roasted mushrooms. On my to-do list is sharing a recipe for slow cooker chicken thighs finished with this sauce, capers, and cooked kale.

If you happen to have some AIP English Muffins in the freezer, an amazing breakfast or snack is toasted English muffin, avocado sliced thinly, and a drizzle of this sauce on top.

Chicken Skewers with Tigernut Butter Sauce {AIP, Gluten-Free, Nut Free}

October 28, 2024 by sara Leave a Comment

Tigernut butter is the stand-in for peanut butter in this Asian-ingredient AIP chicken dish. It's savory, creamy, and especially fresh with a cilantro garnish.

tigernut butter grilled chicken skewers

If you don't have tigernut butter, you can mix tigernut flour with avocado oil to make your own peanut-like butter at home (it will be a tad gritty, unless you have a high speed blender). Here's my homemade tigernut butter recipe.

While these skewers take no time to cook, for the very best flavor, I recommend marinating the chicken for 30 minutes then grilling the skewers to develop some charred areas.

[feast_advanced_jump_to]

On the AIP diet, I often find myself craving rich, fatty foods like peanut butter and really missing a variety of sauces so this recipe really speaks to me (and hopefully you, too)!

Plus, you can make it with simple pantry ingredients (tigernut flour and avocado oil) that you might already have on hand.

chicken dipped in tigernut butter sauce on fork

🎥 Video

🔪 Instructions

Cut the chicken into large cubes and then massage it with the marinade while you preheat the grill. Chicken only needs to marinate for 30 minutes but you could also marinate it overnight.

chicken marinating in bowl with garlic, lemongrass, and coconut aminos

One thing I love about this sauce is that you can mix it straight in your measuring container and you don't even have to cook it. Don't worry about any graininess. You can use tigernut flour (¼ cup plus water) or tigernut butter (⅓ cup) in this recipe.

tigernut butter sauce

💭 Top tip

When you grill the chicken, be sure not to move it around or it won't get the color (and flavor) you are after. I recommend about 5 minutes per side. Once the chicken is done, you will apply the tigernut butter sauce (off the grill) because it's the kind of sauce that will burn easily if heated.

chicken skewers cooking on the grill

I just generously pour the sauce over the chicken skewers and then serve right away with chopped cilantro.

plated chicken skewers with tigernut butter sauce

📋 Recipe

This recipe is adapted from The Frayed Apron Lemongrass Chicken Satay, a recipe I developed that uses peanut butter. I've modified the recipe to be AIP-compliant and peanut free.

chicken skewers grilled with tigernut butter sauce

Chicken Skewers with Tigernut Butter Sauce {AIP, Gluten-Free, Nut Free}

No ratings yet
Prep Time: 10 minutes minutes
Cook Time: 15 minutes minutes
Marinate: 30 minutes minutes
Total Time: 55 minutes minutes
Prep Time: 10 minutes minutes
Cook Time: 15 minutes minutes
Marinate: 30 minutes minutes
Total Time: 55 minutes minutes
Servings: 4 skewers
Calories: 370kcal
Rate
Pin
Share
Print
This Asian-inspired sauce features a pantry ingredient you might have on hand if you're doing AIP-tigernut flour. It will remind you of a peanut sauce and pairs beautifully with grilled chicken.

Ingredients

Tigernut Butter Sauce

  • ¼ cup tigernut flour
  • 3 tablespoons avocado oil
  • 1 tablespoon coconut sugar
  • 2 teaspoons apple cider vinegar
  • 2 teaspoons coconut aminos
  • 1 garlic clove minced
  • ½ cup warm filtered water

Chicken Marinade

  • 3 chicken breasts about 1 ½ pounds
  • 3 garlic cloves minced
  • 1 stock lemongrass bottom ⅓ (tender inner layer), minced
  • 1 tablespoon coconut aminos
  • 1 tablespoon avocado oil
  • pinch sea salt

Garnish

  • 1 ounce fresh cilantro chopped

Instructions

Prepare

  • Soak 4 bamboo skewers in water for 30 minutes or soak 4 stocks thin lemongrass to use those as the skewers. Note: If using metal skewers, no need to soak.
  • Preheat the grill to medium high heat.

Whisk the tigernut butter sauce

  • In a mixing bowl, combine the tigernut flour, avocado oil, coconut sugar, apple cider vinegar, coconut aminos, minced garlic, and water. Whisk until smooth. Taste and add salt to taste.

Chicken Skewers

  • Cut the chicken breast into 2-inch by 2-inch cubes. Set in a bowl and cover with the minced garlic, minced lemongrass, coconut aminos, avocado oil, and sea salt. Massage and set aside to marinate for 30 minutes.
  • Skewer the chicken and place kabobs onto clean grill grates. Do not move. Allow to cook for 5 minutes then rotate with tongs (chicken is fully cooked when the internal temp reaches 165℉). Remove and sauce immediately with the tigernut butter sauce. Top with cilantro and serve hot.

Nutrition

Serving: 1skewer | Calories: 370kcal | Carbohydrates: 10g | Protein: 37g | Fat: 18g | Saturated Fat: 3g | Polyunsaturated Fat: 3g | Monounsaturated Fat: 11g | Trans Fat: 0.02g | Cholesterol: 108mg | Sodium: 348mg | Potassium: 682mg | Fiber: 0.3g | Sugar: 4g | Vitamin A: 529IU | Vitamin C: 5mg | Calcium: 19mg | Iron: 3mg

🥗 Side dishes

For a balanced dinner, I'd serve these chicken skewers as the main entrée or appetizer and include a quick side of cucumbers or sautéed broccoli with garlic (or broccoli rice) and a spritz of lemon juice. For dessert, I might enjoy something refreshing like melon with fresh mint or maybe a sparkling water with a scoop of aip vanilla ice cream!

📖 Variations

  • tigernut flour vs tigernut butter: This recipe requires the equivalent of ⅓ cup tigernut butter so you can make it yourself or buy it. To make it, you simply combine the tigernut flour with a neutral oil (avocado oil). You could use coconut oil, melted, if that's what you have on hand.
  • chicken vs pork: You could easily swap pork for the chicken. I even think steak would work well with this sauce.
  • vegetable plus kabobs: You could add Portobello or cremini mushrooms, pineapple, or onion to the chicken marinade and bake vegetable chicken kabobs for a complete meal
  • grilling vs roasting vs air frying: I think grilling provides a ton of flavor but if you want to roast the chicken or fry it in a neutral oil, that's fine, too. Just be sure to add the sauce AFTER you've cooked the chicken.
  • Chicken thighs vs tenders vs breasts: You can use whatever section of the bird you want in this recipe as long as you cook the meat to 165℉.
  • skewers vs lemongrass: If you can't find lemongrass, you can totally use metal or bamboo skewers, the latter require 30 minutes to soak so they don't burn. If you don't have skewers, you can place the entire chicken breast on the grill and then cut it after it's fully cooked. If you cut it first, it may fall through the grill grates.

Big Batch Nomato Sauce {AIP Nightshade Free Marinara}

October 27, 2024 by sara 1 Comment

This nightshade free marinara sauce is the epitome of natural gourmet. Enjoy it over pasta or freeze it and you'll have tomato-free sauce for your favorite recipes.

nightshade free marinara sauce in jars
[feast_advanced_jump_to]

Red sauce is one of the five mother sauces so if you can't have tomatoes, there are countless implications (e.g. no chili, pasta marinara, pizza, plus no condiments like ketchup and barbecue sauce to name a few).

diced butternut squash, beets, and carrots in the slow cooker

🧂 Seasoning

When you think about what makes a red sauce, it's the acidity, depth, and freshness. For my nomato version, we season with garlic, onion, dried basil and oregano, and salt.

Rather than browning the ingredients which can add a bittersweet taste, I recommend sautéing the onions and garlic in plenty of olive oil. In place of tomatoes, there are a variety of mellow, sweet vegetables that ultimately lack acidity on their own (but are, nevertheless, there for texture and nutrition).

💭 Top tips

  • In testing this sauce, I like the combination of red wine vinegar in the beginning to deglaze and then lemon juice right at the end until the flavor of the sauce dances on the tongue.
  • Please for the love of god, you must salt your food at the beginning of the cooking process. Your cooking will never reach it's full potential if you don't.
  • Fresh herbs, such as the Italian herbs listed above, should be added only when serving as they are delicate and will lose their aroma when cooked.

🔪 Instructions

While you could make this sauce quickly in the instant pot or on the stovetop, a slow cooker will babysit your ingredients (for 5 or 6 hours) while you walk away and come back to FLAVOR.

vegetables cooked until tender after 5 hours in slow cooker

When the vegetables are tender, you can easily blend them directly in the slow cooker if you have an immersion blender. If you need to transfer to a blender, you can do this in batches. Just be sure to cover the lid of the blender with a kitchen towel so as not to burn yourself.

nomato sauce in the blender

What's truly interesting about this sauce is how novel AND familiar it is at the same time. As you might expect, there's an earthiness right out of the slow cooker but this sauce somehow tastes even better the next day with a little added salt and lemon juice.

Ultimately, this is not a true likeness to a tomato sauce. It is, however, a brand new and exciting way to enjoy carrots and beets. I can honestly say it's going to be a staple in my diet (AIP or no AIP) indefinitely because I love when food tastes good and is good for me.

🥘 Ingredients

  • extra virgin olive oil
  • onions: yellow or white
  • garlic cloves: 12 cloves or 12 teaspoons of minced garlic
  • sea salt: especially good for sauce making is Celtic gray sea salt
  • freshly ground black pepper (optional): omit if in the elimination phase of AIP
  • red wine vinegar: check the ingredients to avoid buying one with preservatives
  • 3 bay leaves: adds a slightly floral depth of flavor; must be removed before blending
  • carrots: best substitute would be parsnips
  • butternut squash: any pumpkin will work as a substitute
  • beets: orange-yellow beets will work but red will give the sauce a reddish hue
  • Italian herbs (oregano, marjoram, thyme, basil, and parsley): dried or fresh may be used
  • lemons: used to impart an acidic quality to the sauce at the end

🎥 Video

📋 Recipe

I aspire to add canning instructions at some point in the future. If you pressure can this recipe please let us know how it turns out!

nomato sauce in jar

Big Batch Nomato Sauce {AIP Nightshade Free Marinara}

5 from 1 vote
Prep Time: 1 hour hour
Cook Time: 6 hours hours
Total Time: 7 hours hours
Prep Time: 1 hour hour
Cook Time: 6 hours hours
Total Time: 7 hours hours
Servings: 28 servings (½ cup each)
Calories: 63kcal
Rate
Pin
Share
Print
Yield: approximately 14 cups (more or less depending on the size of your vegetables)
This AIP pasta sauce is a real treat and makes it easy to enjoy a pantry dinner! Simply jar or freeze the extra sauce and reheat when you need it.

Ingredients

  • ½ cup extra virgin olive oil
  • 2 medium yellow onions large dice
  • 12 garlic cloves chopped
  • 2 teaspoons sea salt plus more to taste
  • ½ teaspoon freshly ground black pepper omit for AIP
  • 3 tablespoons red wine vinegar
  • 3 bay leaves for nuanced flavor
  • 4 cups water
  • 4 medium carrots peeled, large (¾-inch) dice
  • 1 medium butternut squash peeled, large (¾-inch) dice
  • 2 large beets peeled, large (¾-inch) dice
  • 2 tablespoons dried Italian herbs oregano, marjoram, thyme, basil, and parsley
  • 4 lemons juiced

Instructions

  • Sweat the aromatics. In a slow cooker on the saute setting, begin the process of sweating by combining the olive oil, yellow onions, garlic, salt, and pepper. Stir occasionally until you see the onions are translucent, about 5 minutes. Deglaze with the red wine vinegar.
  • Braise veggies. Select the low heat setting on your slow cooker then layer in the bay leaves, water, carrots, squash, and beets. Slowly cooking fresh vegetable in a braising liquid is a great way to build layers of flavor for sauce making.
  • Immersion blend and finish seasoning sauce. Your vegetables need to be tender and how long this takes depends on your slow cooker. Once you can easily pierce each vegetable, remove the 3 bay leaves then use an immersion blender to puree into a thick sauce. Stir in the Italian herbs and the lemon juice to taste. If the beet flavor is overpowering, you can add more salt. Ladle the sauce into mason jars and refrigerate for up to 5 days or cool and freeze in airtight bags for up to 3 months.

Nutrition

Serving: 1½ cup portion | Calories: 63kcal | Carbohydrates: 7g | Protein: 1g | Fat: 4g | Saturated Fat: 1g | Polyunsaturated Fat: 0.5g | Monounsaturated Fat: 3g | Sodium: 181mg | Potassium: 184mg | Fiber: 2g | Sugar: 2g | Vitamin A: 4315IU | Vitamin C: 16mg | Calcium: 32mg | Iron: 1mg

🥗 Side dishes

If serving this vegetable-based sauce over cassava pasta or zoodles, consider adding a protein side like these baked pork and beef meatballs. For garnish, I love fresh basil, freshly ground black pepper (if tolerated), or a combination of parsley-olives-capers for a puttanesca spaghetti squash dish.

marinara without tomatoes served over pasta

📖 Variations

celery: try adding up to 2 celery stalks

carrots: If you have a carrot allergy, I suggest parsnips, which are similar in flavor and texture, as a substitute.

olives or capers: boost the acidity to add even more body to the sauce just before serving

meat: after blending, you could make these baked meatballs or try adding grass-fed ground beef directly to the sauce and simmering until fully cooked

red wine: if you like a ragout sauce, you could try replacing half of the water with red wine

fish sauce: just like with classic red sauce, you can add depth (not particularly a fishy flavor) by incorporating a tiny amount of fish sauce or an anchovy

👪 Serving size

A serving of 1 cup cooked pasta would get about ½ cup pasta sauce. This recipe yields = 14 cups or 28 (½-cup) portions.

🍽 Equipment

I recommend a slow cooker aka crock pot that also has the sauté setting. If using an instant pot, you will use the "slow cook" settings. If you want to make this recipe on the stovetop, you can try making it in an enamel coated large Dutch oven with the lid on and set the heat to low.

Baked Pork and Beef Meatballs {AIP, No Egg, No Breadcrumbs}

October 26, 2024 by sara Leave a Comment

You could be 30 minutes away from rich, moist AIP meatballs for dinner. That's the good news. Better yet, these meatballs taste undetectably like the kind with eggs and breadcrumbs, yet there's no dairy, no gluten, and definitely no eggs. How?

pork and beef aip meatballs baked
[feast_advanced_jump_to]

🎥 Video

💭 Top tips

The secret in making AIP meatballs is extra garlic (for spiciness, flavor, and moisture) and pork, which is rich in fat and works well with ground beef.

These meatballs contain so much natural moisture that it will be difficult to develop browning. My favorite way to these to caramelize is to bake them from frozen on a sheet tray coated with olive oil.

aip pork and beef meatball served with pasta

🧂 Seasoning

While I'm really happy with these meatballs with salt + dried Italian herbs + garlic + onion, I think a small amount of fresh herbs (minced parsley or basil) would dial these up a notch.

🥘 Ingredients

  • ground pork: provides moisture and fat and gives these meatballs a nuanced flavor profile
  • ground beef: lean beef works and up to 80% ground beef
  • sea salt: I think the right amount of sea salt in the beginning is key to creating a tasty meatball since it's hard to properly salt them once they're cooked
  • olive oil: such as extra virgin is optional for more richness
  • onion: white or yellow onion, just be sure to mince (chop very, very small)
  • garlic cloves: about 4 or up to 6 if small (4 teaspoons minced)
  • Italian seasoning: dried oregano, marjoram, thyme, basil and parsley or up to 2 tablespoons fresh herbs, minced
  • tapioca starch or arrowroot powder: this is there as a binder to help the meatballs stay together as they bake

📋 Recipe

This recipe is adapted from my popular Dutch oven meatball recipe to remove the eggs and breadcrumbs.

baked pork beef meatballs served with nomato sauce and cassava pasta

Baked Pork and Beef Meatballs {AIP, No Egg, No Breadcrumbs}

No ratings yet
Prep Time: 5 minutes minutes
Cook Time: 20 minutes minutes
Total Time: 25 minutes minutes
Prep Time: 5 minutes minutes
Cook Time: 20 minutes minutes
Total Time: 25 minutes minutes
Servings: 30 meatballs
Calories: 83kcal
Rate
Pin
Share
Print
I'm happy with these meatballs. The pork contains plenty of fat and moisture so there's really no telling these are allergy-friendly. Tapioca or arrowroot are used to provide some binding.

Ingredients

  • 1 pound ground pork
  • 1 pound ground beef
  • 1 ¼ teaspoons sea salt
  • 2 teaspoons olive oil optional for more richness
  • ½ cup onion minced
  • 4 garlic cloves minced
  • 2 teaspoons Italian seasoning dried or up to 2 tablespoons fresh herbs, minced
  • 1 ½ teaspoons tapioca starch or arrowroot powder

Instructions

  • Preheat the oven to 400℉. Line a baking sheet or Dutch oven with parchment paper.
  • Combine all the ingredients and mix with your hands to distribute, about 1 minute of mixing.
  • Roll the mixture into about 30 small (1 ½-inch wide meatballs).
  • Place meatballs on top of prepared baking pan. Bake in a single layer until the internal temperature registers 160℉, about 20 to 25 minutes.

Nutrition

Serving: 1meatball | Calories: 83kcal | Carbohydrates: 1g | Protein: 5g | Fat: 7g | Saturated Fat: 2g | Polyunsaturated Fat: 0.4g | Monounsaturated Fat: 3g | Trans Fat: 0.2g | Cholesterol: 22mg | Sodium: 116mg | Potassium: 91mg | Fiber: 0.1g | Sugar: 0.1g | Vitamin A: 3IU | Vitamin C: 0.4mg | Calcium: 8mg | Iron: 0.5mg

📖 Freezer Instructions

  • You could freeze these and bake them later. Bake from frozen at 400℉ for 30 to 35 minutes or until the temperature inside registers 160℉.
  • You can also bake these and freeze later (my preference). Simply reheat at 400℉ and serve when they are hot and slightly brown/caramelized on the bottom.
cooked then frozen meatballs

I actually think these meatballs develop the best browning when baked, frozen, and then baked from frozen with a coating of olive oil (see picture below).

baked from frozen meatballs

👪 Serving size

A serving size could be 2 to 6, depending on how hungry you are. This recipe will yield approximately 30 meatballs, about 1 ½-inches wide. I've calculated the nutrition based on 1 meatball so you can easily calculate the nutrition based on the number you eat.

🥗 Side dishes

As you can see, I've served these with a Nomato Sauce {Nightshade Free Marinara} and Penne Cassava pasta for a quick AIP dinner.

meatballs and nomato sauce freezer meal

Maple Sandwich Cookies {AIP, Tigernut Flour, Refined Sugar-Free}

October 25, 2024 by sara Leave a Comment

Can you believe these AIP maple cookies contain nearly half the daily fiber recommended for adults? These wholesome sandwich cookies get their toothsome texture and a whopping 13 grams of fiber from tigernut flour (ground tigernut tubers).

I love that!

maple cream filling sandwiched between maple cookies
[feast_advanced_jump_to]

My theory is that bread bakers actually make some of the very best cookies. I assume this has something to do with their knowledge of whole grain flours.

While these cookies are grain-free and gut happy, the texture and flavor have an artisanal quality thanks to a variety of whole ingredients. They're nothing like commercial maple sandwich cookies, which typically contain refined sugars and flours.

maple cookies filled with maple cream filling

For my husband these cookies evoke, What am I going to do if I can't eat that every day?

At last, please feel free to weigh in on these healthified cookies. I'm sure to get mixed opinions!

🎥 Video

⏲️ Baking time

My cookies were done after 7 minutes in a 350 degree oven. At 8 minutes, they burned. Every oven is unique and you should set a timer to monitor your cookies carefully in case they are ready sooner.

🥘 Ingredients

  • maple syrup: grade A or B (more maple flavor) real maple syrup
  • tigernut flour: I used IYA Foods Brand tigernut flour and provide the weight based on my own testing in the recipe card; if you are new to tigernut flour, it's somewhat similar in flavor and texture to oat flour or almond flour
  • coconut butter: not the oil, the ground up coconut is what I've used. I like to buy coconut butter in a large tub because it's really hard to scoop out of a small jar.
  • vanilla extract or maple extract: nothing artificial, get the real deal
  • sea salt: avoid iodized salt on the AIP diet
  • maple crystals: also known as "maple sugar," it's pricey but important to the overall flavor (use "maple cream" instead if you want)
  • palm oil: only used in the filling (use maple cream if you want to avoid using palm oil) or use coconut oil (refined is neutral in taste)

🔪 Instructions Overview

You will make a sticky cookie dough, which needs to be wrapped and chilled. Next, you will portion the dough into 12 roughly equal-sized balls. Chill again. Place dough balls between parchment paper and roll flat. Use a maple leaf cookie cutter to stamp. Remove discard dough and reserve to make 1 extra cookie. Chill again.

maple cookies baked for 7 minutes

Score cookies (optional) then bake at 350F until the edges begin to brown (see picture above). Be sure to remove cookies before they turn black (see below picture of over-cooked cookies).

maple cookies burnt around edges baked for 8 minutes

Cool. Make maple cream filling (maple crystals+softened palm oil) or use maple cream for filling.

real maple cream filling in bowl

Spread gently onto cooled cookies then press together.

maple cream filling spread over cookies

💭 Top tips

  • Instead of using measuring cups, use a scale to weigh your ingredients. That way, if something goes wrong, it will be easier to troubleshoot.
  • Chilling your dough is the only way to get great results.
  • Please keep a close eye on these cookies as they bake. You want the edges to brown a bit but if they start to blacken, that's too far.

📋 Recipe

aip maple cookies with maple cream filling

MAPLE CREAM SANDWICH COOKIES {AIP, Tigernut Flour, Refined Sugar-Free}

No ratings yet
Prep Time: 30 minutes minutes
Cook Time: 14 minutes minutes
Total Time: 44 minutes minutes
Prep Time: 30 minutes minutes
Cook Time: 14 minutes minutes
Total Time: 44 minutes minutes
Servings: 13 sandwich cookies
Calories: 286kcal
Rate
Pin
Share
Print
I find that chilling the dough throughout the rolling, stamping, and baking process makes it easier to handle and results in more clearly defined edges. This recipe yields 12 cookies (baking 6 per tray) and then an additional cookie from the excess dough. You will likely have extra filling leftover. If you prefer, please feel free to use maple cream as your filling.

Ingredients

Cookie Ingredients:

  • 2 cups (224 grams) tigernut flour
  • ½ cup (156 grams) maple syrup
  • ½ cup (67 grams) coconut butter if very hard, recommend softening for 10 seconds in microwave on high
  • 2 teaspoons (10 grams) vanilla extract or maple extract
  • Pinch sea salt

Maple Filling (or use maple cream)

  • ⅔ cup (108 grams) maple sugar blended into a fine powder
  • ⅔ cup (125 grams) palm oil melted partially until soft (microwave on high for 30 seconds)
  • 1-2 pinches sea salt

Instructions

  • Make cookie dough. Combine all the cookie ingredients in a mixing bowl. Mix to form a slightly sticky dough. Chill for 5 minutes.
  • Roll chilled dough and stamp. Arrange a baking pan lined with parchment paper and divide the dough into 12 roughly equal size balls weighing approximately 37 grams each. Using parchment paper between the rolling pin and the dough, roll just larger than your cookie cut then use a maple leaf cookie cutter to stamp down.
    Notes: Wrapping the dough and chilling for 2 hours can help with the stamping process if your dough is too sticky. You can also dip your cookie cutter in maple crystals and do the stamping on the baking sheet lined with parchment or silplat to prevent having to transfer the fragile shaped dough. Your baking tray should hold 6 cookies and so you will bake the first batch while the other batch chills in the fridge. When stamping, try to wiggle the cookie cutter to form well-defined edges that will help you remove the excess dough.
  • Chill maple cut outs. Once the cookies are formed, chill for 15 minutes prior to baking. Meanwhile, preheat the oven to 350F.
  • Bake and watch carefully. Remove maple leaf stamped dough from the fridge (optional step: score veins in the dough with the handle of a spoon). Bake until the edges begin to brown, about 7 minutes (more or less depending on your oven and how cold the dough is). Let them cool completely before handling or they will break.
    Note: During testing, I noticed that the edges burned when overcooked by just 1 minute.
  • Make maple filling. For the maple cream filling, whisk together the powdered maple crystals, softened palm oil, and salt. Note: It’s ok to reuse the mixing bowl you already dirtied. You can refrigerate this mixture for 5 minutes to thicken it for a spreadable consistency.
  • Spread maple mixture onto cookies and press together. Using an offset spatula or a piping bag, gently apply a layer of the maple cream mixture on half of the cookies. Use the remaining half to create little sandwiched maple leaf cookies. Allow to set for 20 minutes (the palm oil will hold up better when it isn't warm). Enjoy!

Nutrition

Serving: 1sandwich cookie | Calories: 286kcal | Carbohydrates: 32g | Protein: 2g | Fat: 18g | Saturated Fat: 8g | Polyunsaturated Fat: 1g | Monounsaturated Fat: 4g | Sodium: 34mg | Potassium: 68mg | Fiber: 13g | Sugar: 18g | Vitamin C: 0.1mg | Calcium: 26mg | Iron: 7mg

🥗 Side dishes

Since this is a Fall AIP cookie recipe, you could serve these for Thanksgiving or Christmas with some homemade coconut milk nog (use ground mace in place of nutmeg for AIP). You could also try using these as a garnish piece by sticking the cookie on top of a scoop of AIP vanilla ice cream.

📖 Variations

  • You could save time on the filling and use maple cream instead. If you try it, let me know how that turns out for you.
  • If you would like to substitute coconut oil for the palm oil in the filling, I'd go with refined coconut oil, which has a neutral taste.
  • skip the sandwiching step and just serve each cookie with frosting and you get 26 portions that way

👪 Serving size

Recipe will yield 13 sandwich cookies. A portion is calculated to be 1 sandwich cookie (nutritional info provided above)

🍽 Equipment

  • Rolling Pin
  • Maple Cookie Cutter
  • Offset Spatula
  • Baking Sheet
  • Parchment Paper

🧂 Seasoning

Vanilla extract or maple extract provide concentrated flavor to the cookie dough.

Broccoli "Rice" {AIP, Dairy Free, Gluten-Free}

October 14, 2024 by sara Leave a Comment

Let's be honest, there's really no great substitute for rice on the AIP elimination diet. Yet, this riced broccoli stands on its own merits for being:

  • highly nutritious
  • anti-inflammatory
  • pretty tasty with a little fat, salt, and acid
heads of broccoli
[feast_advanced_jump_to]

Best of all though, it only takes a few minutes to make it!

🔪 Instructions

This recipe starts with a whole head of broccoli or cauliflower. You will need a food processor fitted with a metal blade.

To prep the broccoli, simply cut the head in half and trim away the bottom of the stem if it seems tough. Place one half head broccoli in the food processor at a time and pulse it until you achieve a rice-like texture (see below picture).

While rice can take 30 minutes to an hour to cook, broccoli "rice" only gets cooked for about 1 to 2 minutes, just long enough to tenderize it and infuse it with flavor.

This is what it looks like after it's been cooked:

cooking the broccoli rice

Notice how the color remains vibrant if you cook it quickly. I point that out because color is a key indicator of nutrition, and I always think food tastes better when savoring how good it is for you.

📋 Recipe

cooked broccoli rice

Broccoli "Rice" {AIP, Dairy Free, Gluten-Free}

No ratings yet
Prep Time: 5 minutes minutes
Cook Time: 3 minutes minutes
Total Time: 8 minutes minutes
Prep Time: 5 minutes minutes
Cook Time: 3 minutes minutes
Total Time: 8 minutes minutes
Servings: 6 people
Calories: 99kcal
Rate
Pin
Share
Print
This sautéed broccoli is flavorful and comes together in 5 minutes.

Ingredients

  • 1 large head broccoli or 2 small heads
  • 3 tablespoon olive oil or avocado oil
  • 1 large clove garlic minced
  • 2 tablespoon lard unsalted butter, ghee, olive oil, or bacon fat
  • 1 teaspoon salt
  • freshly ground black pepper if tolerated
  • lemon optional

Instructions

Rice the Broccoli

  • Rinse and trim the stem of the broccoli so that 2-inches remain. Break down the broccoli into large sections. Place half of the broccoli at a time into a food processor fitted with a metal blade. Pulse just until no large pieces remain - for a texture roughly resembling rice.

Sauté Broccoli Rice

  • Heat a large skillet over medium-high heat with the olive oil. Add the garlic and stir for 30 seconds until aromatic. Do not let the garlic develop any color.
  • Stir in the broccoli rice along with your preferred fat, salt, and a few grinds of black pepper (if tolerated). Cook until the fat is melted and the broccoli is tender - taste and remove quickly because the broccoli will continue to steam cook. Enjoy hot and fresh with lemon juice or as a side to chicken or fish.

Notes

Nutrition is calculated with lard.

📖 Variations

  • You can use this same recipe with cauliflower.
  • Cooking with Bacon vs. Bacon Fat: If you would like to incorporate bacon fat, you can use 1 strip of bacon, diced at the very beginning. Proceed with the garlic, broccoli rice, and reduce the salt to ½ tsp (bacon can be salty).

Nutrition

Calories: 99kcal | Carbohydrates: 7g | Protein: 3g | Fat: 7g | Saturated Fat: 1g | Polyunsaturated Fat: 1g | Monounsaturated Fat: 5g | Sodium: 422mg | Potassium: 333mg | Fiber: 3g | Sugar: 2g | Vitamin A: 879IU | Vitamin C: 92mg | Calcium: 60mg | Iron: 1mg

Vanilla Bean Ice Cream {AIP, Dairy Free, Egg Free}

October 14, 2024 by sara Leave a Comment

This easy allergy friendly AIP vanilla ice cream will stay creamy and does not require gelatin, carrageenan, eggs, or agar. It has a proudly vanilla flavor and will fill your ice cream machine, producing 4 large scoops per can of coconut milk.

vanilla ice cream served over peach pie

Nobody wants an overwhelming coconut flavor in their vanilla ice cream. How to make the coconut obscure has to do with counterbalancing it with robust ingredients: vanilla extract, vanilla bean, and maple syrup.

Even if you don't super love the taste of coconut, this ice cream will convince you that you can enjoy a coconut milk base. Good news because coconut is the only non-dairy milk rich enough for the job.

Coconut milk has enough fat that when you churn it, it behaves a lot like heavy cream and so you will see it is pretty straightforward to make non-dairy ice cream, even without the eggs.

One consideration when making an AIP ice cream is the nutrition. Ice cream texture is impacted by the proportion of sugar (which is why it's pretty difficult to make a smooth sugar-free ice cream). When you reduce the sugar too much in ice cream, the texture looks a bit shaggy or crumbly.

[feast_advanced_jump_to]

This vanilla ice cream is part of our curated AIP dessert series.

scooping AIP vanilla ice cream

💭 Top tip

Another consideration with ice cream is mouthfeel.

Please understand that the vanilla extract isn't just there for flavor. It's common practice to include as much as 1-2 tablespoons of alcohol when making ice cream. When you stick a bottle of alcohol in the freezer, what happens? It doesn't freeze.

Even a small amount of alcohol (as found in vanilla extract) can create a situation on a molecular level where ice crystals are less likely to form. The result? Ice cream with a smoother mouthfeel.

vanilla bean ice cream being scooped into glass

It's debatable whether vanilla extract is AIP because of the alcohol. Strictly speaking, no amount of alcohol is considered AIP. However, I've found some flexibility within the AIP community, which seems to embrace quantities as small as 1 ½ teaspoons and so I've included it in my AIP ice cream because I really think it belongs.

🍽 Equipment

I've only tested this recipe with an ice cream machine and Ninja Creami. Over the years, I've made this exact recipe in probably five different ice cream machines and consistently find that these ratios all work beautifully to get a smooth, soft serve consistency right out of the machine.

Testing note: The ice cream will hold its shape best for scooping if you freeze it for an additional 4 (and up to 8) hours after taking it out of the ice cream machine.

No Ice Cream Machine?

If you do not own a machine and you still want to try this recipe, there's a technique I conceived of years ago that I would love for somebody to test!

Set aside ½ cup of the ice cream mixture in cold, liquid form and pour the remaining amount into an ice cube tray. Place your frozen ice cream cubes into your high speed blender with the cold liquid and blend until completely smooth. Transfer to a container. Cover with plastic wrap and freeze for 4 hours.

Scoop and serve. If you try this technique, tell me in the comments how this works for you. My guess is that it may end up slightly icier which is why I think an ice cream machine is an excellent investment.

So what's your favorite way to serve this ice cream? Do you like it a la mode or do you want to pair it with something warm, like this AIP peach crisp?

📋 Recipe

scoops of dairy free vanilla bean ice cream

Vanilla Bean Ice Cream {AIP, Dairy-Free, Egg Free}

No ratings yet
Prep Time: 5 minutes minutes
Cook Time: 2 minutes minutes
Freeze Time: 4 hours hours
Total Time: 4 hours hours 7 minutes minutes
Prep Time: 5 minutes minutes
Cook Time: 2 minutes minutes
Freeze Time: 4 hours hours
Total Time: 4 hours hours 7 minutes minutes
Servings: 4 servings
Calories: 119kcal
Rate
Pin
Share
Print
This is my favorite dairy-free ice cream base recipe. While you don't strictly need the vanilla bean to make this, I highly recommend you try it. Nothing compares to the aroma of a freshly split vanilla bean.
Yield: 2 cups (4 scoops)

Ingredients

  • 1 14 ounce can coconut milk
  • 6 tablespoons maple syrup
  • 2 tablespoons honey
  • 1 ½ teaspoons pure vanilla extract
  • ½ vanilla bean split lengthwise, seeds scraped
  • pinch sea salt

Instructions

Bring to a boil

  • In a small pot, combine the entire can of coconut milk, maple syrup, honey, vanilla extract, half vanilla bean (pod and seeds), and salt. Bring to a boil over high heat, then immediately turn the heat off and whisk for 1 minute. Remove from the heat and set the pot inside of a large bowl with ice (an ice bath) to cool the mixture. Note: The mixture must be cool before the next step.

Churn until creamy and somewhat firm

  • Remove the vanilla bean pod then pour the cold mixture into your ice cream machine (follow instructions of your machine). Churn until you see it thicken, about 10 minutes. Set plastic wrap directly over the ice cream and freeze for a minimum of 4 hours. After 4 hours, you can see if it is cold enough to try scooping.

Notes

Chef's Notes:

  1. Spices - This recipe has been tested with spice add-ins. When adding a spice, such as cinnamon, aim for ½ teaspoon. Add during step 1.
  2. Coconut milk - Multiple brands have been tested with this recipe and all should work. Be sure to only use full fat. Lite coconut milk does not have enough fat for making ice cream.
  3.  Sweeteners - I've tried reducing the sugar content of this recipe and have never liked the texture. The amount of sweetener in this recipe is the precise amount needed to achieve a creamy texture. I like the way maple and honey work together to add depth of flavor.
  4. Vanilla extract - The small amount of alcohol in vanilla extract is important to minimizing the ice crystals that typically form in ice cream. If you are avoiding all alcohol on the AIP diet, you may leave this ingredient out, but you should expect some ice crystals to form. 
  5. Add-ins - If you want to try adding fruit or chocolate, the best time to do this is to add directly to the ice cream as it is thickening and churning. Note that the fruit must be very dry or you will be introducing water, which will turn to ice crystals.

Nutrition

Serving: 1scoop | Calories: 119kcal | Carbohydrates: 29g | Protein: 0.04g | Fat: 0.2g | Saturated Fat: 0.1g | Monounsaturated Fat: 0.003g | Sodium: 3mg | Potassium: 76mg | Fiber: 0.03g | Sugar: 27g | Vitamin C: 0.1mg | Calcium: 34mg | Iron: 0.1mg

Frequently Asked Questions

Is vanilla AIP friendly?

Yes. Based on my research, vanilla beans do not pose a problem for people who are sensitive to seeds since the seeds are tiny. Some sources say that you should avoid alcohol in all forms (alcohol is found in vanilla extract) but I have also gleaned that the amount in an extract is generally not a problem on AIP. If you are concerned, you can leave the extract out.

Is coconut milk allowed on AIP?

Coconut is AIP compliant but guar gum is not. It can be difficult and expensive to source canned coconut milk without added guar gum. Be sure to check the ingredient label as this can change with well-known brands over time.

Can I eat as much AIP ice cream as I want?

I want to make AIP accessible for people who love food. Based on my training and research, it's best to focus on balancing blood sugar even if a food is technically AIP. For AIP and anyone with an autoimmune condition, I suggest enjoying desserts sparingly. For this recipe, a portion on AIP would be 1 scoop per day AND I recommend pairing sweets with protein and fiber because that will help reduce the spike in your blood sugar response.

What if I'm sensitive to coconut?

If you are able to tolerate dairy, you can substitute with heavy cream. There is no great alternative to coconut milk if you are doing AIP and you would be better off making a sorbet recipe instead.

What if my ice cream is icy?

Assuming you included the vanilla extract and followed the recipe as written, you will eventually get ice crystals if the ice cream sits in the fridge for a few days. Here's what I recommend: 1) let the ice cream sit out a bit longer before scooping to allow some of the iciness to soften 2) run it through a ninja creami to redistribute the ingredients.

Can I double batch this recipe?

You can double the recipe but your ice cream machine may have a volume limit that you should not exceed. You could refrigerate half of the base though and use it at a later date. It can keep in the refrigerator for up to 4 days but you will have to rewarm it because it will separate. Be sure to cool it completely before running it through your machine.

Peach Crisp {AIP, Gluten-Free, Dairy-Free}

October 13, 2024 by sara Leave a Comment

Peach crisp is a must-make dessert for surviving summer on the AIP diet. It’s perfectly acceptable to turn on the oven in August when you’re preparing this crowd-pleaser—especially when topped with a generous scoop of AIP vanilla bean ice cream.

peach crisp served in baking dish
[feast_advanced_jump_to]

🎥 Video

For years, I made crisps by intuition alone, using pantry staples like oats, maple syrup, and whatever seeds or nuts I had on hand. When I discovered that tigernut flour serves as the AIP-friendly alternative to oats, I couldn’t wait to try it in a crisp.

My spontaneous attempt at an AIP peach crisp turned out beautifully—though, in a fit of culinary inspiration, I neglected to write down the recipe.

Now, here I am in October, finally weighing and measuring ingredients and testing with some seriously underwhelming peaches. Even out of season, this peach crisp still tastes fantastic.

Crisp Hacks I Tested For You

Hack #1: Prebake the crisp topping.

Results: Yes. I found that the flavor improved when pre-baking the crisp. I believe this was due to more coconut oil melted and getting dispersed into the topping mixture.

Hack #2: Make sure there are a variety of small and larger (pea-sized) clumps when cutting the pastry.

Results: Meh. While this is generally good practice with butter, I actually think with coconut oil that the best practice is to aim to work the flour a bit more into the coconut oil, aiming for the wet sand look as opposed to chunks.

🔪 Instructions

Gather Pantry Ingredients and Prepare

baking pans rubbed with coconut oil

Preheat the oven to 350℉.

Grease your baking dish with coconut oil. Set aside.

Baking Tip: You can use whatever bakeware you have on hand, but I like to aim for a deep layer of peaches so an 8x8 baking dish works great.

Honey & Spice Make Peaches Nice

In a mixing bowl, add the chopped peaches, honey, ½ teaspoon of the cinnamon, lemon juice, and the cassava flour. Stir to combine, then transfer to the prepared baking dish.

chopped peaches with cinnamon and honey in mixing bowl

Make the Crisp Topping

1

In a separate mixing bowl, add the topping ingredients--coconut sugar, tigernut flour, cassava flour, 1 teaspoon cinnamon, salt, and packed ½ cup coconut oil (room temperature).

2

Use a pastry cutter to cut the coconut oil into the dry ingredient mixture, using a downward twisting motion. You want the coconut oil to combine well with the dry ingredients but a few clumps are ok.

crisp topping dry ingredients mixed with pastry cutter

Bake and Serve

Bake until you see a thick bubbling liquid around the peaches and the topping darkens in color and no longer appears dry.

peach crisp with pre-baked topping and peach crisp with topping

Troubleshooting and Baking Tips: You get good flavor when you pre-bake the crisp topping because the coconut oil gets evenly distributed. Pictured above - the crisp on the top is cooked perfectly while the crisp on the bottom appears dry.

In the above example, you have the exact same mixture with the only difference being bake time. Notice that if you bake your crisp an extra 10 minutes, the oil has more time to blend into the pastry. Therefore, if your crisp appears dry, you can fix it by simply baking longer.

📋 Recipe

aip baked peach crisp served warm

Peach Crisp {AIP, Gluten-Free, Dairy-Free}

No ratings yet
Prep Time: 15 minutes minutes
Cook Time: 45 minutes minutes
Total Time: 1 hour hour
Prep Time: 15 minutes minutes
Cook Time: 45 minutes minutes
Total Time: 1 hour hour
Servings: 6 people
Calories: 402kcal
Rate
Pin
Share
Print
AIP | Gluten-Free | Dairy-Free | Egg-Free | Soy-Free | Nut-Free
To maximize the flavor and juiciness of fresh peaches, I recommend tossing them with honey before baking. For the crisp topping, aim for a sweetener that provides depth; both maple syrup and coconut sugar offer a balance of sweet and savory notes. Serve the crisp warm and bubbly, topped with a scoop of vanilla bean ice cream!

Ingredients

Spiced Peaches

  • 6 peaches chopped (skin-on)
  • 2 tablespoons honey (40 g)
  • ½ teaspoon ground cinnamon
  • 1 ½ teaspoons lemon juice
  • 2 teaspoons cassava flour

Crisp Topping

  • 1 cup coconut sugar (170 g)
  • ¾ cup tigernut flour (86 g)
  • ¾ cup cassava flour (85 g)
  • 1 teaspoon ground cinnamon
  • pinch sea salt
  • ½ cup coconut oil (85 g) room temperature (not melted), plus more for greasing

Instructions

Prepare

  • Preheat the oven to 350℉. Grease an 8x8 baking dish with coconut oil. Set aside.

Make the spiced peaches

  • In a mixing bowl, add the chopped peaches, honey, ½ teaspoon of the cinnamon, lemon juice, and the cassava flour. Stir to combine, then transfer to the prepared baking dish.

Make the crisp topping

  • In a separate mixing bowl, add the topping ingredients--coconut sugar, tigernut flour, cassava flour, 1 teaspoon cinnamon, salt, and packed ½ cup coconut oil (room temperature).
  • Use a pastry cutter to cut the coconut oil into the dry ingredient mixture, using a downward twisting motion, until the mixture resembles wet sand with some pea-sized crumbs. Note: You can use two forks or your hands to crumble, just be sure to leave some pea-sized clumps in the mixture.

Bake

  • Evenly spread the topping over the peaches in the baking dish. Bake until you see a thick bubbling liquid around the peaches and the topping darkens in color and no longer appears dry, approximately 45 minutes to 1 hour.

Serve

  • Serve warm with vanilla bean ice cream or whipped vanilla bean coconut cream.

Notes

Test Notes

  1. 6 medium peaches were used and weighed 1 pound 12.4 ounces (with pit). It's ok to use 6 large peaches (or even 8 medium peaches) since I had quite a bit of pastry to work with and wished I had more peaches.
  2. Note that all ovens bake differently, so you should rely on my description of doneness more than the bake time.
  3. I tossed my peaches in cassava flour because I like the way cassava thickens the juices at the bottom. If you forget this step, the peaches will still taste good but may be a bit watery.
  4. I pre-baked the crisp topping for 10 minutes and slightly preferred the flavor of that method but I'll leave that decision up to you since it involves 1 extra step.

Make-Ahead Directions:

  • Bake as directed. After the crisp cools, cover and refrigerate until the next day. When you are ready to reheat, set it out at room temperature for 20 minutes, then bake at 350℉ until hot, about 30 minutes.
  • I haven't tested assembling or freezing ahead, but I believe this recipe would turn out just fine. Just remember to extend the bake time if starting with a cold/frozen crisp.

Nutrition

Serving: 1crisp | Calories: 402kcal | Carbohydrates: 62g | Protein: 2g | Fat: 18g | Saturated Fat: 15g | Polyunsaturated Fat: 0.4g | Monounsaturated Fat: 1g | Sodium: 73mg | Potassium: 195mg | Fiber: 3g | Sugar: 38g | Vitamin A: 491IU | Vitamin C: 8mg | Calcium: 37mg | Iron: 3mg

Frequently Asked Questions

What can I add if I want a crunchy texture?

If you happen to be reintroducing nuts or seeds, go ahead and try adding a handful of pumpkin seeds or some chopped pecans, if you'd like.

What can I substitute for the coconut oil?

Palm oil, butter, or ghee.

How do I make this crisp with a different fruit?

For anything juicy (berries, stone fruit), follow the recipe and aim for about 2 pounds of fresh fruit. If using apples, you do not need to toss them with the cassava flour.

What if I want to use frozen fruit?

You can use the fruit frozen but just increase the cassava flour slightly (add an extra 1 tablespoon) since frozen fruit tend to release more liquid.

What flour works as a substitute for tigernut flour?

Instead of tigernut flour, replace 1:1 with old fashioned oats, if tolerated.

Carob Avocado Pudding {AIP, Dairy-Free, Egg-Free}

October 7, 2024 by sara 2 Comments

Carob Avocado Pudding. Did you know that if you whip avocado with carob, coconut oil, and maple syrup, you get a chocolate-like pudding? This dessert is so thick, creamy and delicious, you could totally pipe it on your favorite AIP cupcake as a frosting.

⭐ Featured Comment

I am extremely grateful for this recipe. I’m on day 15 of the AIP and it’s been hard the last few days because I started craving chocolate… And when I first tasted this cream after I mixed I literally cried because it was sooo good and I felt so like home after these 15 days. We don’t realize how sentimentally connected we are to some foods until we have something similar again… thanks!

-Mariana

This is a house favorite recipe that is a part of our AIP Dessert Series! View the full series.

[feast_advanced_jump_to]

🎥 Video

🥘 Ingredients

You only need 6 ingredients to make this exquisite pudding:

  • ripe avocados
  • carob powder
  • maple syrup
  • vanilla extract
  • sea salt
  • coconut oil

That's it, but if you want to incorporate a garnish, I'm partial to fresh, tart berries.

📖 Variations

For AIP, you could use maple syrup, date syrup, coconut nectar, honey, or even creamy palm sugar interchangeably.

For non-AIP, feel free to swap cocoa powder for the carob powder.

📋 Recipe

Source notes: I developed this recipe for The Frayed Apron but I first encountered the idea in my health supportive culinary program at The Natural Gourmet Institute. I've adapted that recipe by reducing the sugar content from ½ cup to 6 tablespoons for people with autoimmune conditions.

carob avocado puddings in parfait glasses

Carob Avocado Pudding {AIP, Dairy-Free, Egg-Free}

5 from 1 vote
Prep Time: 5 minutes minutes
Refrigeration Time: 30 minutes minutes
Total Time: 35 minutes minutes
Prep Time: 5 minutes minutes
Refrigeration Time: 30 minutes minutes
Total Time: 35 minutes minutes
Servings: 6 parfaits
Calories: 85kcal
Rate
Pin
Share
Print
Made with avocado and sweetened modestly with a nutritive sweetener, these chocolate-like puddings won't spike your blood sugar. Note that for the best texture, these puddings need 30 minutes to set properly in the refrigerator.
AIP, DAIRY FREE, GLUTEN FREE, EGG FREE, SOY FREE, CHOCOLATE FREE

Ingredients

  • 2 ripe avocados
  • ¼ cup carob powder
  • 6 tablespoons maple syrup or other nutritive liquid sweetener
  • 1 teaspoon vanilla extract
  • 1 pinch sea salt
  • 1 tablespoon coconut oil refined or unrefined

Instructions

  • PREPARE THE AVOCADOS. Cut avocados in half and remove seeds. Use the peel as a handle to squeeze the avocado into a blender, food processor, or bowl (if using an immersion blender).
  • BLEND UNTIL CREAMY. Add carob, maple syrup, vanilla, salt, and oil and blend on high until smooth and evenly consistent. You may need to use a spatula to scrape the sides. Once the pudding is lump free and uniform in color, portion into parfait glasses, cover with plastic wrap and transfer to the refrigerator for at least 30 minutes or up to 2 days. It will firm up a bit because of the coconut oil.
  • GARNISH AND SERVE. Enjoy cold with toasted coconut or fresh berries, such as raspberries or strawberries.

Nutrition

Serving: 1parfait glass | Calories: 85kcal | Carbohydrates: 17g | Protein: 0.2g | Fat: 2g | Saturated Fat: 2g | Polyunsaturated Fat: 0.1g | Monounsaturated Fat: 0.2g | Sodium: 10mg | Potassium: 83mg | Fiber: 2g | Sugar: 14g | Vitamin A: 1IU | Vitamin C: 0.04mg | Calcium: 37mg | Iron: 0.2mg

Questions and Answers

What does carob taste like?

It has a slightly sweet and toasty flavor that is reminiscent of chocolate.

Is carob good for you?

Carob contains no caffeine and is considered anti-inflammatory. Medicinally, carob is taken to improve gut health and balance blood sugar.

What purpose does the avocado serve?

Avocado provides richness and is a healthy source of monounsaturated and polyunsaturated fats ("good fats"). The avocado provides vitamins C, E, and K as well as folate, which helps the body produce healthy red blood cells. Eating avocado on AIP can help prevent inflammation. Avocados can also help with weight management, digestive health, and cognitive function.

English Muffins {AIP, Gluten-Free, Egg Free}

October 4, 2024 by sara 7 Comments

If you can whisk and stir, you can make wholesome AIP English muffins at home. This grainless dough has the texture of a batter and the leavening agent is yeast which helps give this bread a porous texture. Video guidance below.

Gluten-free English muffins
[feast_advanced_jump_to]

These English Muffins Give Me Hope

Seven minutes. My phone timer counts down. Will these AIP English muffins turn out? It feels like a long shot as I've stripped down my tried-and-true gluten-free English muffin recipe.

AIP is a challenge, even for me--I'm Sara. I've been a recipe developer for 10 years and I have a culinary degree in health supportive cooking.

I measure one and then two tablespoons of gelatin followed by 6 tablespoons of water, replacing two eggs. Whisking until frothy, I rummage through my pantry in search of an AIP-compliant flour finding cassava and tigernut. Only two flours. If it works, fewer ingredients is always friendlier.

Mr. Hashimoto's (my husband has fully recovered from his Hashimoto's) takes in the scene: A laptop for notetaking. Measuring cups and spoons. A Nikon camera. I like this side of you.

Me too. The tears that come surprise me and I realize, I've missed this.

Memories of doctor's offices, children calling me "mommy," and an identity conflict as the foodie before and after my diagnosis dance in my subconscious. In an instant, an English muffin recipe tells me what I need to know, I still get to bake.

And, my dear reader, you can, too. That's why I created the Autoimmune Pantry. It's a space for me, you, anyone looking for answers to the question, What does it look like to enjoy health supportive cooking and eating?

Since being diagnosed with Hashimoto's, I've embraced the science-backed AIP diet and know that it's working for me (it worked for my husband, too). It works.

It's fitting that my first recipe on Autoimmune Pantry is made up of AIP pantry essentials. I expect an English muffin recipe is the sort of thing that will make AIP breakfast much more practical for you.

Back to the recipe development. Our first impressions are as follows:

Great taste. Tastes like properly yeasted bread. Wow. I could eat a million of these. If you served this to me in a restaurant, I'd be pleased.

Even as an experienced recipe developer, you don't always get wins, but I feel like my best self today knowing that I can still create even on the Autoimmune Protocol (AIP).

chef Sara Furcini

Freezing Instructions

I have one more bit of good news for those struggling with AIP breakfasts, which is that YOU CAN FREEZE THESE!

One of my AIP revelations is batch cooking and how much this can help with stress. To batch this recipe, use the recipe card multiplier to see the ingredients x2 or x3. Extra English muffins can go straight into a ziplock bag and into the freezer. For breakfast, lunch or a quick snack, you can toast directly from frozen and pair with avocado, bacon, or your favorite jam. Simple, do-able.

AIP English muffin breakfast with jam

🎥 Prefer to Watch Instead of Read? Welcome to My Kitchen

🔪 Instructions

Step 1: Bloom the gelatin. Just whisk until frothy. This mixture will replace 2 eggs.

gelatin egg in bowl

Step 2: Mix the dry ingredients. Just whisk everything to distribute evenly.

gluten-free flour mixture

Step 3: Preheat the oven to 375F. You can use 8 English muffin rings but if you don't have those, the Mason Jar lid rings worked well for me.

Step 4: Combine the wet and dry mixtures. Be sure to whisk really well to get the ultimate light, chewy English muffin texture. This step should take you about 4 minutes of whisking. You know you're doing it right if your arm gets tired and you need a break.

wet ingredient mixture in bowl

Step 5: Spoon the batter into the prepared rings. Cover your batter with oiled plastic wrap or a slightly damp tea towel and check after 30 minutes to see if the batter appears fluffy, smooth and is close to the top of your rings. How long this step takes will depend on how warm or cold it is in your house. On a cold winter day, it might take an hour for your dough to rise.

English muffin dough shaped using Mason Jar lid rings

Step 6: Bake for 25 to 30 minutes or until the internal temperature is 190-200℉. I like to bake the English muffins inside of the rings set on top of a sheet tray with parchment paper for easy clean-up.

Step 7: Cool before unmolding. Once cool, you just gently press the English muffin through the mold and then use a fork inserted to pry it apart into halves. I think these have the very best texture when toasted until brown and crispy.

How to cut out English muffins

You're done! Head to the pantry and get chomping on your favorite smears and spreads. Let me know your favorites in the comments below.

Toasted whole English muffin on a plate

Pantry Ingredients: Tigernut flour and Cassava flour are important AIP-compliant flours that you will see frequently in baking recipes (such as this peach crisp). You can also use tigernut flour in savory applications, such as with these chicken skewers with tigernut butter sauce.

AIP English Muffins

English Muffins

5 from 1 vote
Prep Time: 45 minutes minutes
Cook Time: 30 minutes minutes
Total Time: 1 hour hour 15 minutes minutes
Prep Time: 45 minutes minutes
Cook Time: 30 minutes minutes
Total Time: 1 hour hour 15 minutes minutes
Servings: 8 English muffins
Calories: 249kcal
Rate
Pin
Share
Print
These gluten-free English muffins have a nice chewy texture with a nutty flavor that you get from the Tigernut flour. I recommend serving them toasted with your favorite jam.
AIP-Elimination compliant
Dairy Free, Egg Free, Gluten-Free, Nut free, Soy Free

Ingredients

  • 2 tablespoons (14 grams) gelatin powder
  • warm water see instructions
  • 1 ½ teaspoons (10 grams) vinegar such as apple cider vinegar
  • ⅓ cup (70 grams) avocado oil olive oil works, too
  • 2 ¾ cups (300 grams) cassava flour plus more for sprinkling
  • ¼ cup (27 grams) tigernut flour
  • 1 ¼ teaspoons (7 grams) baking soda
  • ¾ teaspoons fine sea salt
  • 2 ¼ teaspoons (8 grams) active dry yeast or instant yeast

Instructions

  • Bloom the gelatin. In a medium bowl, whisk the gelatin powder with 6 tablespoons (82 grams) warm water until frothy and no clumps remain, about 2 minutes. Add the vinegar, oil, and 1 ½ cups (355 grams) warm water and whisk again just to combine. Set aside.
  • Mix dry ingredients and set aside. In a bowl, combine the Cassava flour, tigernut flour, baking soda, salt, and yeast. Whisk and set aside.
  • Preheat the oven to 375F. Line a baking sheet with parchment paper and sprinkle with cassava flour. Rub 8 English muffin rings* with oil then dust with cassava flour. Place on the prepared baking sheet.
  • Combine the wet and dry mixtures. Use a stand mixer with beater or simply whisk by hand to form a fluffy, sticky batter, about 4 minutes. Note: It's important to mix really well to achieve the most beadlike consistency in gluten-free baking.
  • Spoon the batter into the prepared rings. Cover with a piece of oiled plastic wrap and allow to rise for 30 to 45 minutes or until you see the batter has reached the top of the rings.
  • Bake for 25 to 30 minutes or until the internal temperature is 190-200℉.
  • Cool slightly before unmolding. Let the muffins cool completely before using. These are best served sliced and toasted and will freeze well. For the proper “English muffin” texture, you stab a fork in the outside and pry (working around the outer circumference)-- prying open the English muffin will give it the signature look.

Notes

This recipe was developed and tested with IYA Cassava flour and IYA Tigernut flour.
If you don't have English muffin rings, you can use the outer lid rims of mason jars.
See post for ingredient notes and substitutions.

Nutrition

Serving: 1English muffin | Calories: 249kcal | Carbohydrates: 37g | Protein: 3g | Fat: 9g | Saturated Fat: 1g | Polyunsaturated Fat: 1g | Monounsaturated Fat: 6g | Sodium: 429mg | Potassium: 18mg | Fiber: 1g | Sugar: 3g | Vitamin C: 2mg | Calcium: 63mg | Iron: 4mg

🥗 Side dishes

You could serve these with avocado and smoked sea salt for a quick AIP snack. I love to serve these with jam but you could whip up some AIP tigernut butter by mixing tigernut flour with avocado oil and maple syrup (it tastes strangely similar to peanut butter). Let me know your favorite sides to enjoy with these muffins.

One of my favorite sides might be bacon or sausage.

FAQs


How long do English muffins last in the fridge?

English muffins stay fresh for about 4 or 5 days in the fridge.

What kind of oil is best for English muffins?

A neutral-tasting oil, like avocado oil works well here. But I almost always have olive oil on hand, and I've used that, too!

Can I meal prep these English muffins?

Yes! You can use the recipe card to print an ingredient shopping list. For meal planning, I recommend doubling the recipe (note: when doubling a recipe, do NOT double the salt). You will get 16 English muffins, which you can freeze for up to 1 month.

Should I use active dry yeast or instant yeast?

Either! Since there is a 30 minute resting period where the dough rises inside of the English muffin forms, that's enough time for active dry yeast (the slower of the two) to take action. No need to activate the yeast in this case.

Is yeast AIP?

Yeast is ok to use on the autoimmune protocol as long as it is certified gluten-free and you don't have an allergy to it.

Can I exclude the yeast?

Quickbreads that are leavened with baking soda don't contain yeast, so if you would like to exclude the yeast, my recommendation would be to increase the baking soda to 1 ½ teaspoons. Without yeast, there is no need to allow time for a rise. Simply bake right away. Note, I have not tested this so please weigh in on whether they turn out.

Chef Sara Furcini

Welcome! I'm Sara.

My background is in health supportive cooking. I created this space to share AIP recipes for people looking to manage or reverse autoimmune disease.

Learn more

Popular

  • AIP roast scallops with olive oil and no dairy
    AIP Roast Scallops
  • AIP roast chicken
    Comforting AIP Whole Roast Chicken with Garlic and Herbs
  • AIP burger with AIP cheese sauce and tempura zucchini fries
    Grass-Fed Burger with Umami Sauce and Tempura Zucchini Fries {AIP, Dairy-Free}
  • sautéed kale with shiitake ginger and garlic
    Seasonal Sautéed AIP Greens

Seasonal

  • strawberry rhubarb crisp
    Strawberry-Rhubarb Crisp {AIP, Paleo}
  • blueberry pie with strawberries on plate
    Blueberry Pie with Cassava Crust (AIP, Paleo)
  • red velvet chocolate cupcake with AIP vanilla frosting
    Red Velvet Cupcakes {AIP, Paleo}
  • AIP strawberry cupcake with fresh strawberries
    Strawberry Cupcakes with Strawberry Frosting {AIP, Paleo}

Rate This Recipe

Your vote:


A rating is required
A name is required
An email is required